Creating a beautiful living room photo wall can be a game-changer for your home decor. I’ve been on a quest to find the best ways to showcase personal memories and artistic flair. If you’re looking to elevate your living space, you’re in for a treat! This post is packed with ideas that can turn your plain walls into a stunning gallery that reflects your unique style and personality.
Whether you’re a minimalist at heart or someone who loves a bit of eclectic charm, this guide is for you. If you enjoy home decor and want to create a personalized photo display, you’ll find inspiration that speaks to your taste. From simple arrangements to more elaborate setups, I’ve gathered 17 creative living room photo wall ideas that will help you express yourself and add warmth to your space.
Get ready to discover tips and tricks to transform your walls into a personal gallery. Each idea is designed to be both visually appealing and easy to implement, ensuring that even if you’re new to home decor, you can create a space you’ll love. Let’s dive into these inspiring gallery wall ideas that will make your living room a cozy and inviting haven.
Key Takeaways
– A well-designed living room photo wall can enhance the overall aesthetics of your space and reflect your personality.
– Different styles, such as monochrome, botanical, or vintage, can help you create a unique photo display that resonates with your tastes.
– Floating frames and textured layers offer innovative ways to showcase photos while keeping the decor fresh and interesting.
– Incorporating inspirational quotes or seasonal themes can add a dynamic touch to your photo wall, making it feel alive.
– Mixing various media in your arrangements can create an engaging visual experience and celebrate your diverse interests and travels.
1. Monochrome Magic
Embracing a monochrome color scheme for your photo wall can create a sleek and sophisticated look. This timeless combination of black and white photographs brings an elegant touch to any living space. When framed uniformly in similar styles, these images create visual harmony. Consider using a mix of frame sizes and orientations to keep the display interesting while ensuring it feels cohesive. Placing black frames against a white wall or vice versa will enhance the minimalist vibe of your living room.
To implement this look, you can find budget-friendly frames at thrift stores or online retailers. Don’t hesitate to experiment with various textures, like matte versus glossy finishes, for added depth. This style not only makes a bold statement but also aligns beautifully with current design trends focused on simplicity and elegance.
Consider these tips to craft your monochrome masterpiece:
– Pair black-and-white photos with simple, clean frames.
– Choose images that tell a cohesive story, like family portraits.
– Incorporate a small shelf below the photos for decorative accents.
This monochrome approach elevates your living space while showcasing your favorite memories in a refined manner.


How To Choose the Right Living Room Photo Wall
Creating a stunning living room photo wall can transform your space from ordinary to extraordinary. To make the best choices for your personalized gallery, consider these key factors:
1. Size
The size of your living room photo wall is crucial. First, measure the available wall space. You want to leave enough room around the edges for balance. A large wall can handle more substantial frames, while a small area might benefit from smaller, clustered arrangements. Aim for a display that feels proportional to the room size and surrounding furniture.
2. Theme
Deciding on a theme helps unify your gallery wall. Think about what best represents your style. Are you drawn to a minimalist approach with black-and-white photos? Or perhaps a colorful collection that displays travel memories? A cohesive theme will make your photo wall visually appealing and meaningful.
3. Frame Styles
The variety of frame styles can significantly impact the look of your wall. Mixing and matching different frame styles adds interest, while uniform frames create a clean, orderly appearance. Consider materials like wood, metal, or acrylic that resonate with your living room decor. Choose colors that either contrast or complement your walls for an eye-catching effect.
4. Arrangement
Planning your arrangement is key to a successful photo wall. Try different layouts on the floor before committing to the wall. You can opt for a grid layout for a structured look or a more organic arrangement for a casual feel. Remember to maintain a consistent spacing between frames to create harmony.
5. Lighting
Proper lighting can enhance the beauty of your photo wall. Natural light works wonders but can create glare; consider placing your wall in a spot where light complements rather than overwhelms it. You can also add picture lights or spotlights to highlight special pieces. The right illumination will give your gallery an inviting glow.
6. Personalization
Your photo wall should reflect your personality and memories. Include family photos, travel snapshots, or even artwork that speaks to you. Personal touches make your space feel unique and lived-in. Don’t hesitate to incorporate elements like quotes or small objects to add depth and character.
Pro Tip:
Before hanging anything, use painter’s tape to outline the arrangement on the wall. This allows you to visualize the layout without making any permanent marks, ensuring you get it just right before committing!
Taking these factors into account will guide you in selecting the best elements for your living room photo wall. Focus on creating a collection that not only beautifies your space but also tells your story. With thoughtful planning, your gallery wall can become a focal point that sparks conversation and brings warmth to your living area.


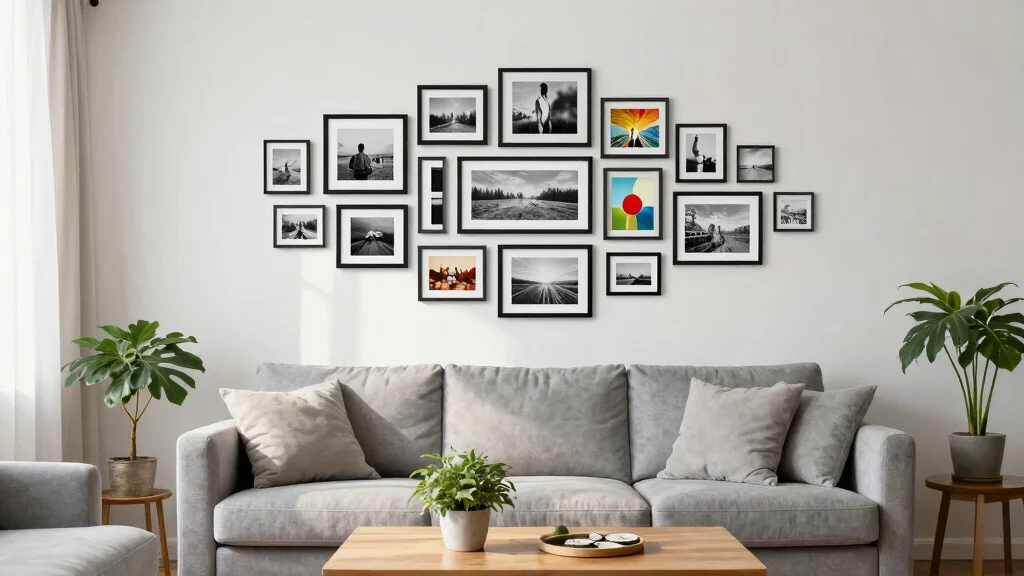
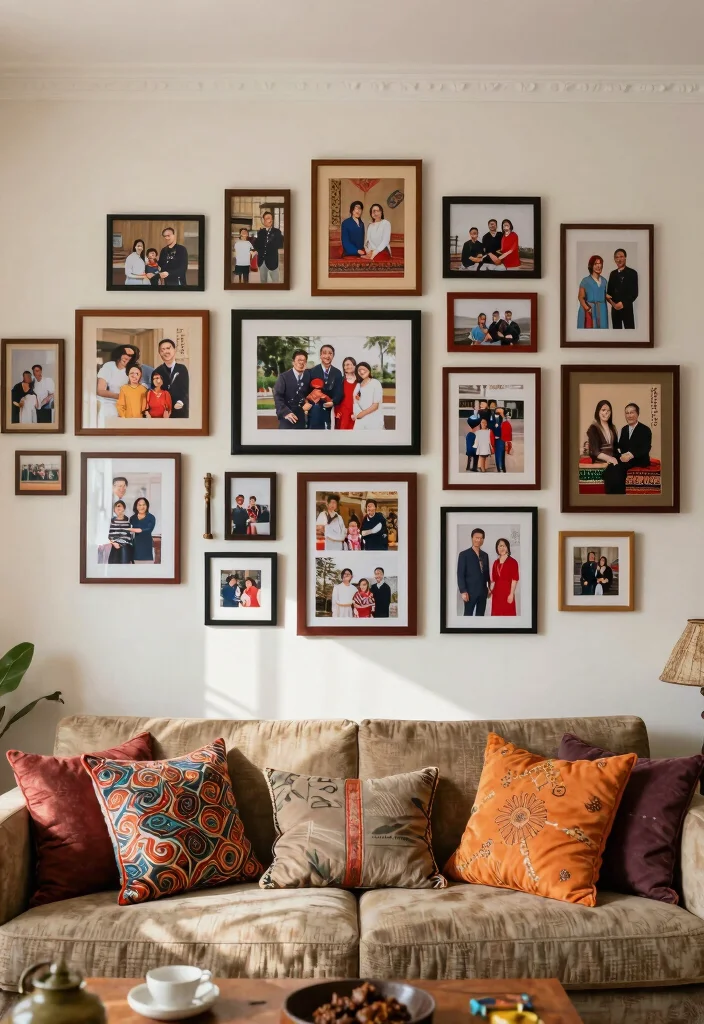
2. Gallery of Memories
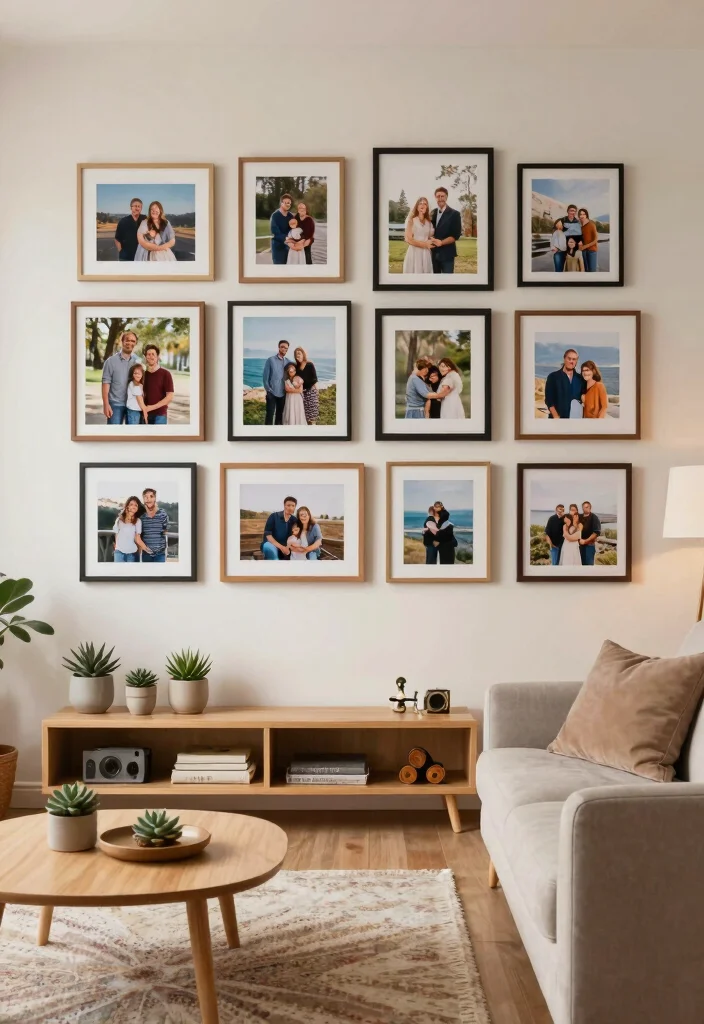
Transform your living room into a personal gallery by creating a wall that tells your story. Curate a collection of cherished family photos, travel snapshots, and special moments to showcase your unique narrative. Mixing different frame styles, such as rustic wood and modern metal, adds an eclectic flair that captures your personality. Incorporate small decorative touches like hanging plants or unique wall art to add character and warmth to your display.
Before hanging anything, lay out the arrangement on the floor to visualize how it will look. Using varying frame sizes creates more visual dynamism. You might also personalize the gallery with handwritten notes or small artifacts, adding layers of meaning to your wall.
Here are some ideas to create your memorable gallery:
– Plan your layout on the floor for better visualization.
– Use varying frame sizes to create visual interest.
– Incorporate personal items that evoke special memories.
This gallery wall not only serves as a striking focal point but also allows for a beautiful conversation starter in your home.


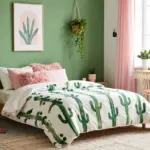
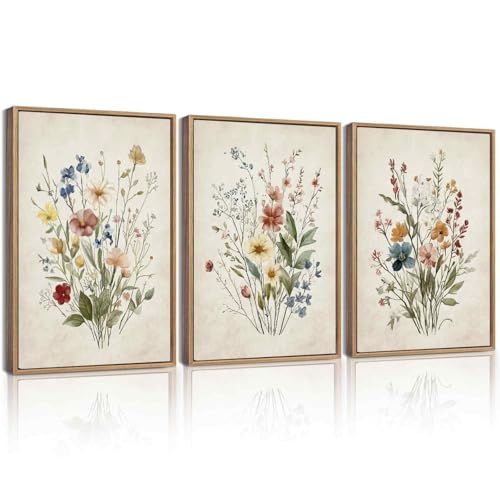
3. Botanical Bliss

Infuse your living room with a refreshing vibe by combining photographs and natural elements. Framed images of plants, flowers, or stunning landscapes paired with real greenery can create a vibrant botanical display. This design choice enhances not just the decor but also uplifts your mood, creating a serene atmosphere in your space. By using plant hangers or wall-mounted planters alongside your photos, you can introduce depth and life to your wall.
To achieve this look, consider using both colorful and black-and-white botanical prints to contrast against lush greenery. Floating shelves can serve as a perfect platform for mixing plants and pictures. Additionally, using wall decals with natural motifs can frame your photos beautifully.
Here are some ways to incorporate botanical elements:
– Use vibrant or monochrome botanical prints for contrast.
– Install floating shelves to blend plants and pictures.
– Frame your photos with nature-inspired wall decals.
This botanical approach not only enhances the aesthetic but also brings a touch of nature indoors, enriching your living environment.


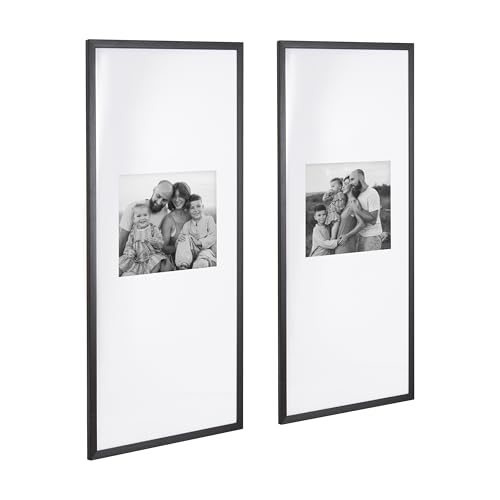
4. Floating Frames
Adopt a modern approach to display your photos with floating frames that create a unique sense of depth. These frames allow your images to appear as if they’re suspended within the frame, adding a contemporary twist to your decor. This minimalistic design works wonders in a clean, uncluttered living room, allowing each piece to shine on its own. You can arrange these frames in groups or showcase them individually for a sleek look.
When choosing your frames, stick to a uniform color for a cohesive appearance, or mix colors for a playful touch. Make sure the frames are properly secured to avoid any accidents. Opt for images with complementary hues to ensure a polished overall look.
Consider these tips to enhance your floating frame display:
– Choose a uniform color for a cohesive vibe.
– Secure frames well to prevent accidents.
– Use photos with complementary colors for a polished look.
This design choice not only elevates your space but also adds a modern flair that feels effortlessly chic.


5. Textured Layers
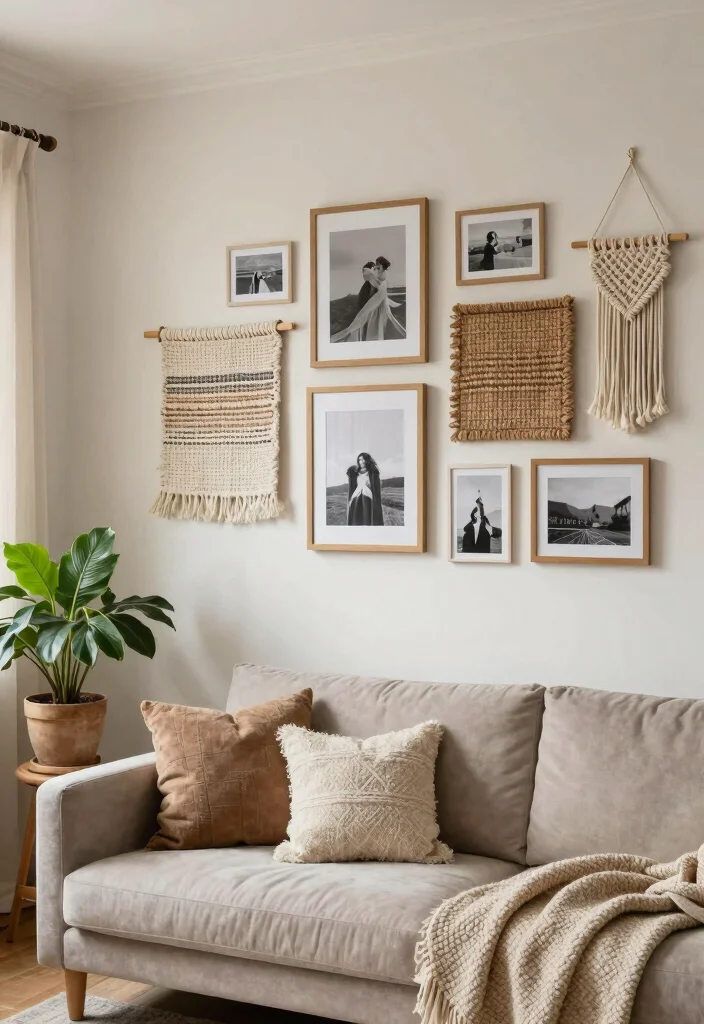
Create a captivating living room photo wall by layering various materials and textures. Mixing framed photos with textiles like woven hangings or macramé adds a tactile element, making your decor feel warm and inviting. This layered approach can create a dynamic display that reflects your personal style while enhancing the overall atmosphere of your space.
For a visually interesting wall, use different materials, such as wood, fabric, and metal, to create contrast. Thoughtful arrangement is essential to maintain balance and avoid chaos in the design. Adding personal touches, like sentimental artwork or trinkets, can further enhance the wall’s appeal.
Here are some ways to layer textures:
– Use a variety of materials for visual interest.
– Arrange items thoughtfully for balance.
– Include personal artifacts that hold meaning.
This textured approach works beautifully in neutral or earthy living rooms, enriching the visual appeal without overwhelming the senses.
6. Timeline of Life
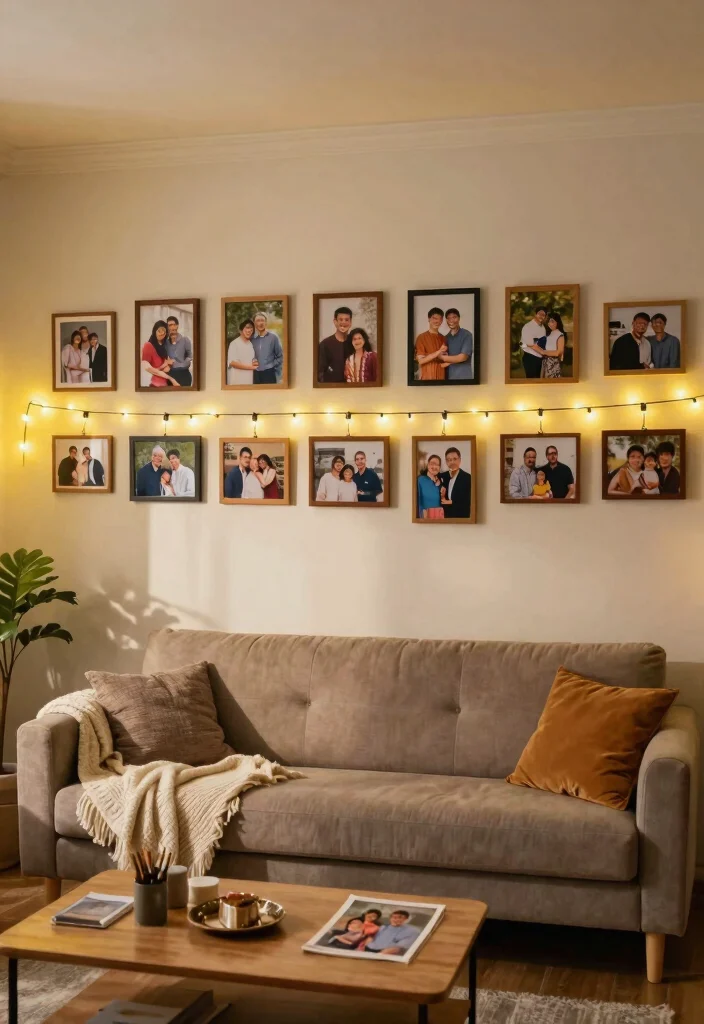
Design a timeline wall that captures the essence of your life journey through photographs. This visually striking concept tells a personal story, showcasing milestones and cherished memories. Starting from a significant moment, like a wedding or the birth of a child, arrange your photos chronologically to create a captivating narrative. This wall can become a beautiful focal point and a great conversation starter in your living room.
To illuminate specific moments, consider using string lights to highlight important photos. Adding small captions or dates under each image personalizes the timeline further. Mixing landscape and portrait images will maintain visual interest while telling your story.
Here are some tips for crafting your timeline:
– Use string lights to add emphasis on special moments.
– Personalize with captions or dates beneath images.
– Mix landscape and portrait photos for variety.
This timeline wall evolves over time, allowing you to reflect on your family’s growth and experiences.


7. Artful Arrangements
Transform your living room photo wall into a curated gallery by artfully arranging various artworks alongside your photographs. This eclectic style reflects your individual taste while adding character to your space. You can play with sizes and orientations, such as hanging a large piece as a focal point and surrounding it with smaller photographs, creating an inviting atmosphere.
Ensure a balance of visual weight by mixing bold colors with softer tones. Creative mounting options like clipboards or washi tape can add a fun twist to your display. Pair your photos with art that shares similar themes or colors for a cohesive look.
Here are some suggestions for your artful arrangement:
– Balance visual weight with bold and soft colors.
– Use creative mounting options for a playful touch.
– Pair photos with art that shares themes or colors.
This approach not only personalizes your space but also invites viewers to explore the stories behind each piece.
Artful arrangements on a living room photo wall turn simple memories into a quiet, personal exhibit. Start with a bold focal piece, then breathe with smaller photos and soft textures—minimalist balance that invites guests to linger. Your space, your gallery, your story.
8. Black and White Flair
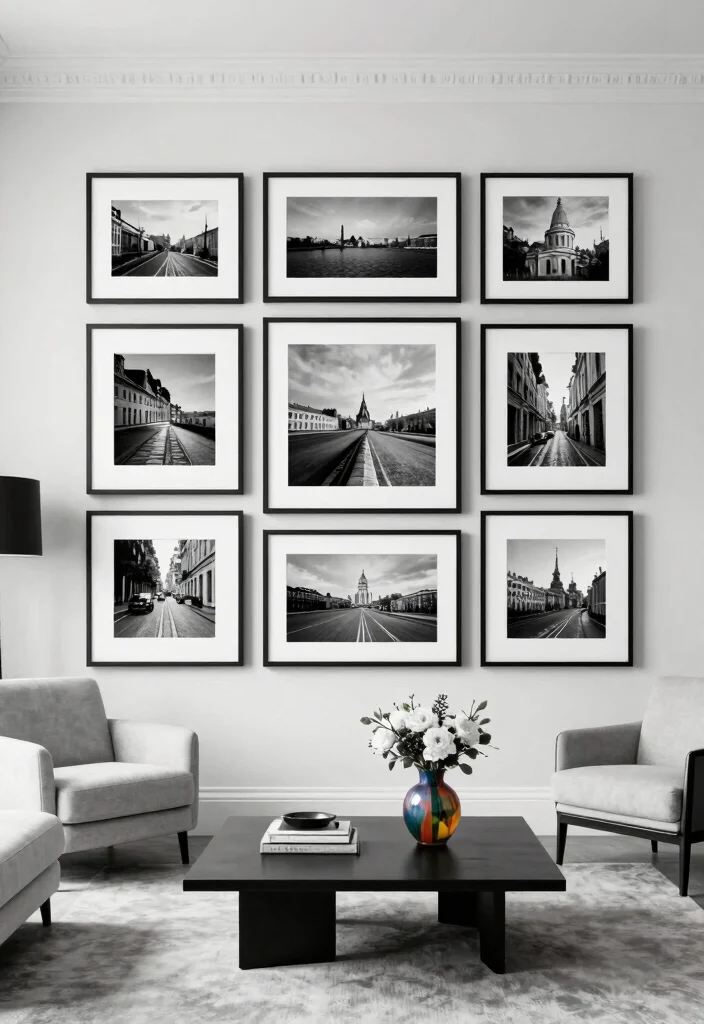
Introduce a dramatic flair to your living room with a black-and-white photo wall. This classic design choice adds sophistication and allows your images to shine in a striking format. Black and white photos evoke deep emotions and nostalgia, making them perfect for capturing special moments. You can arrange them in a grid for a clean look or go for a more casual freeform style.
To enhance the visual impact, consider using varied frame thicknesses for depth. Adding shadows and layers can make the photos stand out against the wall. Additionally, integrating some colored accents in decor items can maintain a contemporary feel.
Consider these ideas for your black-and-white display:
– Use varied frame thicknesses to create depth.
– Incorporate layers to enhance photo visibility.
– Add colored accents in decor for a modern vibe.
This black-and-white wall serves as a bold contrast to brightly colored furniture, making it a striking centerpiece.
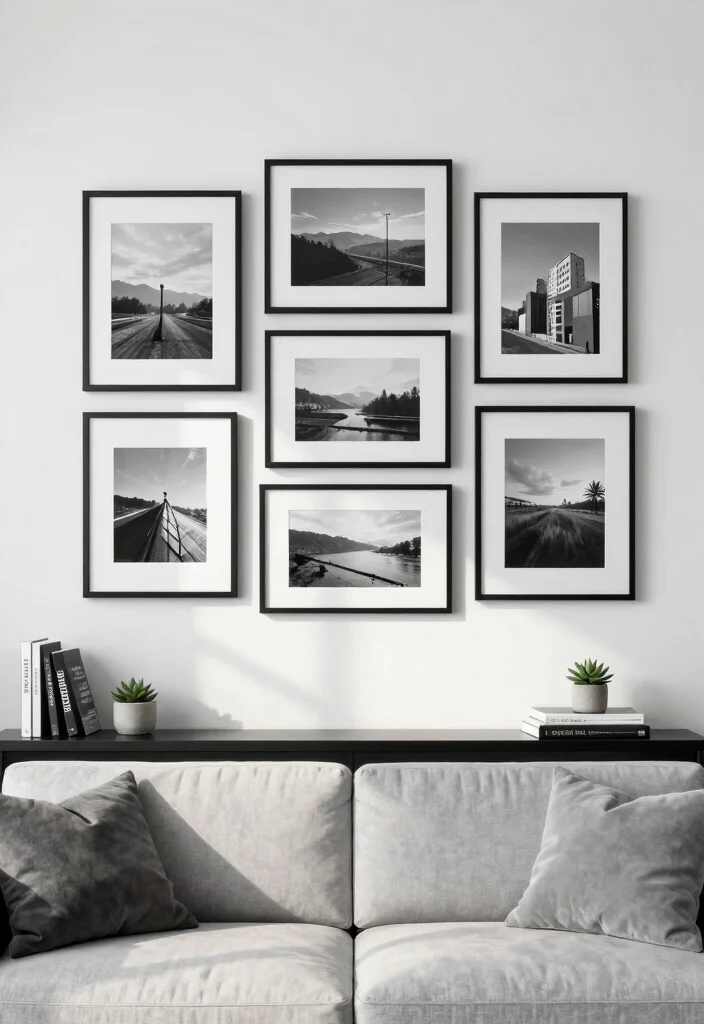
9. Minimalist Display
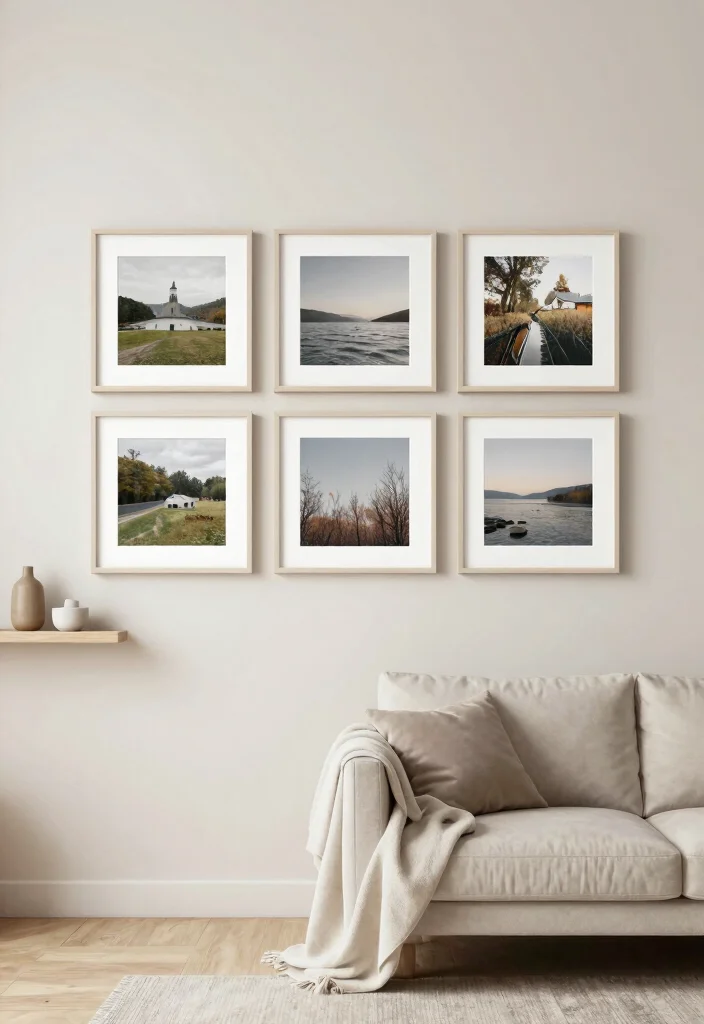
Simplify your living room with a minimalist photo wall that showcases a select few stunning images. When arranged thoughtfully, just a few chosen pieces can make a strong impact. Opt for large frames with ample white space that draws attention to the photos without cluttering the space. This approach allows your images to be the star while maintaining a clean and airy decor.
Choose a neutral wall color to enhance the minimalist aesthetic. Simple frames help focus the viewer’s attention on the images themselves. You can also integrate a single shelf for small decorative items that complement your chosen photos.
Here are tips to achieve a minimalist display:
– Choose a neutral wall color for a clean backdrop.
– Opt for simple frames to keep focus on images.
– Include a single shelf for complementary decor.
This minimalist approach highlights the beauty of simplicity, allowing your favorite memories to shine.


10. Mixed Media Wall
Embrace creativity with a mixed media wall that combines photographs with other artistic elements. By incorporating items like fabric panels, paintings, or wooden accents alongside your photos, you can create a rich, layered look. This eclectic mix not only adds depth to your display but also showcases a variety of interests and artistic preferences. Maintaining a common theme—such as color or style—will ensure visual harmony.
Enhance the texture of your wall by using varied materials. Arrange elements in a way that leads the viewer’s eye across the display. Adding lighting can highlight specific areas, creating dramatic effects.
Consider these tips for your mixed media wall:
– Use varied materials to enhance texture.
– Arrange elements to guide the viewer’s gaze.
– Incorporate lighting to emphasize details.
This playful approach allows you to refresh your display periodically, keeping your decor feeling new and engaging.
Did you know a mixed media wall can boost perceived depth by up to 20% when you mix photos with fabric panels and wooden accents? Keep a unifying color thread to tie textures on your living room photo wall, then add one new element at a time.


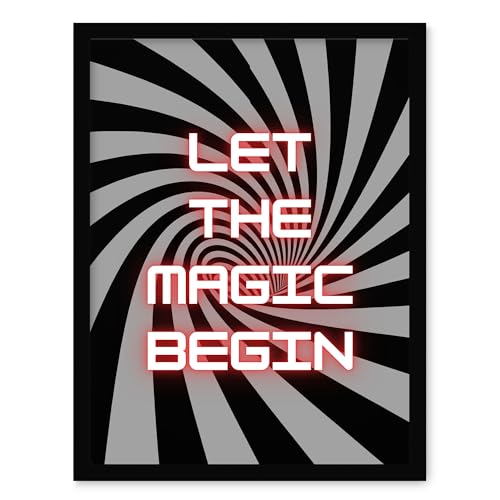
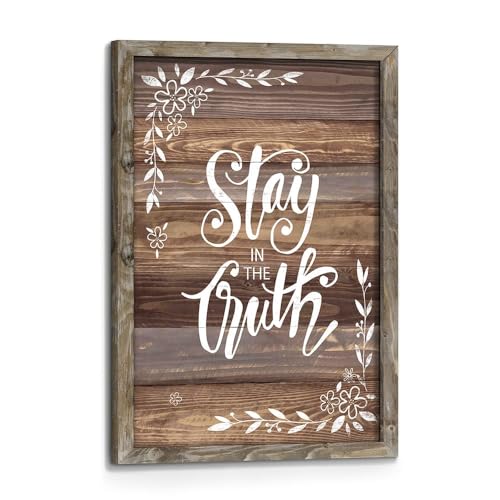
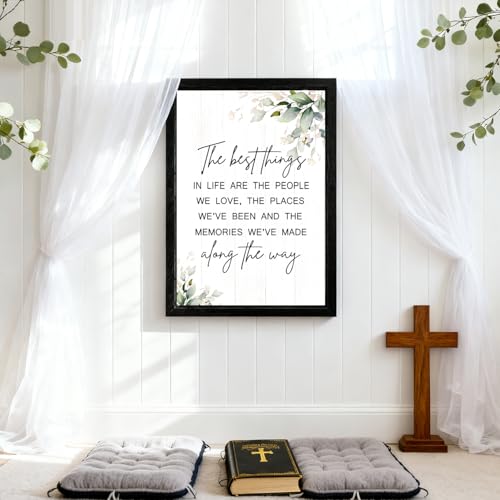
11. Inspirational Quotes

Bring positivity into your living room by integrating inspirational quotes with your photo wall. This concept not only creates a motivational atmosphere but also showcases your personal design style. Choose a few favorite quotes and pair them with photographs that resonate with the message. Layering text with images offers a unique touch that personalizes your gallery wall.
For a chic look, select elegant fonts, or go bold and playful for a more casual vibe. Ensure the layout flows well, balancing images and text without overcrowding. Using varying text sizes can add visual interest to the overall design.
Here are some ideas for incorporating quotes:
– Use elegant fonts for a sophisticated touch.
– Balance images and text for a clean look.
– Vary text sizes for added interest.
Handwritten quotes can provide a personal touch that store-bought art often lacks, making your gallery truly one-of-a-kind.


12. Seasonal Rotation
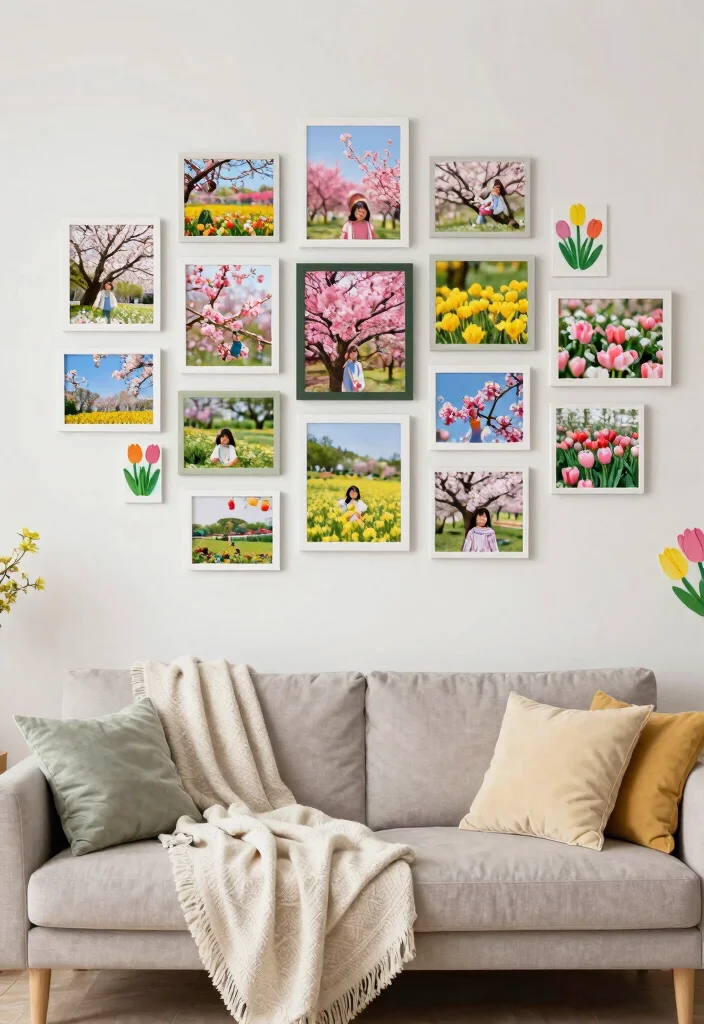
Keep your living room fresh and vibrant with a seasonal rotation of your photo wall. This approach lets you display images that reflect the current season, creating a lively atmosphere. In spring, showcase blooming flowers or outdoor scenes; in winter, highlight cozy family moments. You can even swap decor elements to match the seasons for a full transformation.
Organize previous photos neatly for easy rotation. Consider themes for each season—like colors or holidays—to guide your selections. Using removable adhesive hooks can make the process hassle-free.
Here are some tips for your seasonal wall:
– Store previous photos neatly for easy access.
– Consider seasonal themes to guide selections.
– Use removable hooks for easy changes.
This seasonal approach keeps your decor dynamic, allowing you to celebrate the beauty of each time of year.
13. Cultural Heritage Showcase
Honor your cultural heritage by integrating traditional art and photographs into your living room photo wall. This concept adds rich textures and colors, creating a meaningful display that reflects your roots. Combining family photos with traditional artwork or artifacts creates a narrative that is both beautiful and engaging, allowing guests to connect with your culture.
Consider using a mix of frames to reflect various cultural styles. Highlight the stories behind each piece for a personal touch that resonates with viewers. Using maps or textiles as backgrounds can further enhance the theme of your display.
Here are some ideas to celebrate your heritage:
– Use a variety of frames to reflect cultural diversity.
– Highlight stories behind each piece for connection.
– Incorporate maps or textiles to enhance the theme.
This display elegantly blends cultural traditions with contemporary decor, enriching your living space.
14. Vintage Vibes

Create a nostalgic atmosphere with a vintage-inspired living room photo wall. Use antique-style frames and sepia-toned photos to transport your decor back in time. Curating vintage photographs alongside old postcards or memorabilia evokes memories that spark conversations. This style harmonizes beautifully with traditional or rustic decor, adding warmth and character to your living space.
Using mismatched frames can give a collected-over-time feel, while mixing different types of media, like photographs and vintage posters, enhances the theme. Integrate decorative elements such as old cameras or vintage books to enrich your display.
Here are some tips for your vintage wall:
– Use mismatched frames for an eclectic touch.
– Mix photographs with vintage posters for variety.
– Include decorative elements like cameras or books.
Thrift stores can be treasure troves for unique frames and vintage pieces, making your decor journey even more exciting.


15. Travel Adventures
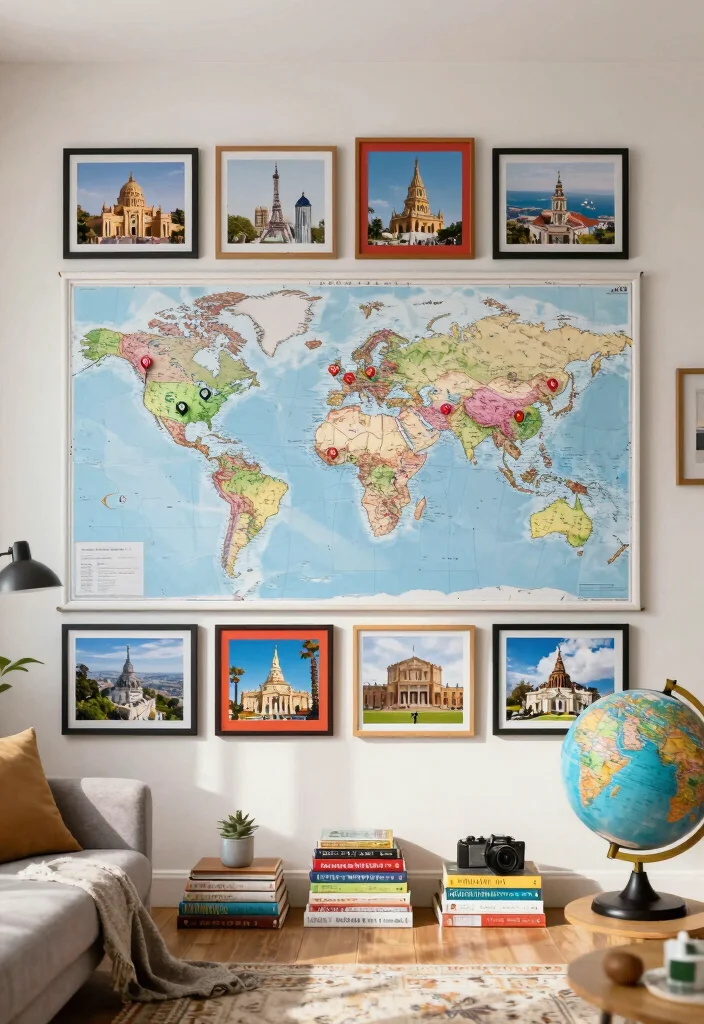
Celebrate your wanderlust by transforming your living room photo wall into a gallery of travel adventures. Select images from your favorite trips and arrange them to reflect your journey through different cultures and landscapes. Incorporating a world map or travel-themed decor adds a sense of adventure and excitement to your display, showcasing not just memories but your passion for exploration.
Choose frames that complement the global theme; rustic wooden frames or map designs work beautifully. Mixing different sizes of photos adds visual interest, while including travel memorabilia like postcards or tickets tells a fuller story of your experiences.
Consider these ideas for your travel wall:
– Use frames that reflect your travel theme.
– Mix sizes for added visual interest.
– Incorporate travel memorabilia for a richer narrative.
Create a travel map on one side of the wall to pin locations corresponding to your photos, making your gallery interactive and engaging.


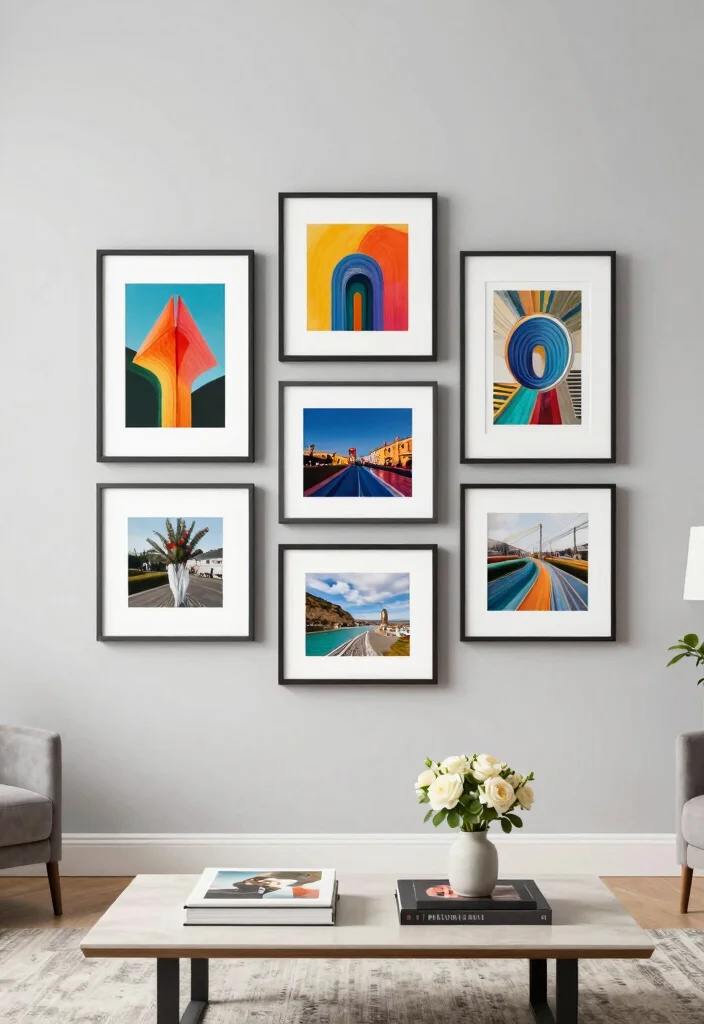
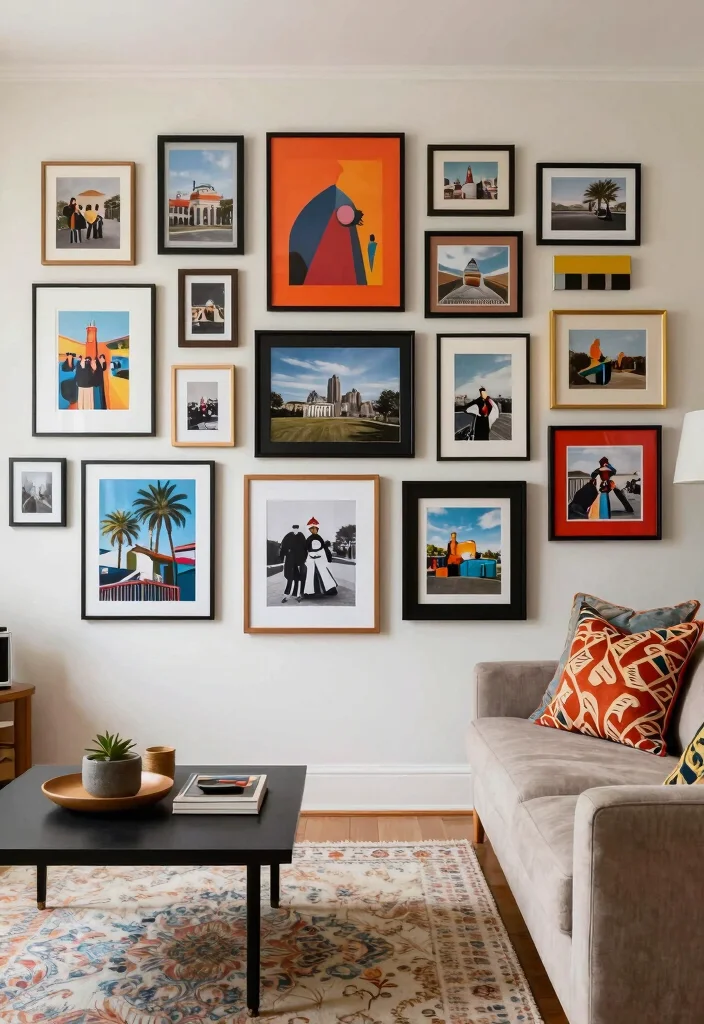
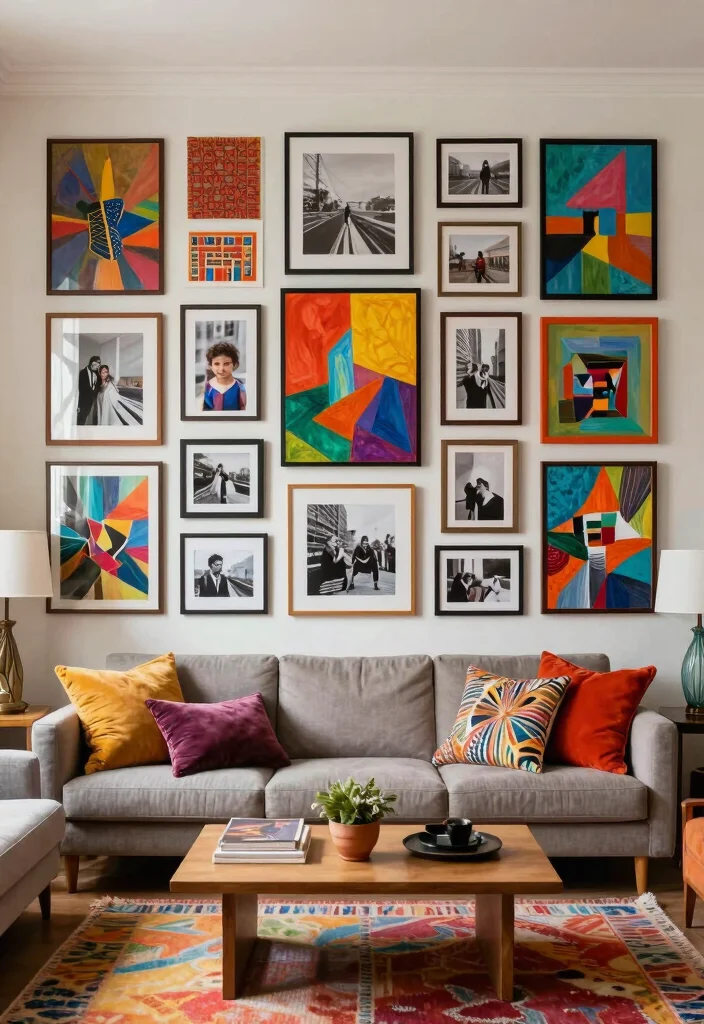
16. Color Pop
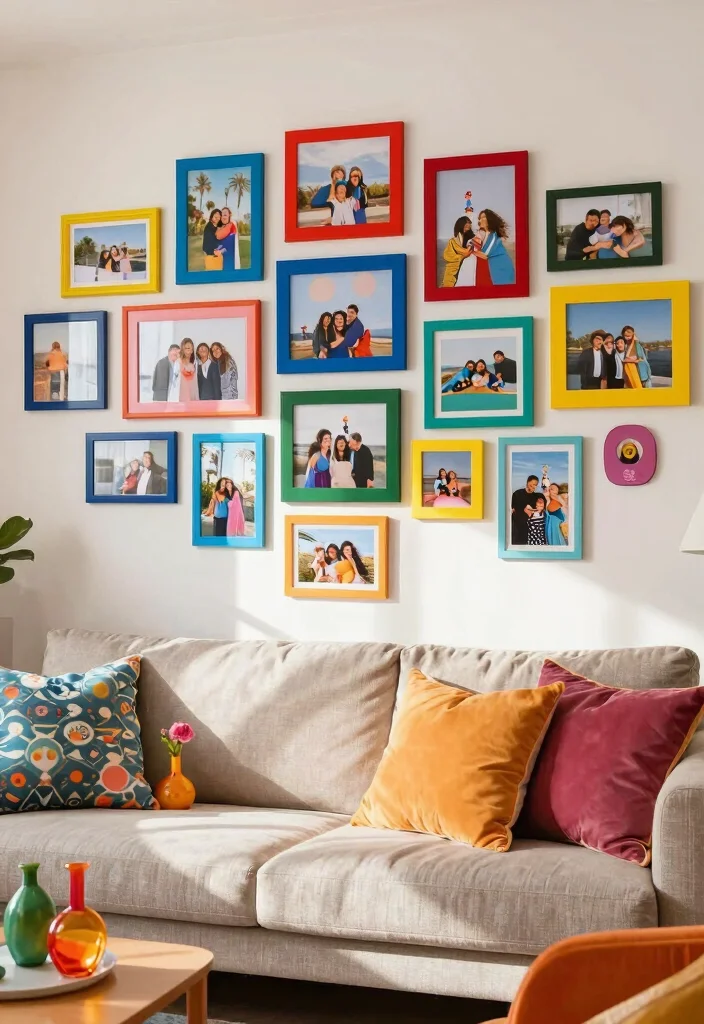
Make a bold statement with a photo wall that embraces vibrant colors and playful designs. Selecting colorful photographs and pairing them with equally vibrant frames creates an energetic atmosphere in your living room. This lively approach introduces a youthful touch, promoting joy and creativity throughout your decor. Mix sizes and orientations for a whimsical gallery wall that captures attention.
Ensure the colors of the photos and frames complement each other for a harmonious look. A bright background color can enhance the vibrancy of your gallery, making it a focal point. Incorporate fun decorative elements, like colorful vases or art pieces, nearby to amplify the theme.
Consider these tips for your colorful display:
– Ensure colors complement each other for harmony.
– Use a bright background to enhance vibrancy.
– Incorporate colorful decor elements nearby.
Choose images that evoke strong memories or feelings, deepening the emotional connection within your vibrant gallery.
Color Pop instantly transforms a living room photo wall into a lively centerpiece. Mix vibrant photos with bold frames, and vary sizes and orientations to spark joy and conversation. Your space feels personal, playful, and totally Instagram-ready.


17. Artistic Approach
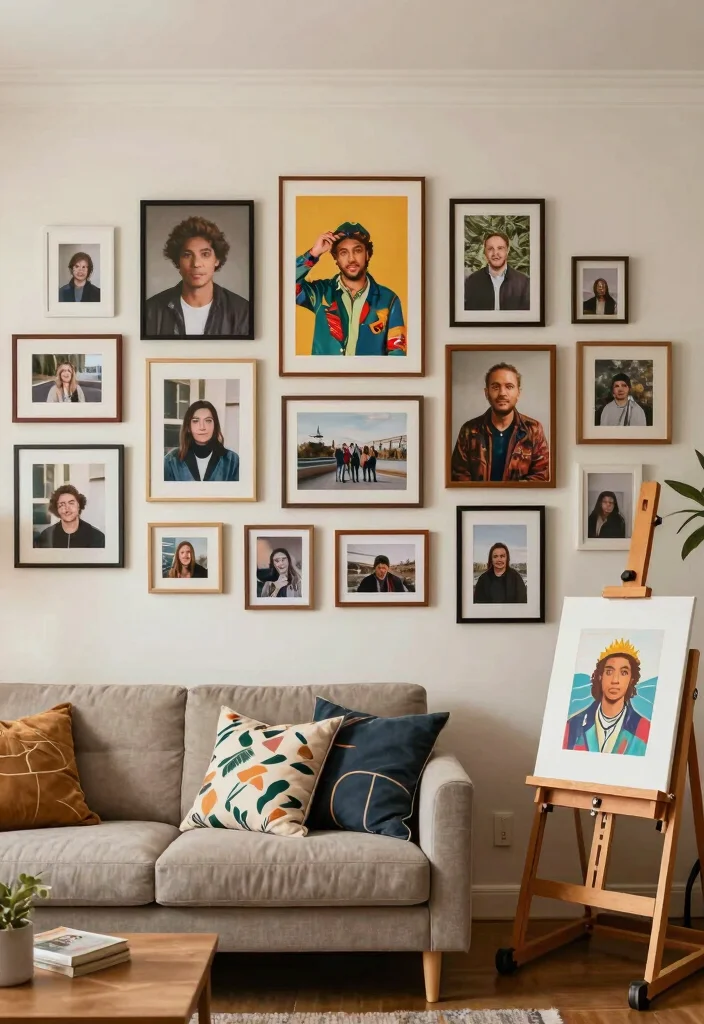
For a truly unique living room photo wall, incorporate your own artwork or illustrations alongside your photographs. This artistic approach adds a personal touch, transforming your space into a mini art gallery that reflects your creativity. Consider varying frame styles and colors to create an engaging visual composition that draws the eye.
Use a mix of mediums, from sketches to photography, to showcase your diverse talents. Highlight certain pieces with spotlights for dramatic effect, making them stand out. Curate the wall to evolve with your artistic journey over time, allowing it to change as you grow.
Here are some tips for crafting your artistic display:
– Use a variety of mediums to showcase your talent.
– Highlight pieces with spotlights for drama.
– Curate the wall to reflect your artistic journey.
This personal gallery not only serves as a decor choice but also expresses your creativity and invites guests to engage with your artistic talent.
Conclusion

Creating a captivating living room photo wall is an enjoyable way to express your personality and style.
From minimalist designs to vibrant mixes of colors and textures, there’s an endless array of options that can transform your space into a beautiful gallery. Experiment with the ideas presented, and don’t hesitate to get creative with your own unique touches. Remember, your photo wall tells your story, so let it shine brightly in your home!
Frequently Asked Questions
How do I start a minimalist living room photo wall without making the space feel cluttered?
Begin with a simple theme and a restrained color palette, such as neutrals with a single accent color.
Choose a strong anchor piece or a clean grid of 4–6 frames to set the tone for your living room photo wall. Use simple, slim frames in the same finish or two complementary finishes for cohesion.
Plan your layout on paper or with painter’s tape, then maintain generous negative space between items (aim for 2–3 inches). Keep mats around photos to create breathing room and reduce visual noise. This is classic gallery wall ideas that stays calm and intentional.
What layout works best for a gallery wall in a small living room?
In small spaces, go with a clean grid or a single focal piece with a few supporting frames. A grid using evenly spaced frames creates order and makes the wall feel intentional rather than crowded. Use matching frames or a minimal two-tone scheme to keep it cohesive. Measure wall area, find the center, lay out on paper, or use painter’s tape to map it first. Keep spacing at 2–3 inches and consider a mix of landscape and portrait orientations within the grid. This approach aligns with gallery wall ideas and photo display inspiration for compact rooms.
What types of frames and art suit a minimalist living room photo wall?
Choose simple frames in neutral tones like black, white, or light wood. Keep frame sizes coordinated, perhaps one size plus a second small size for variety, and use mats to create clean edges. For art, mix high-impact photos or art prints with a few personalized wall art items—family photos, travel prints, or typography—while keeping the palette cohesive. Matte prints, black-and-white photography, or soft desaturated color work well with minimalist decor. For longevity, opt for archival paper and UV-protective glass.
How can I personalize a living room photo wall while keeping it cohesive?
Pick a clear theme like family memories or travel moments and route your color palette. Select 3–5 cornerstone pieces and fill in with supporting photos or art that echo the same tones. Use the same mat color and frame style across the board to unify the look, even if some images are personal and others are art prints. Add a small accent color through a decor item nearby to tie the wall to the rest of the living room design. Remember, personalized wall art is encouraged, but restraint is key to home decor tips success.
How many photos should I include and how should I arrange my living room photo wall?
There is no one-size-fits-all, but for a minimalist aesthetic you can aim for 6–12 pieces overall, with one or two larger centerpieces and the rest smaller frames. Start by placing the anchor piece, then arrange the others around it in a grid or organic rhythm. Keep gaps at roughly 2–3 inches, and use painter’s tape to preview the layout before hanging. This method matches classic gallery wall ideas and photo display inspiration for a refined living room design.
Related Topics
living room photo wall
gallery wall ideas
minimalist design
personalized wall art
photo display inspiration
home decor tips
easy decor projects
modern aesthetics
beginner friendly
DIY home decor
wall art trends
cozy living room