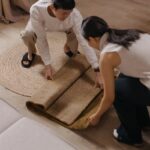
You’ll transform your rug’s frayed edges into a polished finish by gathering binding tape, adhesive, and scissors first. Clean and flatten your rug thoroughly, then trim edges straight using a utility knife. Measure your perimeter carefully before selecting your binding method: adhesive, tape, or sewn. Handle corners with precise 45-degree folds for neat mitre joints. Secure binding ends with overlap, reinforce with glue or stitching, then wait 24–48 hours for full cure. Inspect corners and seams for durability. These foundational steps produce professional results that last.
Gather Your Binding Materials and Tools

Binding Materials
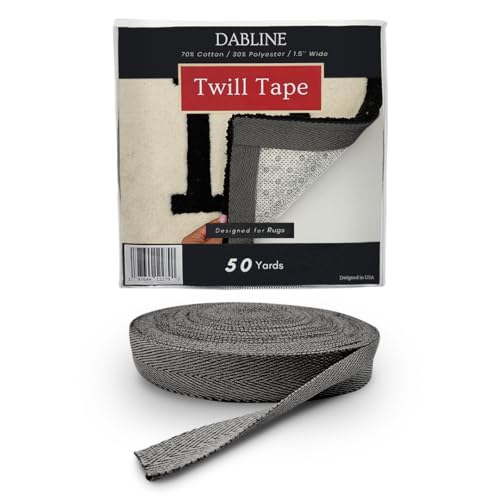
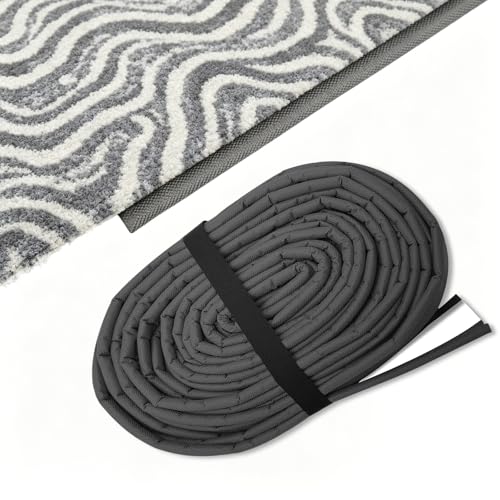
- Wide binding tape (cotton, polyester, or bias tape)
- Compatible adhesive like Instabind or carpet tape
- Piping cord (optional)
Essential Tools
- Scissors for trimming
- Utility knife for straightening rug edges
- Hot glue gun for securing binding
- Measuring tape for accurate perimeter length
Optional Items
- Carpet pad cut to size
- Sewing machine with zipper foot (if sewing binding)
- Appropriate needle and thread
Organize your supplies in one spot before starting. Use a measuring tape to calculate correct binding lengths. Quality scissors and a sharp utility knife create clean, neat rug edges. This preparation ensures professional-looking results.

★DIY Crafting: This 2-inch wide webbing tape in a length of 10 yards is perfect for various DIY craft projects in daily life and home use.
BOOST YOUR RUG'S VALUE: Enhance your rug's appeal and sale value with a professional and clean finish, ultimately boosting its sale value and overall market appeal.

★DIY Crafting: This 2-inch wide webbing tape in a length of 10 yards is perfect for various DIY craft projects in daily life and home use.
Clean and Prepare Your Rug Thoroughly

Preparing your rug properly sets you up for success before you even touch the binding. Skipping this step leads to frustration later on.
Start with a thorough vacuum. Remove all loose dirt and debris from both sides. This prevents particles from interfering with your rug binding adhesion.
Address any stains next. Clean set-in stains before edging begins. Trapped dirt beneath the binding shows through and compromises your finished look.
Flatten your rug completely. Lay your rug on a clean, flat surface for several hours. Wrinkles and folds create uneven edges during rug edge binding.
Check for alignment. Ensure corners are square and edges are straight. A properly prepared rug guarantees professional results when you’re ready to bind.

Regular style Instabind is an easy to use DIY binding that is perfect for binding carpet edges in your home. This is perfect for the homeowner wanting to get a professional looking bound rug without the high prices of sending it out to a professional. Instabind will give you a professional look without the visible stitching that can detract from the overall appeal of a professionally bound rug.

【Safety Guard】Worried about wrinkled, shifting carpets causing accidents? Concerned about pet messes under carpets harming child’s health? This strip easily connects carpets and floors, keeps spaces clean and safe—ideal for homes and public areas
Made of durable Oxford fabric that is waterproof and wear-resistant.
Trim and Straighten All Rug Edges

Trim and straighten all rug edges with the right tools and techniques to ensure clean, professional results. Proper edge trimming makes binding significantly easier and improves the finished appearance of your project. This guide walks you through the specific methods that deliver the best outcomes.
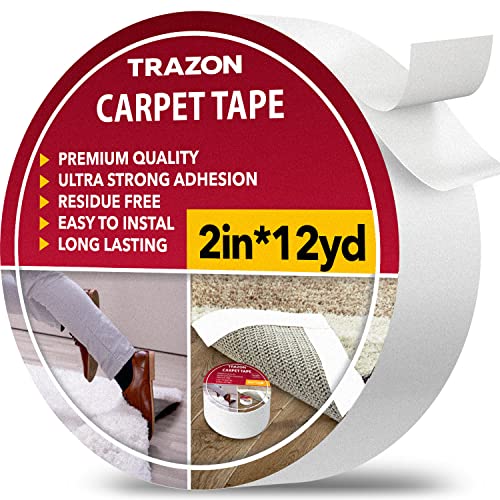
Hot Melt Technology for Extra Sticking Power. Get a rug holder that will finally do its job! Our hot melt double stick carpet tape is highly adhesive compared to acrylic tapes. It offers an outstanding holding power to fix your rugs, runners, carpets, or other stuff you want to keep in its place. Because of increased tensile strength, our two sided carpet tape will be doing its sticky job for 6 months and more.

Hot Melt Technology for Extra Sticking Power. Get a rug holder that will finally do its job! Our hot melt double stick carpet tape is highly adhesive compared to acrylic tapes. It offers an outstanding holding power to fix your rugs, runners, carpets, or other stuff you want to keep in its place. Because of increased tensile strength, our two sided carpet tape will be doing its sticky job for 6 months and more.

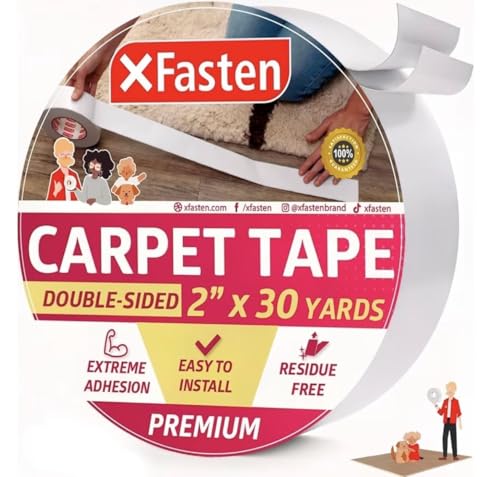
PREMIUM HEAVY-DUTY BONDING FOR CARPET EDGES: Our carpet binding tape is engineered with reinforced synthetic polyester to deliver superior grip and lasting durability. Unlike standard options, it requires no stitching and bonds securely—ideal for transforming raw carpet edges into polished rugs or runners with a clean, invisible finish.
Straight Edge Importance
Straight edges are essential to professional-looking binding. When trimming a rug, a straight edge ensures clean, precise edges. Uneven edges create gaps where binding won’t adhere properly.
The process:
- Flip the rug to expose all edges
- Measure the perimeter carefully before trimming
- Use a utility knife with a straight edge as my guide
- Recut if needed until each edge runs true
Straight edges mean binding sits flush against the rug’s borders. They create square corners that look intentional and finished. When edges align perfectly, binding application becomes straightforward and the final result lasts longer.
Cutting Techniques And Tools
Cutting Techniques And Tools
Getting your rug’s edges perfectly straight requires proper tools and methods.
Essential Tools:
- Utility knife or box cutter
- Straightedge or ruler
- Cutting mat or scrap cardboard
The Process:
Place your cutting mat underneath to protect the floor. Use your straightedge to mark consistent edge lines across the rug’s perimeter.
Make trimming increments gradually rather than cutting large sections at once. After each small cut, check for straightness before continuing.
This approach prevents overshooting. Once you’ve completed edge trimming, re-check the entire shape and straighten all corners. This ensures your binding will sit perfectly flush along the straight boundaries you’ve created.
Measure Your Rug’s Perimeter for Binding Length

Before you cut a single inch of binding material, you’ll need to measure your entire rug’s perimeter. Use a flexible measuring tape to trace along all rug edges carefully. Record each measurement for length and width sides separately.
Measure your entire rug’s perimeter with a flexible tape, recording length and width separately before cutting any binding material.
Why this matters: Accurate measurements prevent binding shortages and waste.
Here’s what to do:
- Measure each side of your rug individually
- Follow actual rug edges, not assumed straight lines
- Account for any irregular or curved edges
- Add 6–12 inches extra for corners, overlaps, and mistakes
- Re-measure after laying the rug flat to verify accuracy
This extra binding length provides the flexibility you need during installation. Precise measurements let you start the binding process with confidence and reduce the risk of running short on materials.

Package Included: Package includes 1 pcs Low Shank Adjustable Tap Bias Binder Presser Foot for Singer, Brother, Janome, Juki, Babylock, Elna, Kenmore, White, Necchi, Simplicity, Euro-Pro, and More Sewing Machines.
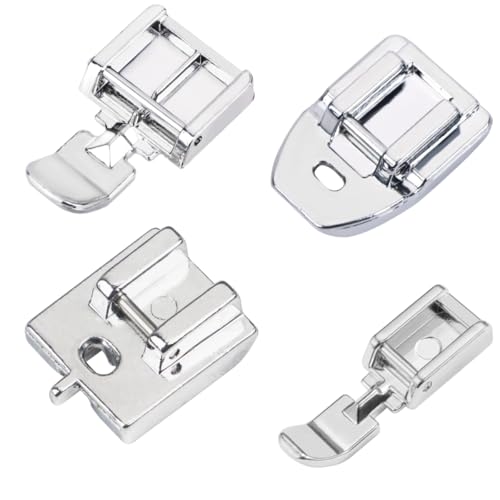
4 Essential Zipper Feet: Complete set includes wide zipper foot, narrow zipper foot, invisible zipper foot, and concealed zipper foot to handle every zipper sewing need

✅ PROFESSIONAL ZIPPER INSERTION: Sew zippers with precision by stitching close to zipper teeth for clean, secure finishes. Perfect for dresses, skirts, cushions, and other sewing projects requiring accurate zipper placement.
Choose Your Binding Method (Adhesive, Tape, or Sewn)

Three main binding methods work well for rug edges: adhesive, tape, and sewn approaches. Each offers different benefits for your project.
- Adhesive edging uses carpet tape and a hot glue gun for quick application and a modern finish
- Binding tape involves sewing tape with half underneath and half over your rug for seamless results
- Sewn binding provides traditional durability through hand-stitching or machine work with complete control
- Corner handling requires careful folding or mitred corners regardless of your chosen method
Consider your rug’s style and your comfort level with tools. Adhesive edging setup is simpler but takes practice. Sewn binding demands more time yet delivers lasting results. Binding tape offers a practical middle ground. Your rug edge preparation and corner handling success depend on matching the method to your skill level.

100% acrylic

Regular style Instabind is an easy to use DIY binding that is perfect for binding carpet edges in your home. This is perfect for the homeowner wanting to get a professional looking bound rug without the high prices of sending it out to a professional. Instabind will give you a professional look without the visible stitching that can detract from the overall appeal of a professionally bound rug.
PREMIUM HEAVY-DUTY BONDING FOR CARPET EDGES: Our carpet binding tape is engineered with reinforced synthetic polyester to deliver superior grip and lasting durability. Unlike standard options, it requires no stitching and bonds securely—ideal for transforming raw carpet edges into polished rugs or runners with a clean, invisible finish.
Apply Binding Around the Rug Perimeter
Now you’re ready to wrap that binding around your rug. You’ll need to pick a starting point, handle those tricky corners smoothly, and keep the binding tight and even as you go. Each of these steps requires attention to detail so your rug binding looks polished and holds strong.

【Cotton Material & Practical Packaging】 Crafted from breathable fabric cotton, this webbing tape is eco-friendly & soft. Each roll measures 2-inch wide x 15-yard long (5cm x 13.7m).Its gentle texture provides comfort feeling, making it ideal for bag straps, apron ties, and garment edging.

★DIY Crafting: This 2-inch wide webbing tape in a length of 10 yards is perfect for various DIY craft projects in daily life and home use.
★DIY Crafting: This 2-inch wide webbing tape in a length of 5 yards is perfect for various DIY craft projects in daily life and home use.
Starting Point Alignment
Where should you start applying binding to your rug? The right corner choice affects your project’s success.
- Select a corner that’s least visible in your room
- Align the binding edge perfectly with your rug edge
- Ensure you have a straight, clean starting line
- Keep the binding flush against the perimeter throughout
Peel back the adhesive carefully and slide the binding under the rug edge. This creates continuous contact from the start. Perfect alignment at your starting point prevents gaps and bunching later in the process.
Proper preparation at this stage results in smoother corners when you reach them. You’ll notice the difference when finishing the final stretch around your rug.
Navigating Corners Effectively
Once you’ve got your starting point locked in place, it’s time to work your way around the rug’s edges. Corners are where most people run into trouble, so here’s the technique that keeps them looking sharp and professional.
At each corner, cut a line matching the edge precisely. Then fold the binding neatly so it forms a tight corner without bunching. The key is keeping that edge straight while the corner lies flat against your rug.
| Step | Action |
|---|---|
| 1 | Cut binding to match edge |
| 2 | Fold binding at corner |
| 3 | Press flat against rug |
| 4 | Secure with adhesive |
| 5 | Continue around perimeter |
Work continuously around the rug perimeter, ensuring your binding meets exactly where you started. This corner folding technique prevents wrinkles and delivers a professional, polished finish.
Maintaining Even Tension Throughout
How you pull the binding matters just as much as how you fold it. Consistent tension prevents your rug from warping or developing slack spots.
My approach to keeping everything even:
- Pull binding firmly but gently as you move around the perimeter
- Check alignment frequently by laying your rug flat every few feet
- Watch for tension imbalances at corners and curves
- Adjust immediately if you notice bunching or loose areas
I work methodically from one starting point toward the opposite end. This prevents rushing through sections where tension varies. After each corner, I trim excess material carefully to maintain smooth edge binding throughout.
Consistent tension and alignment produce a professional, uniform finished perimeter. The polished result reflects careful execution of proper binding technique.
Handle Corners and Seams Carefully
Corners are where your rug binding gets tested. The following techniques will help you achieve professional, polished results.
Creating Mitre Joints
At each corner, cut the binding at a 45-degree angle to match the rug edge. Then fold it around the corner to create neat mitre joints that look seamless.
Trimming and Aligning
After working the corner, fold back any excess adhesive. This allows you to trim and align the binding precisely with the rug edge.
Reinforcing Edges
Add a small glue bead at starting and ending points where seams meet. This prevents unraveling and keeps everything secure.
Mastering corners requires steady hands and patience. With practice, this technique becomes reliable and efficient.

★DIY Crafting: This 2-inch wide webbing tape in a length of 10 yards is perfect for various DIY craft projects in daily life and home use.

【Safety Guard】Worried about wrinkled, shifting carpets causing accidents? Concerned about pet messes under carpets harming child’s health? This carpet edge binding trim connects carpets and floors, keep clean and safe—ideal for homes and public areas
Secure Binding Ends and Overlap Points
Now that you’ve mastered the corners, it’s time to focus on the endpoints where your binding begins and ends.
Securing these points properly prevents your rug from unraveling. Follow these steps:
- Align binding squarely at both start and end points for a clean overlap
- Extend binding tape slightly past the rug edge to create neat overlap you can trim later
- Apply hot glue sparingly along the unfinished rug edge onto the binding for secure adhesive closure
- Smooth the entire length after joining, eliminating gaps at overlap points
Run a small bead of glue along where binding meets the rug edge. This reinforces your starting point and final join. Once everything’s aligned, trim any excess binding flush with the edge. Your rug will have professional-looking, secure endpoints.
Secure area rugs and carpets in place with our double sided carpet tape heavy duty. Our double sided tape for rugs to stay in place is great to keep rug in place on carpet, hardwood floors, and carpet-to-carpet applications.

ULTIMATE HOLDING POWER: Experiencing the market-leading adhesion with our Heavy Duty Double Sided Rug Tape! Being designed to firmly secure rugs, carpets, and runners; Being the strongest anti-slip solution available. Easily cut to size for a perfect fit to keep your floors safe and clutter-free.

Grip Design: the original Gorilla Grip grippers for hard floors help to keep your rugs in place and prevent corner and side curling; easy to apply to the underside of carpet corners and floors to help rugs stay in place and flat against the floor
Reinforce Edges With Adhesive or Stitching
For adhesive edging, I apply carpet tape along the rug back first. Then I press binding material onto the tape and finish the top edge with glue. This method works for edge reinforcement and dries quickly.
If you prefer stitching, hand-sewing gives you complete control over each stitch. Machine binding moves faster using binding tape or pre-formed edging.
Key steps for either method:
- Trim the rug edge neatly
- Handle corner mitre folds carefully
- Apply materials evenly and smoothly
Both approaches prevent fraying and maintain a professional appearance in your rug for years to come.

Use cotton Easypiping to make beautiful area rugs in your home. This DIY product is great for on-site "binding" of carpet remnants giving them a professional finished look that is second to none. Save time and money and bind your carpet yourself at home.

DUAL ZIPPER FUNCTION: This 2pcs zipper foot set includes a wide zipper foot and an invisible zipper foot, designed for smooth, accurate stitching close to zipper teeth, making installation faster and more professional for everyday sewing and garment projects

You are buying One piece snap-on type adjustable bias binder foot for sewing machines. This adjustable foot is universal fitting.
Allow Cure Time and Inspect for Durability
Now that you’ve reinforced your rug’s edges, patience becomes your best tool for success. Wait the full cure time your adhesive specifies, usually 24 hours, before you use the rug heavily. Once it’s dry, inspect your binding carefully to ensure everything held strong.

Sold in 5 foot sections. Package quantity: 5 feet if order is for 1. Adding quantity 1 to your cart means you will receive 5 feet; quantity 2 = 10 feet, quantity 3 = 15, etc. All quantities will ship as one continuous piece.

Sold in 5 foot sections. Package quantity: 5 feet if order is for 1. Package quantity 5 does not mean (5) 5 foot sections.

Sold in 5 foot sections. Package quantity: 5 feet if order is for 1. Package quantity 5 does not mean (5) 5 foot sections.
Drying Time Requirements
How long should you wait before using your newly bound rug?
I recommend following these drying time guidelines for your project:
- Allow 24 hours minimum for the adhesive to cure fully before any heavy use
- Check binding edges after initial cure by gently pressing to ensure the adhesive has set properly
- Inspect corners and seam joins for peeling or gaps, especially with Instabind or similar products
- Wait an additional 24–48 hours if you’ve used a carpet pad for maximum stability
Rushing this process will compromise your rug’s durability. The adhesive bond requires full cure time to perform correctly. Conduct light foot traffic tests and gentle tugs before placing it in high-traffic areas. Keep your newly bound rug away from damp environments during this period. Once you’ve confirmed the bond is secure, the rug will withstand regular use.
Quality Assessment Techniques
Your binding work requires verification to ensure it will hold up under real-world use. A properly completed binding will provide lasting durability for your rug.
Check Your Adhesion
Gently tug along each edge to test adhesion strength. Look for any loosening or gaps in the binding. This simple test identifies problems early.
Inspect Corner Mitre
Your corner mitre should have snug, neat folds with no fraying. This is where binding meets itself and requires special attention to ensure proper construction.
Evaluate Edge Tension
Run your hand along the entire perimeter. The binding should lie flat without puckering or bubbles. Uniform edge tension indicates quality work.
Monitor After Use
Watch high-traffic areas closely during initial use. Reapply adhesive or add extra stitching if needed.