
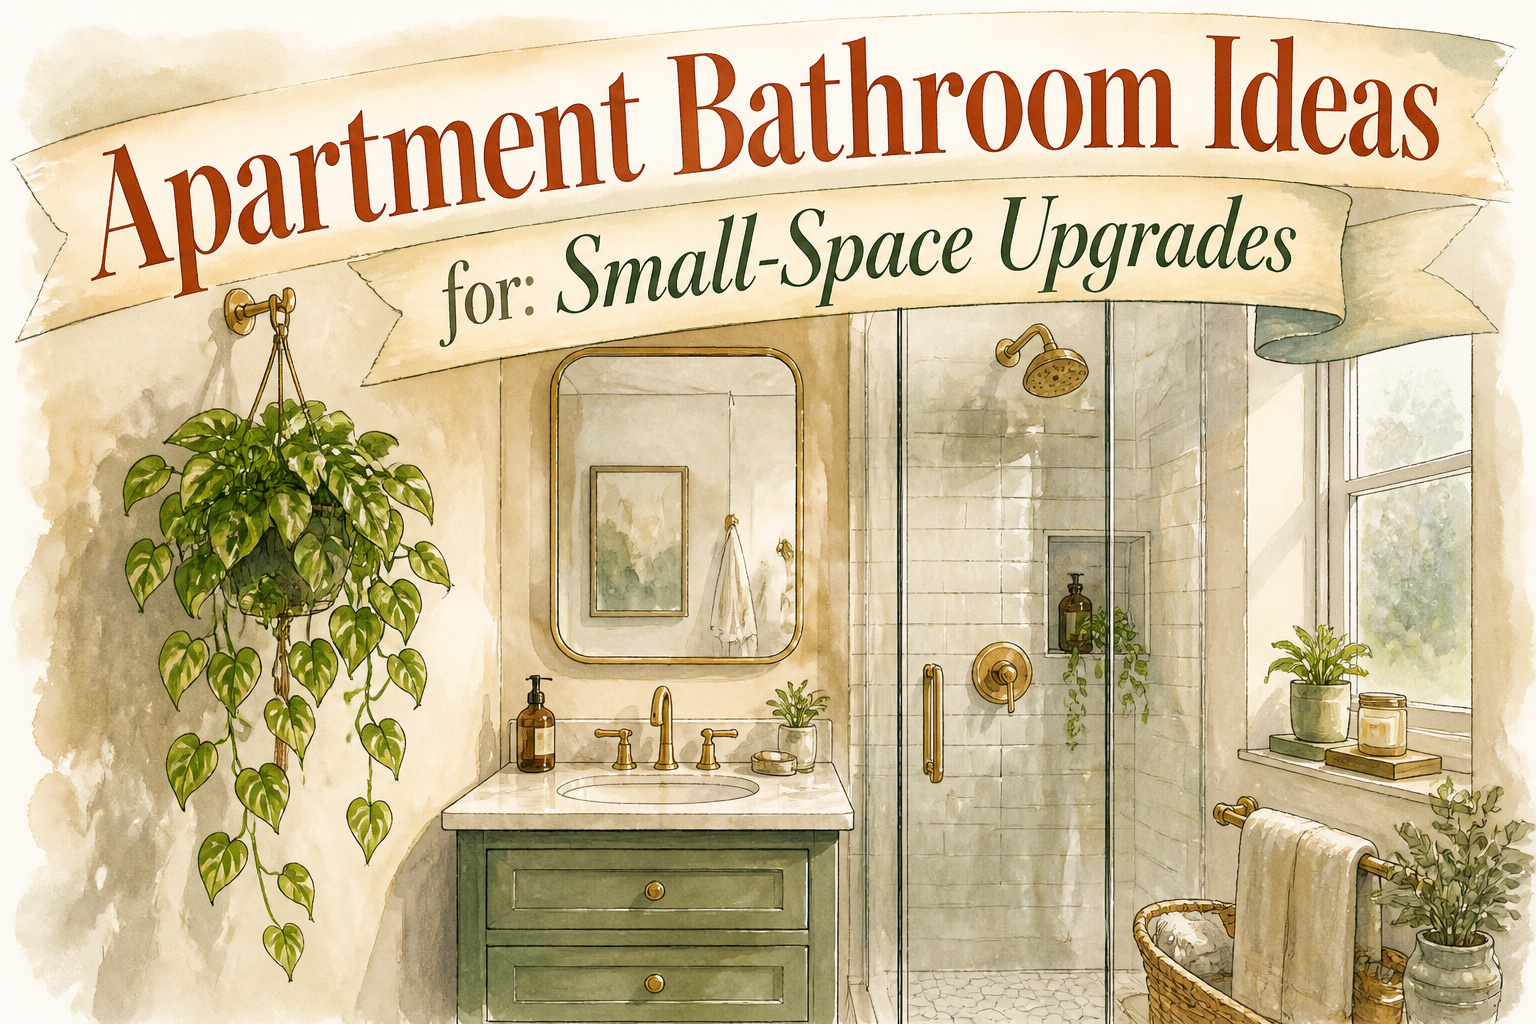
Small-space bathroom upgrades range from a $6 pothos to a forty-dollar salvage mirror, and the deciding factor is whether you can undo it Sunday night. The adhesive shelf I overloaded peeled at 2 a.m. three weeks in, which is why every item below comes with the condition that keeps it from costing your deposit.
1. Floating Shelves
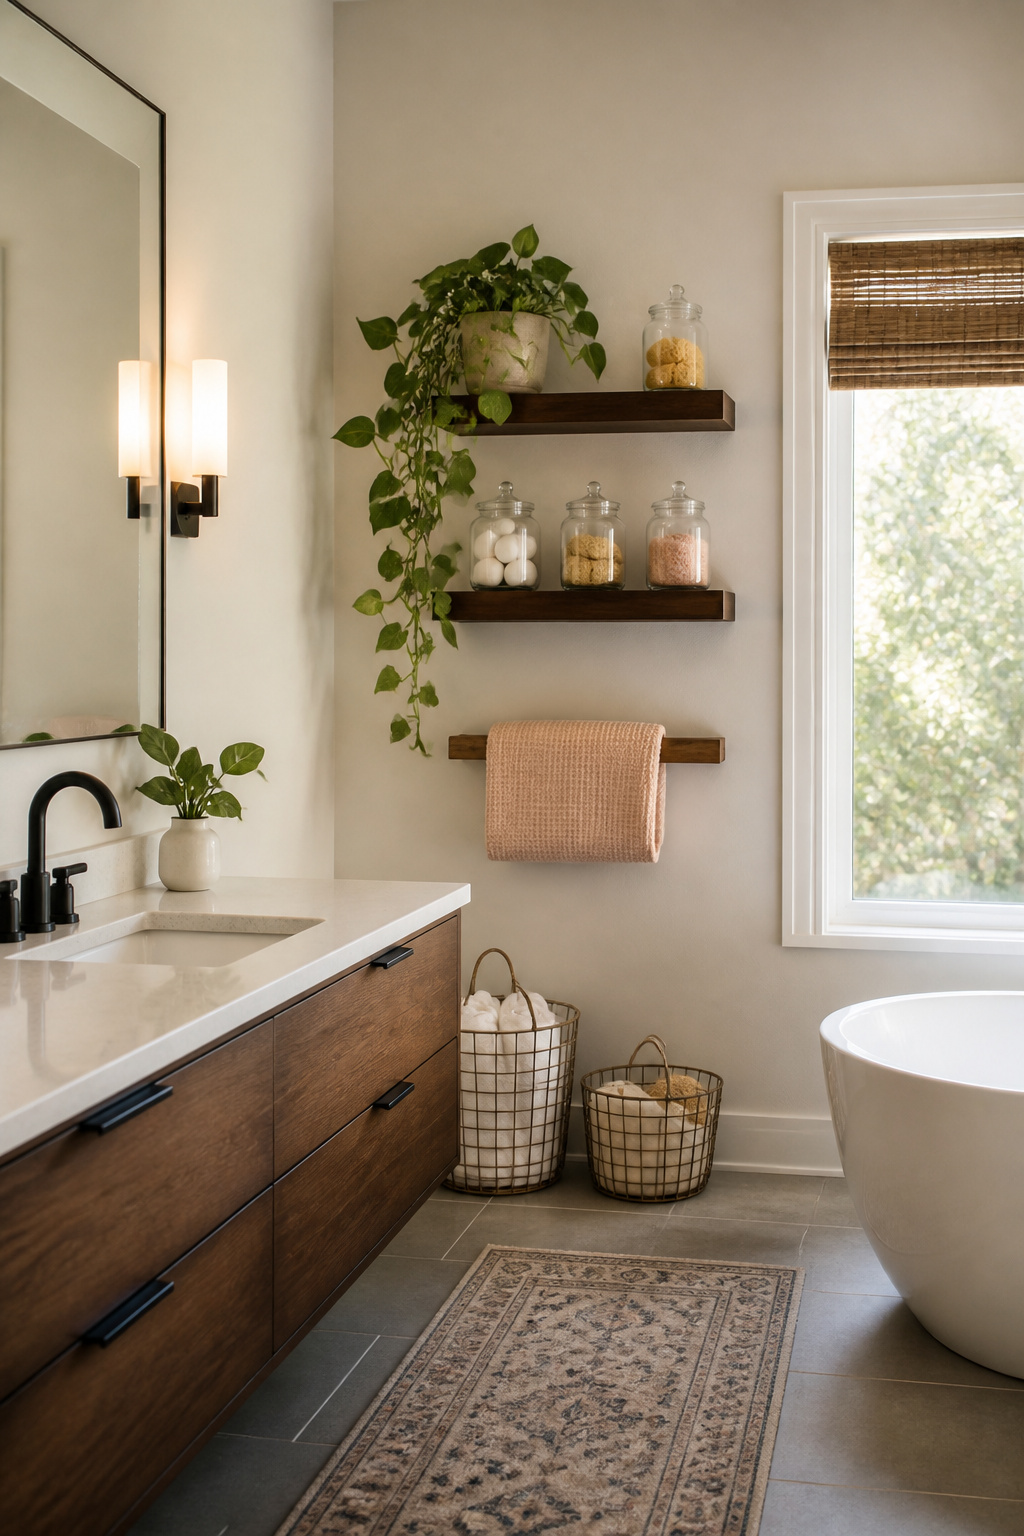
Floating shelves are a simple and stylish way to add storage and decor to your bathroom. The trick for renters is skipping the drill entirely. Adhesive brackets rated for ten to fifteen pounds work on smooth painted walls, and tension rods wedged between side walls can hold a shallow shelf above the toilet without a single hole. I overloading the first shelf I hung with glass jars and a trailing pothos. The bracket held for three weeks, then peeled at 2 a.m. Keep the load under half the rated weight if steam hits that wall daily, and skip adhesive altogether on tile or textured surfaces where the bond fails unpredictably. A slim shelf on the long wall, not the usual spot above the tank, leaves room for a rolled towel below and a small plant above. Wire mesh baskets corral the extras without cluttering the floor.
2. Light Color Palette
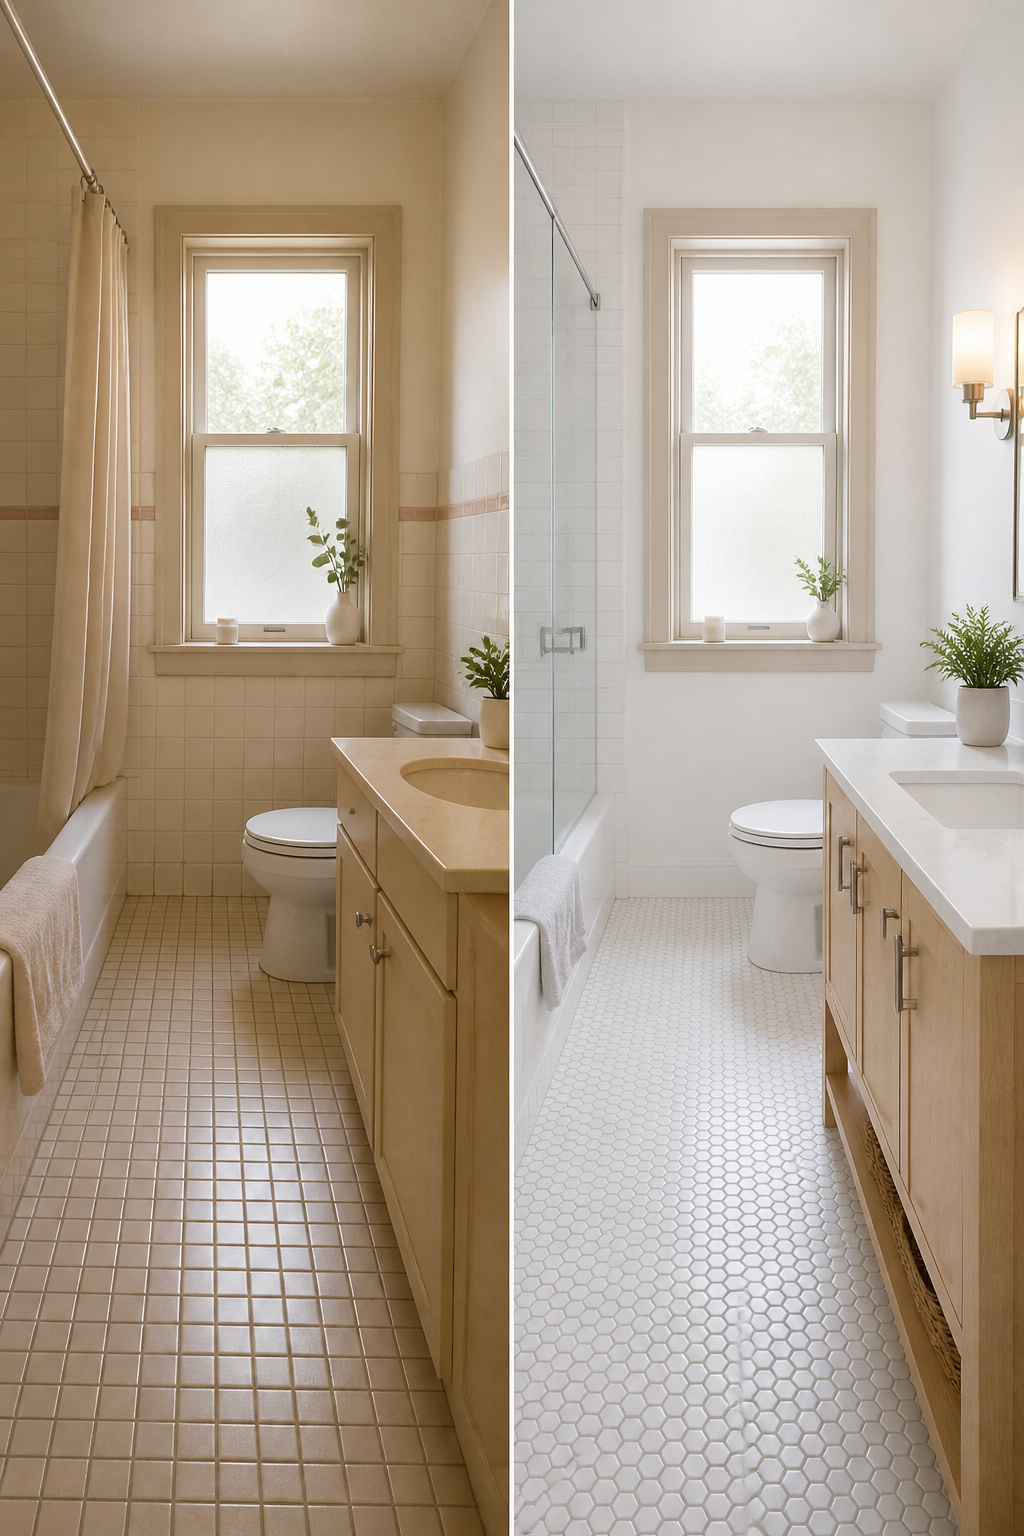
Warm white paint on three walls and a crisp white ceiling did more for my last rental bathroom than any shelf or mirror I added later. Cool white, under the same fluorescent tube, flattened every shadow and made the grout look gray. Beige sounded safe on the swatch, but the bathroom’s overhead light pulled out a dingy yellow undertone that read as dirty by week two. My rule since then is two colors max in a small bathroom: one warm neutral for the walls, one clean white for trim and ceiling. Anything else fragments the space. I did try the bold accent wall once, a deep teal behind the toilet that every blog suggested would "add depth." It cut the room in half visually. Using light, neutral colors to make the space airier and more open works because it actually lets your eye travel uninterrupted. That teal wall lasted one weekend before I rolled over it.
3. Decorative Towels
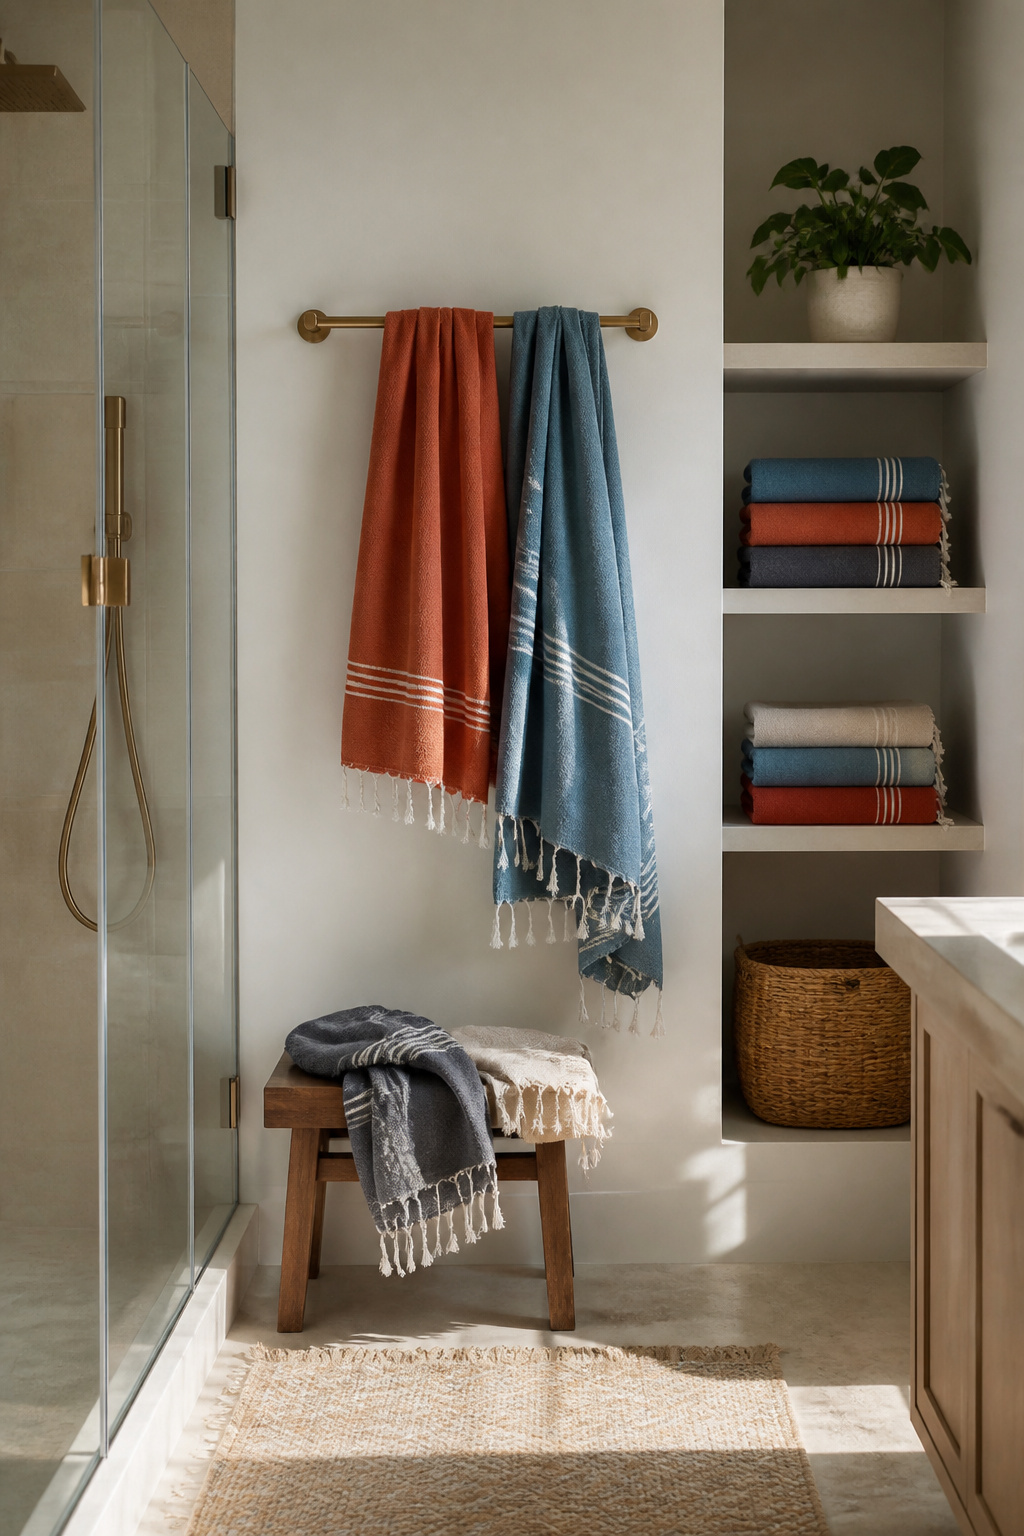
Hang decorative towels in place of plain white ones to add a pop of color without drilling a single hole or losing your deposit. The swap sounds simple until you walk into a bathroom where the towels are folded so precisely they feel like museum pieces. That staged look is what you want to avoid. Color should invite someone to actually dry their hands.
The rotation trick keeps them usable. One set hangs for show; another set lives in use. Turkish cotton seconds run about $12 and handle the daily work while the displayed ones stay fresh longer. How often the use set hits the washer depends on your household, but the display towels stretch to every couple of weeks since they barely see water.
Waffle weave towels fit this system well. They wash easily and still read as something you chose on purpose rather than grabbed in a six-pack. The texture reads casual, like a slow Sunday morning where everything has its place but nothing feels too precious to touch.
4. Mirrors
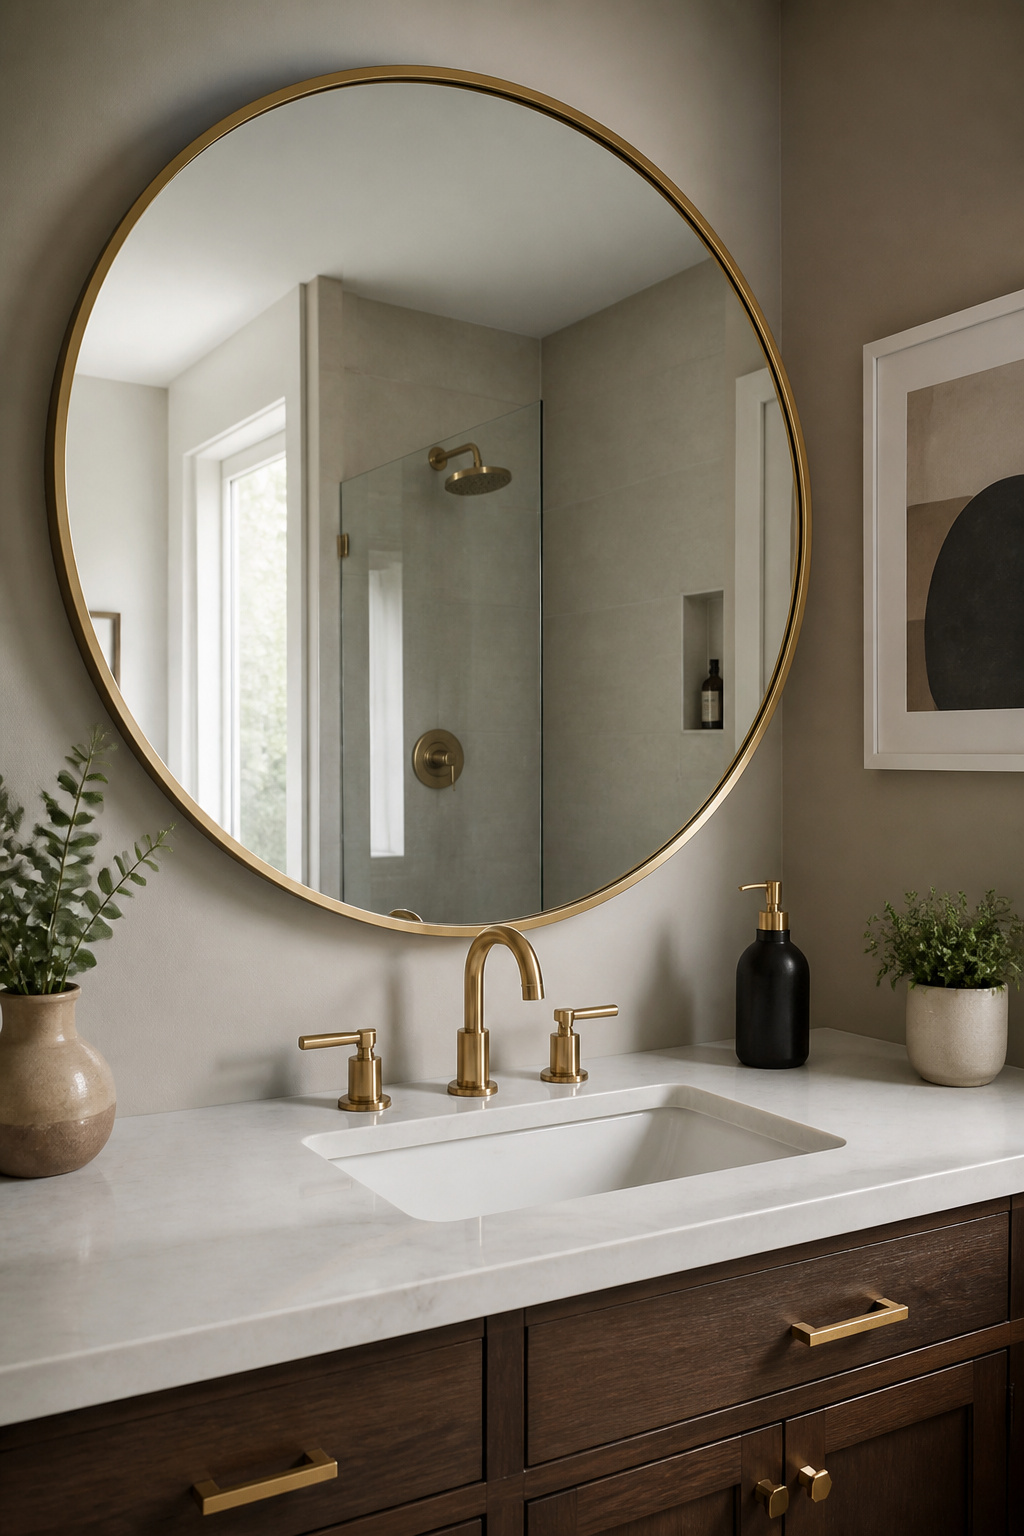
A mirror hung too high only flatters the ceiling. In my last rental, the existing mirror sat six inches above eye level, which meant I saw my forehead and the light fixture and nothing else that made the room feel larger. Hang the bottom edge of a mirror no higher than five or six inches above the sink, or anyone under five-foot-eight ends up with a view of tile grout.
A medicine cabinet trades depth for reflection. The recessed box breaks the wall plane and shrinks the visual field, while a flat mirror lets the wall keep going. Consider hanging a large mirror above the sink if the one you have is small. I found a forty-inch round mirror at a salvage store for forty dollars, stripped its brass frame with steel wool, and the bathroom doubled in apparent depth. The round shape softened the boxy room without any commitment I couldn’t undo with a spackle patch.
5. Plants
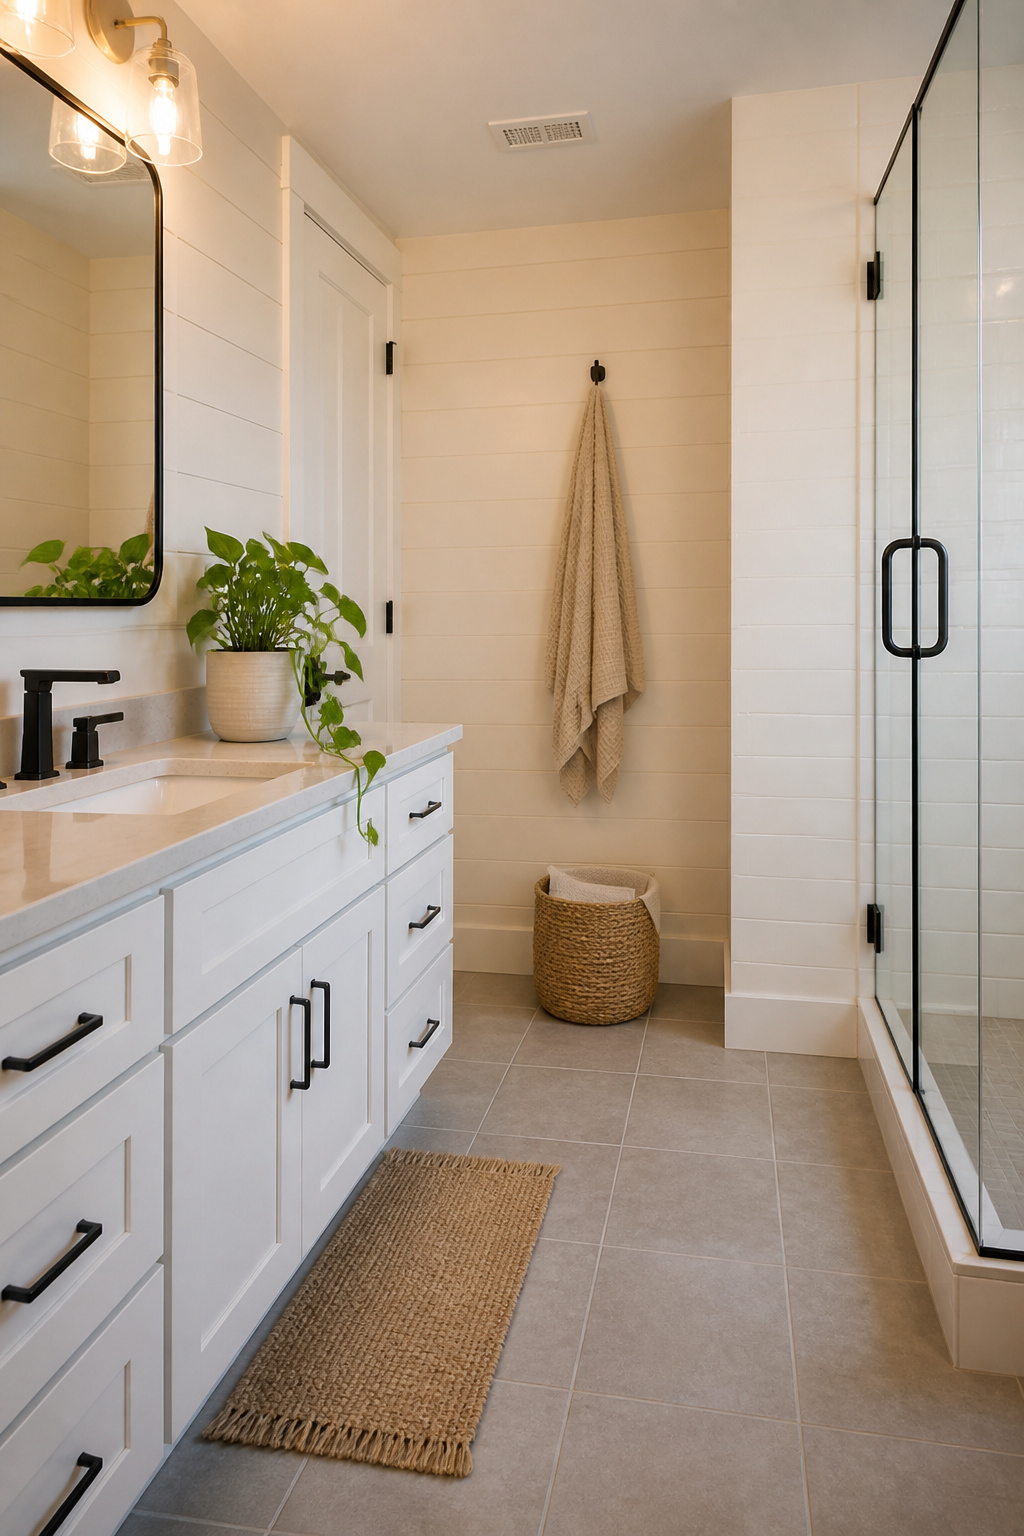
Bring some greenery into your bathroom with plants. A $6 pothos from the corner nursery outlived the $35 specialty fern I tried first, and the difference came down to light. My bathroom has no window. Ferns need more than the ambient glow from the hallway; pothos tolerates it and actually prefers the humidity. The trick most sources skip is watering without dripping on the floor. I carry the pot to the sink, let it drain fully in the basin, then set it back on a saucer. Skipping that step leaves a ring on the vanity or a puddle on tile. One trailing plant softens hard surfaces and brings a windowless room to life; start cheap, start with pothos, and upgrade only after you know what survives your actual conditions.
6. Peel-and-Stick Wallpaper
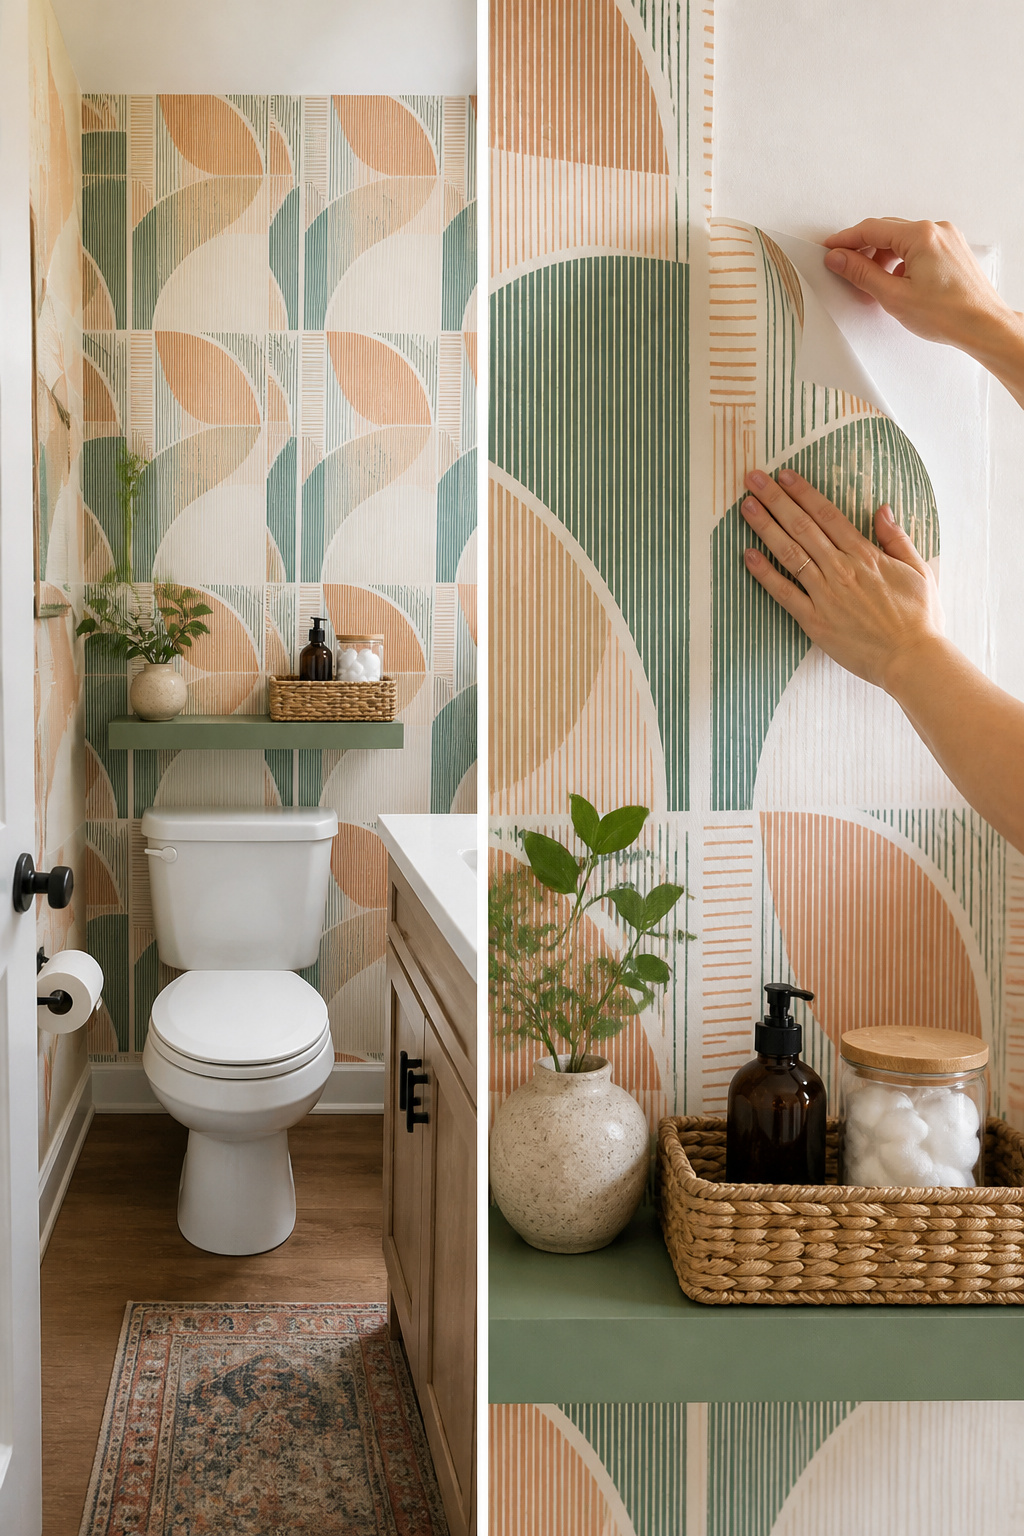
Peel-and-stick wallpaper turns a single wall into the whole personality of the room. I paid $23 for one roll, enough for the narrow wall behind my toilet, and the install took 45 minutes once I stopped overthinking it. That first attempt, trying to match a pattern across two sheets above the tub, burned three hours and taught me why the wall behind the fixture is the only one worth choosing in a small bathroom. One continuous surface means no seams to line up.
The steam above a tub is real, and most peels will lift eventually there. Adding a wallpaper accent wall can instantly elevate the look of your bathroom, but keep it to the dry zone or accept that you’ll be pressing edges back down after hot showers. My behind-the-toilet strip has held two years without a curl.
7. Shower Curtain Updates
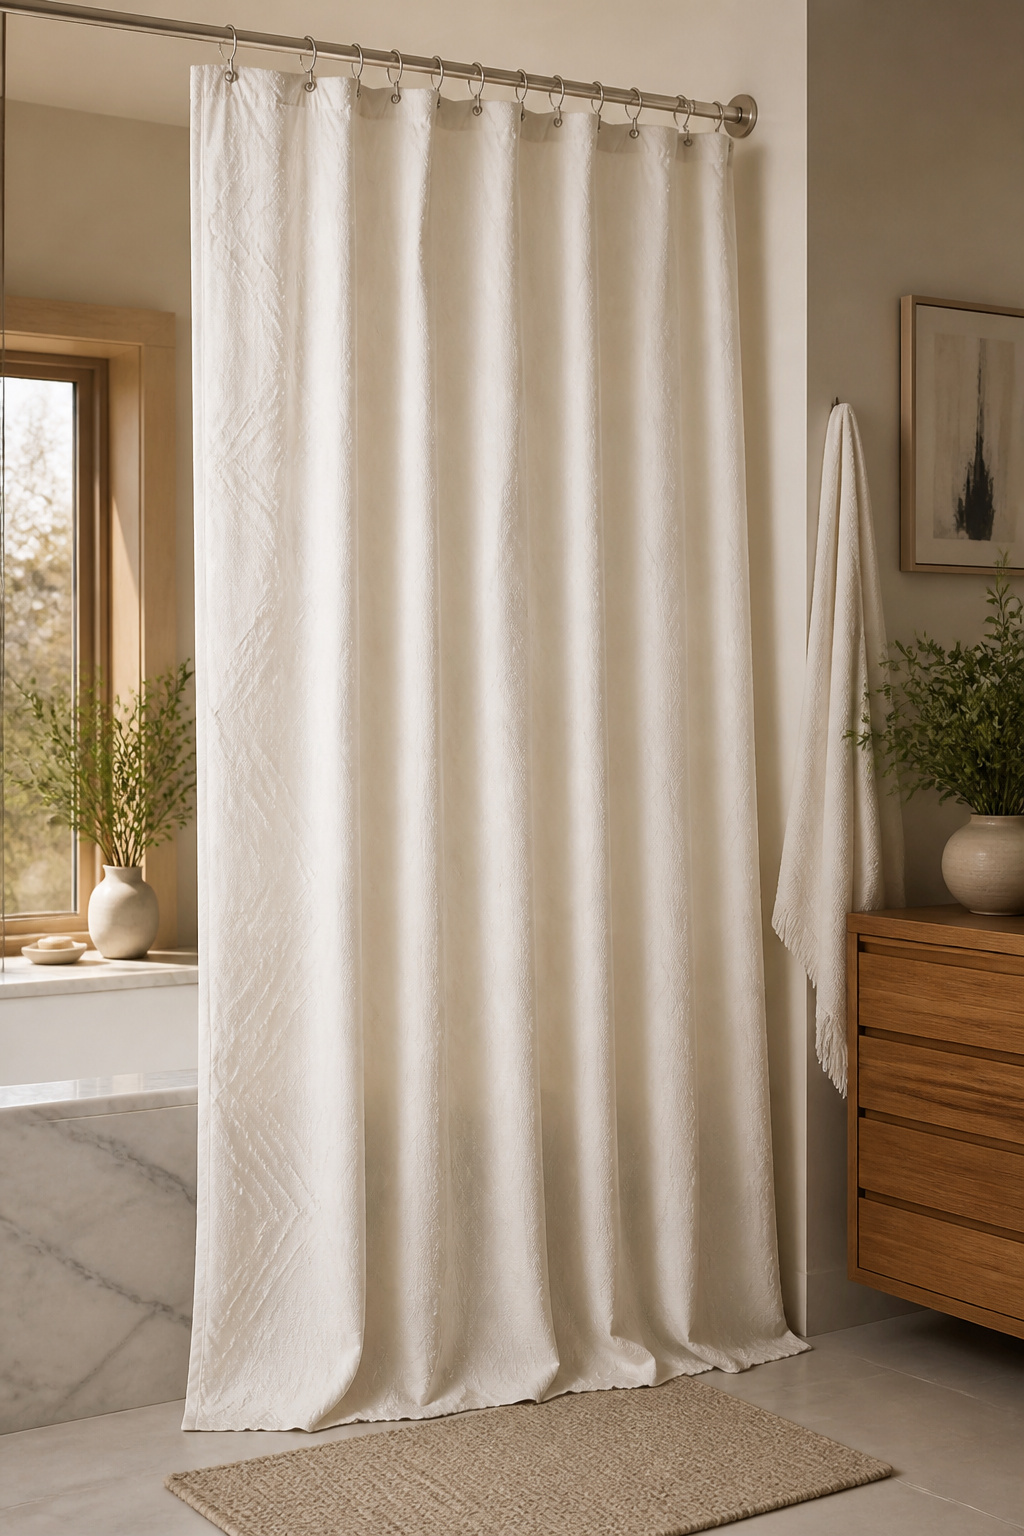
One easy way to give your apartment bathroom decor a fresh look is to switch up your shower curtain. The fabric matters more than the pattern, and most people get this wrong from the start. Cotton duck hangs with real weight and dries faster than you’d expect; polyester stays cheaper but starts looking tired where the water hits it daily. I skip PVC liners entirely, the off-gassing is real and they crack along the fold lines within a season anyway.
The rod height is where renters gain actual height. Bump it a few inches closer to the ceiling and let the curtain fall to floor length: the eye reads the full vertical drop as ceiling height, and a small bathroom suddenly feels cavernous. I found an $18 cotton duck curtain in a tight weave that read as $80 once it was steamed and hung high, the texture did the work no print could match.
Replacement timing depends on the weave. Lightweight polyester every eight to ten months, cotton duck every eighteen if you shake it out weekly and wash it quarterly. The difference in cost per year is negligible; the difference in how the room feels is not.
8. Storage Baskets
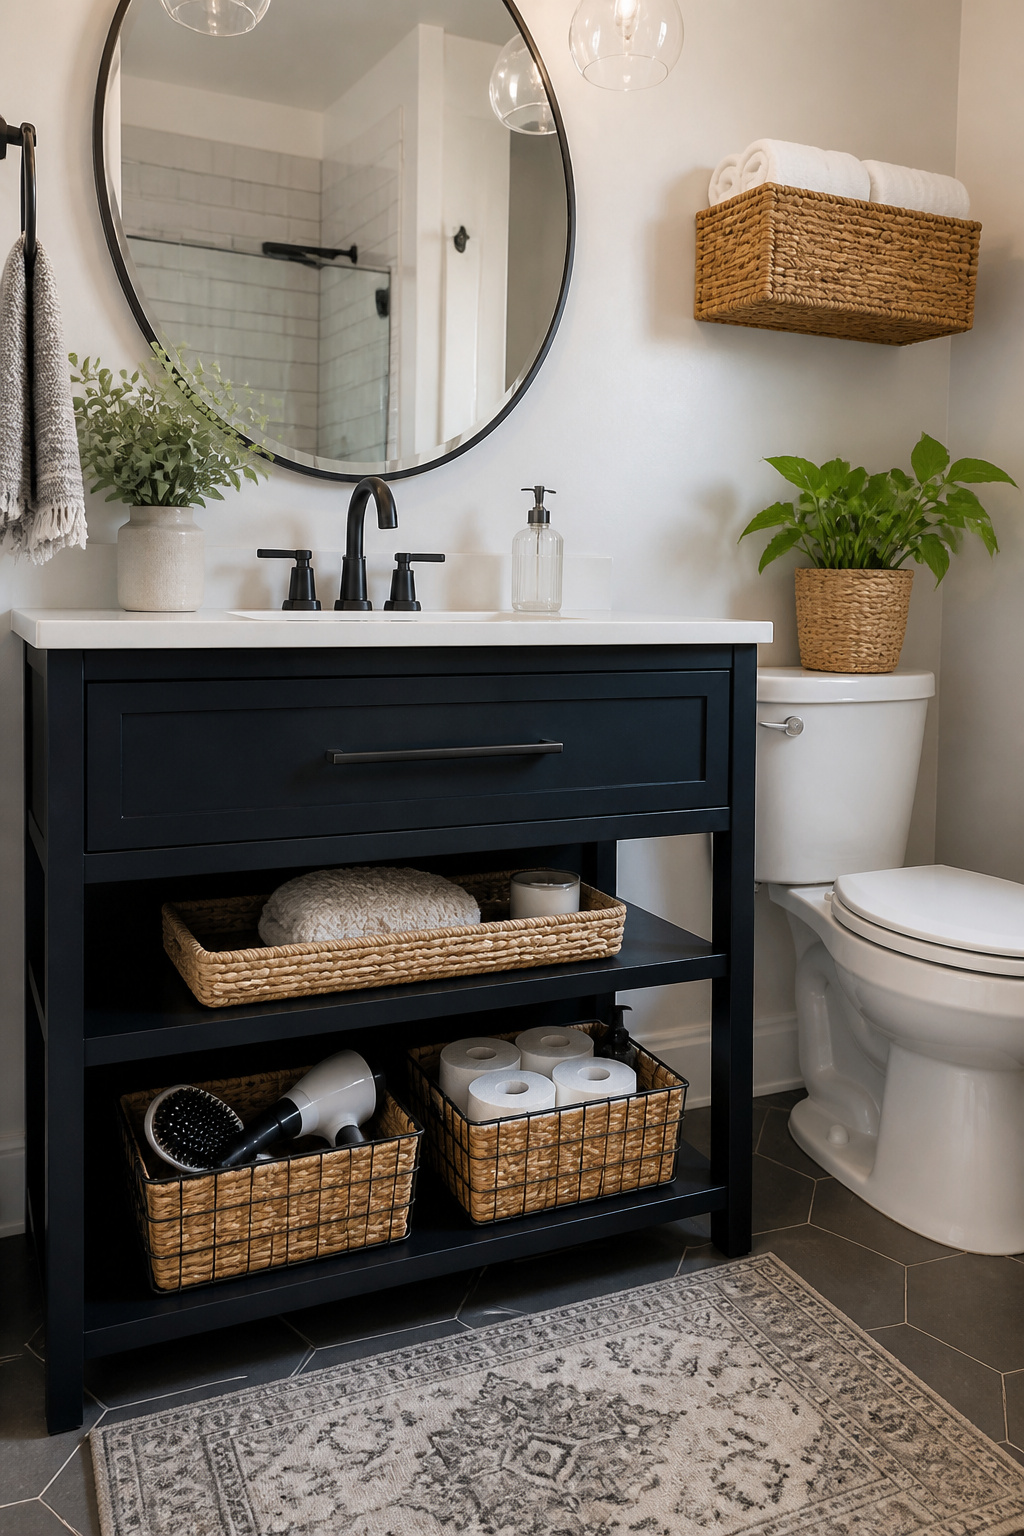
Woven or wire baskets add some texture and functionality to your bathroom with storage baskets that fit tight apartment footprints. I learned the hard way that material matters more than shape here. My first pick was a $32 seagrass lidded bin from a boutique, chosen mostly for the spa-like look the artisanal weave promised. Three weeks of shower steam later the sides had warped so badly the lid no longer sat flat. Seagrass and rattan absorb humidity, then sag; in a small bathroom with poor ventilation, they are a short-term decoration at best.
The replacement was an $8 wire basket with a fabric liner from IKEA, sized exactly for the under-sink cabinet. It corralled a hair dryer, two curling irons and their cords without the bulk of a bin that wasted vertical space. A second lidded plastic basket, also cheap, went on the shelf above the toilet to hide four rolls of toilet paper. The lid keeps the spare rolls visible to you but not to guests, which matters more than I expected in a bathroom with no closet.
Wire wins for anything near moisture. If you want warmth, a woven look works only in synthetic or sealed finishes, and even then, check the underside for bare fiber that will drink up steam.
9. Warm Lighting
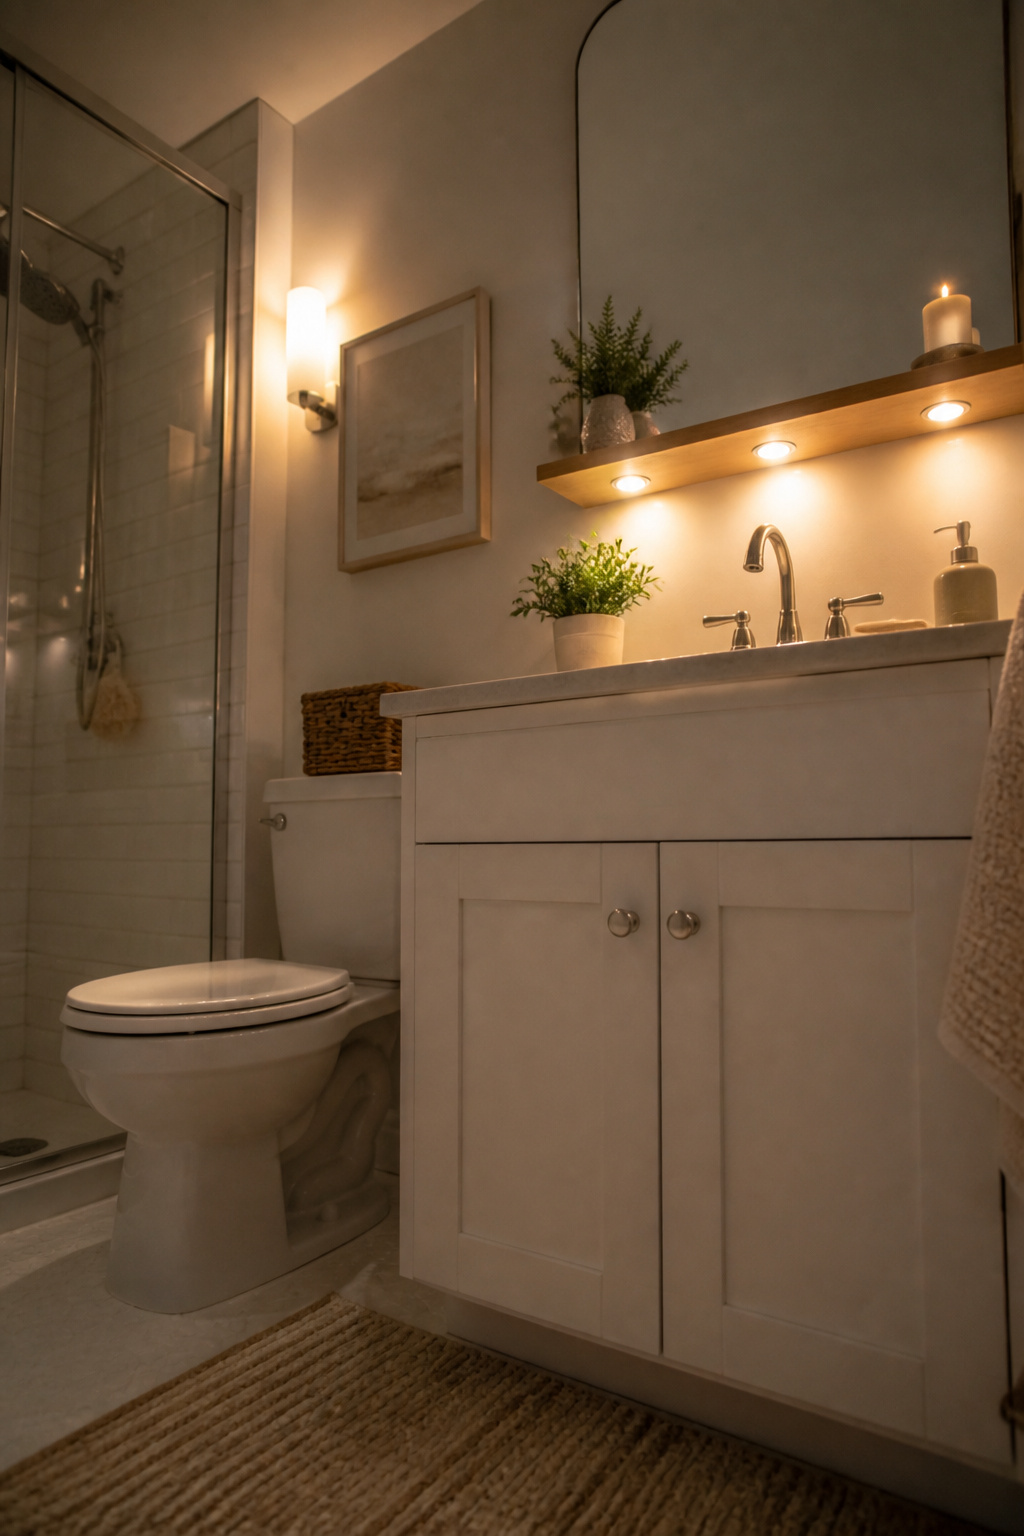
The landlord’s bar light over my bathroom mirror stayed exactly where it was. I worked around it instead of replacing it, because the lease is clear about electrical work and I did not want to have that conversation.
Warm dimmable stick-on puck lights solved the problem. I used three on a narrow oak shelf above the sink, set to 2700K, which is warm enough to cancel out the blue cast from the overhead fixture without feeling orange. Battery-operated puck lights mean no wiring, no permission slip, and they peel off when I move.
The cord from the puck light remote, because there always is one, disappeared behind a strip of painted quarter-round matching the wall. That was the hiding method that actually worked; adhesive channels pulled the paint off in the steam.
Accent lighting in small bathrooms doesn’t have to feel like clutter when it’s installed right. The puck lights sit against the wall, not floating mid-air, so they read as part of the shelf instead of gadgets stuck on afterward. A small brass sconce on the opposite wall, also battery-powered, balances the glow across the narrow space.
10. Art Prints
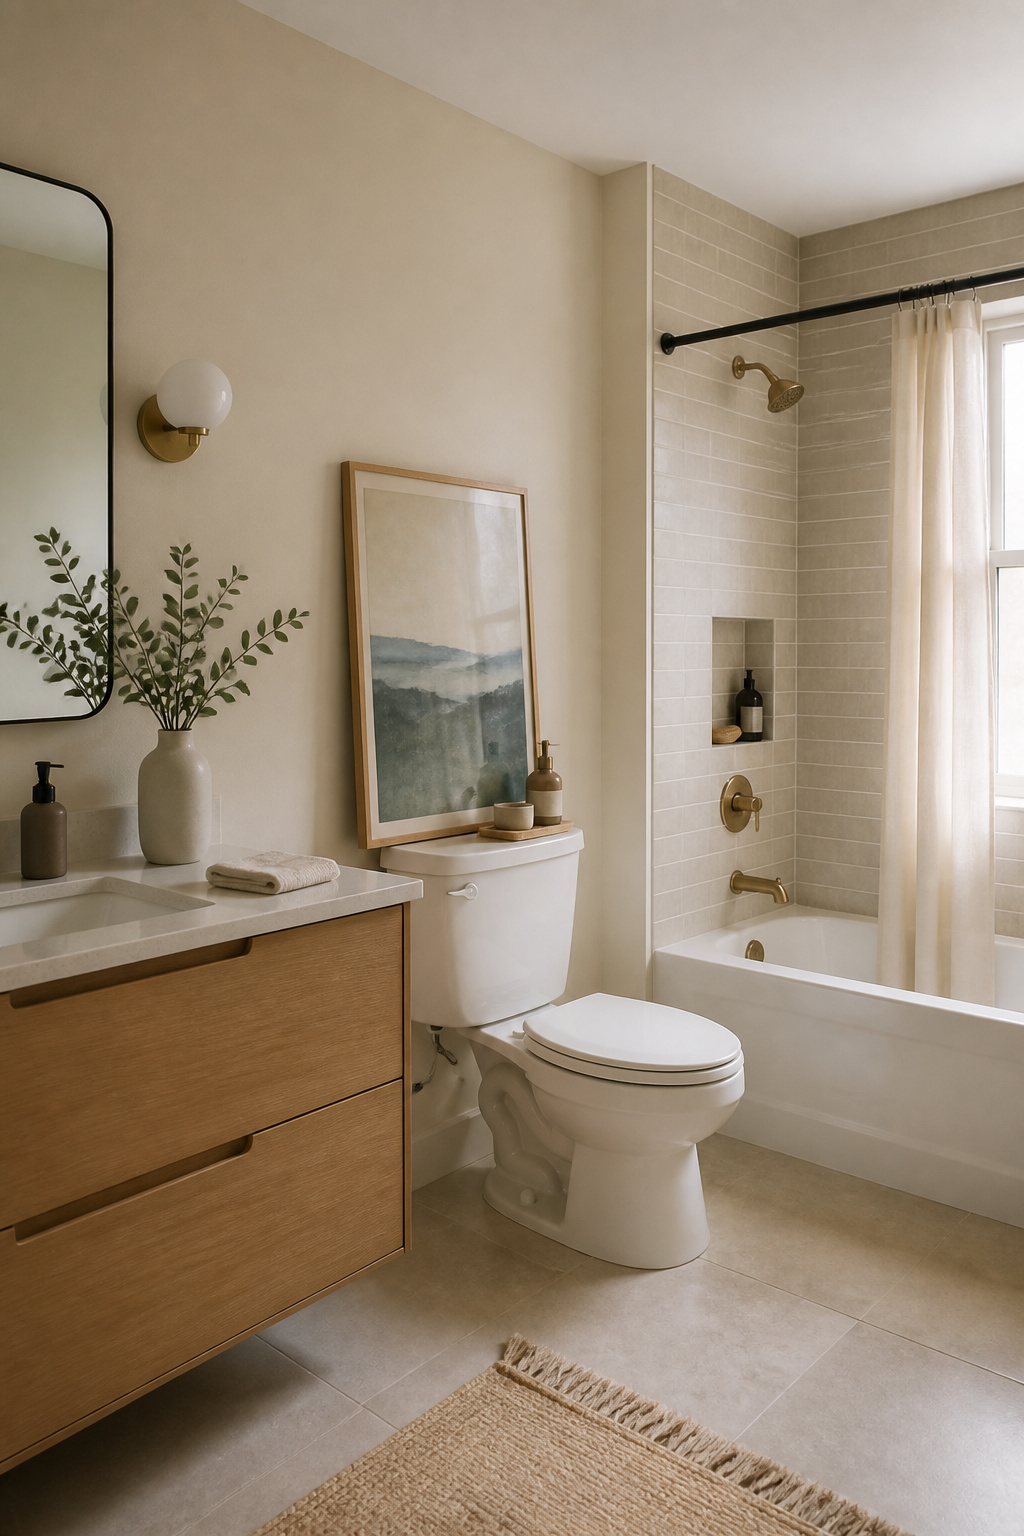
The wall above a toilet is the most wasted space in any small bathroom. A single art print fixes it with one move, and the frame matters more than the image.
I learned the humidity lesson the hard way. Glass fogs in a bathroom; acrylic survives. Standard glass traps condensation between the pane and the print, warping paper and growing mildew. Acrylic sheeting vents moisture, weighs less, and survives the temperature swings of a shower cycle. A thin natural oak frame around an acrylic face looks identical from three feet away and lasts past the first hot soak.
The $4 print that looks intentional is a digital download. You pick a five-size file, print it at a pharmacy kiosk, and slide it into a frame from a big-box store. No shipping wait, no nail holes if you use damage-free strips. The blush tones in my piece echo the wall color, which is why the corner feels styled instead of random.
Prop a piece of art above your toilet tank. Let it lean against the wall for a sleek, nails-free display.
The lean works for renters, but keep the center of the image between 57 and 60 inches from the floor. That is the standing eye-level rule for any space you view upright, and a toilet tank sits lower than you think. I eyeballed mine at first; the print read as floor clutter until I raised it four inches.
Over-the-Toilet Storage
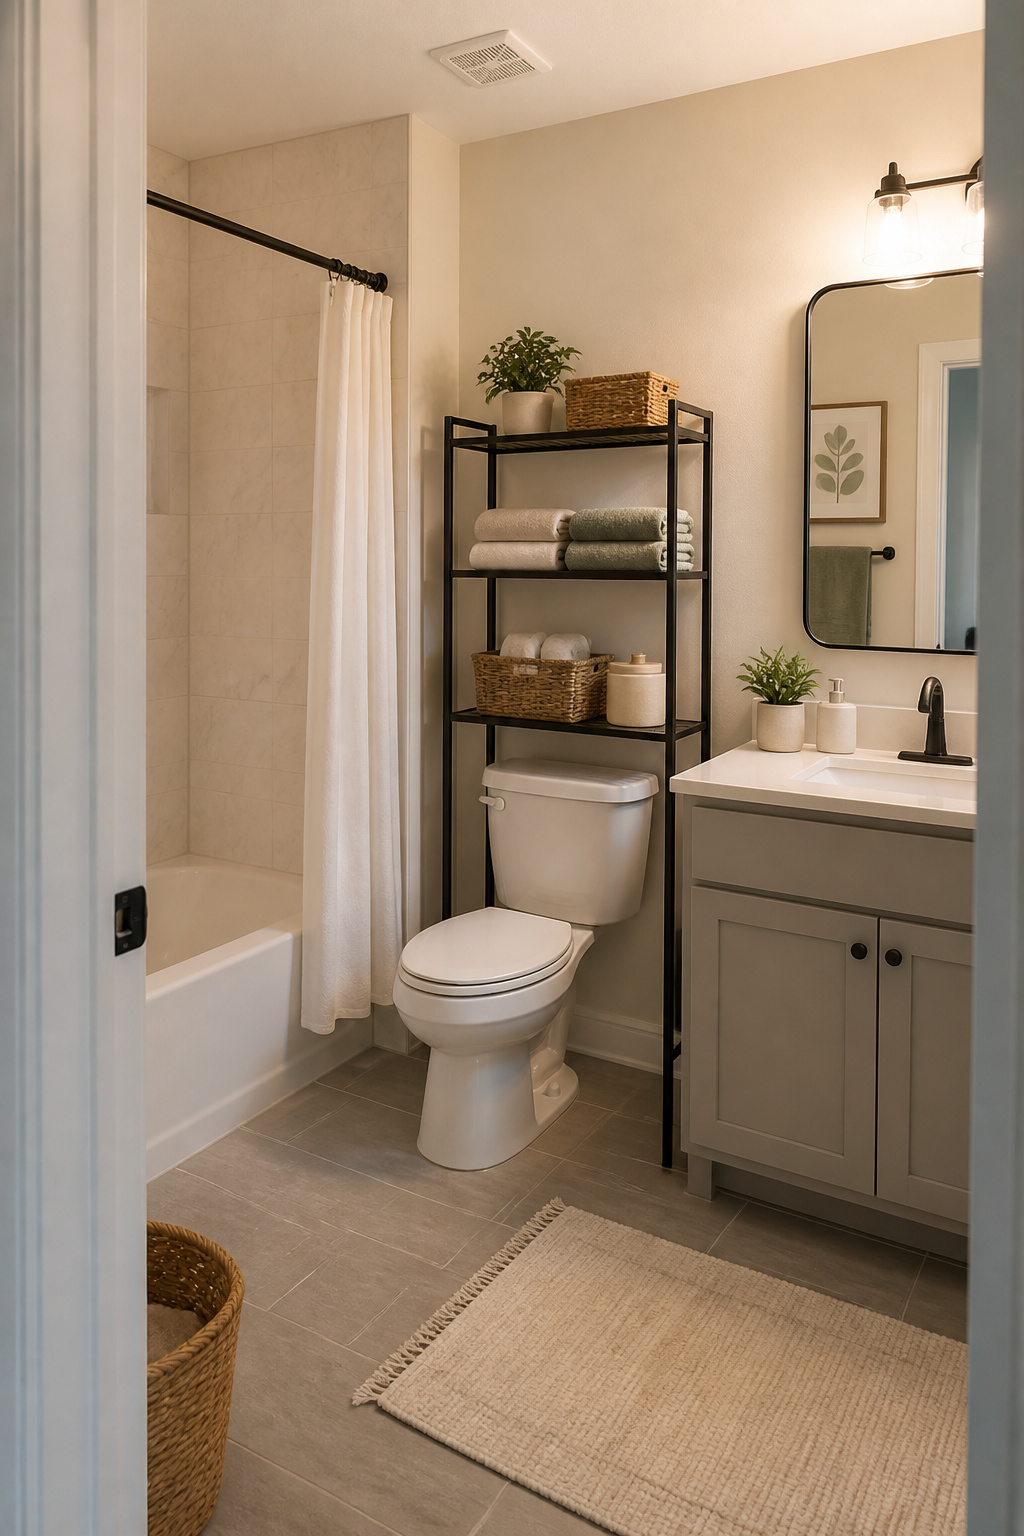
The metal rack I bought for this spot cost about thirty-five dollars and went together in ten minutes, no drill needed. It sits on two legs that straddle the tank and press against the wall with small rubber pads. The stability test that matters is rocking it forward hard with the seat down, because that is exactly what happens when you stand up at night and reach for the shelf behind you. If it skids even an inch, add felt pads or swap the unit; looks mean nothing when the whole thing tips into the bowl.
I had a cabinet-style unit in my cart first, the kind with a closed front that hides everything behind a little door. Then I measured the clearance above the flush valve on my particular toilet and realized the bottom shelf would sit half an inch below the top of the tank lid, blocking the valve chain if anything sagged. Most apartment toilets run that tight, which is why the open-frame metal version won for me. The legs give you vertical inches the cabinet base steals, and the open sides mean you do not have to account for handle placement on either end.
Textured Rugs and Mats
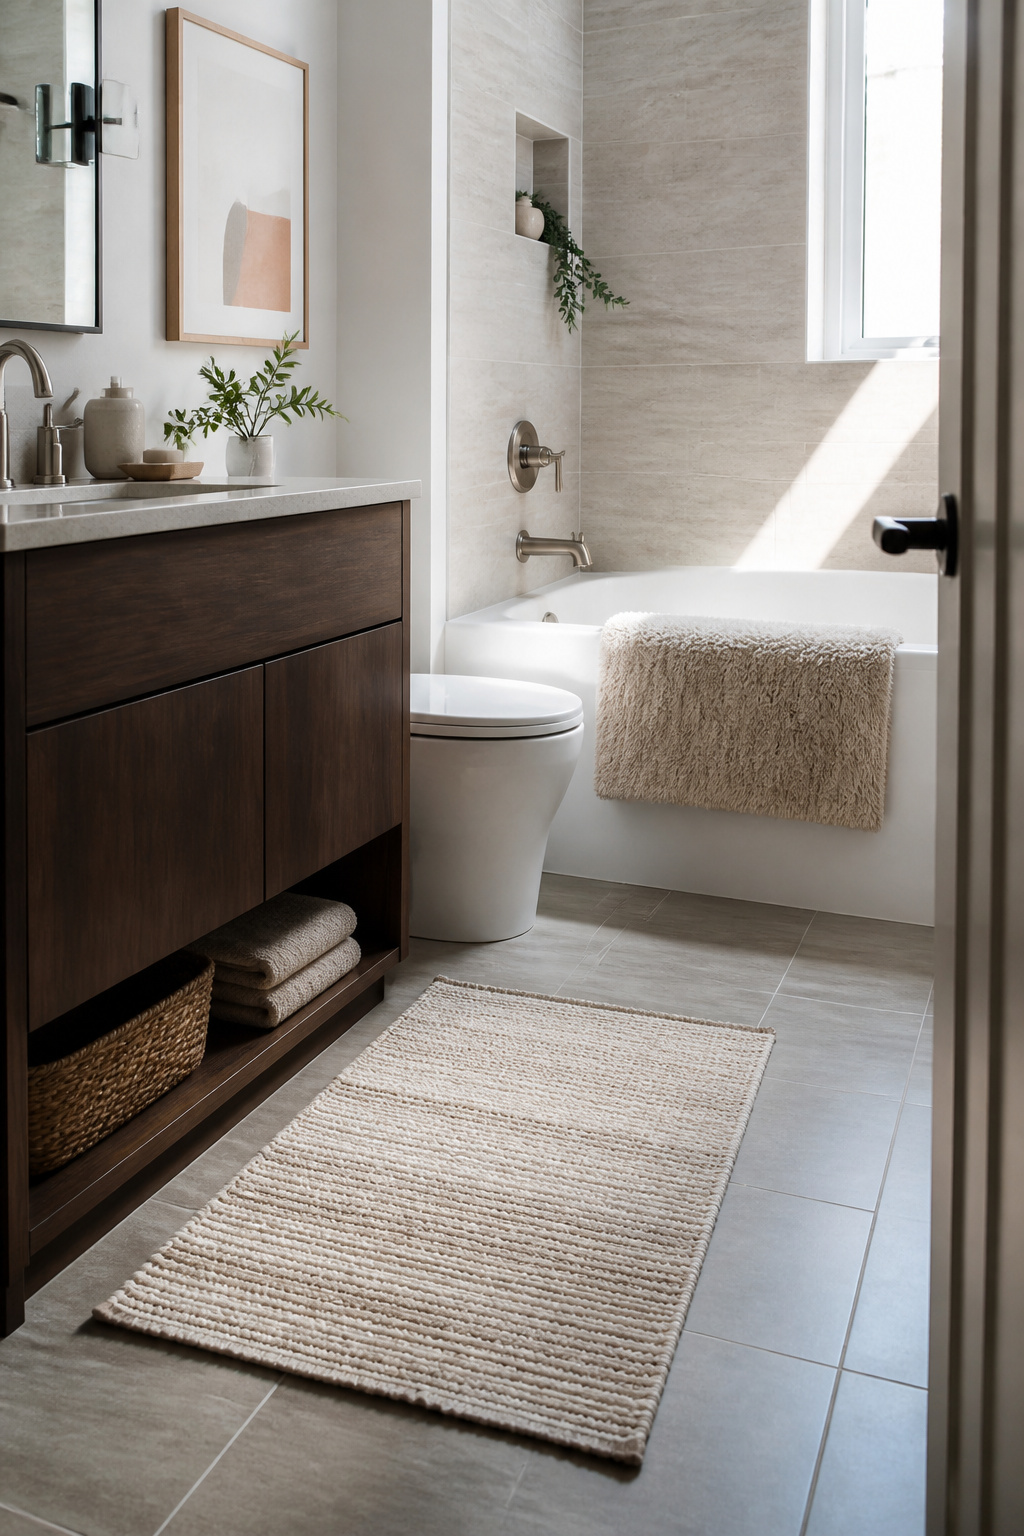
Woven bath mats do more for an apartment bathroom than most people expect. The texture breaks up flat tile visually, and the slight lift underfoot turns a cold floor into something tolerable on winter mornings.
I spent two years cycling through options before I landed on a system. Memory foam mats feel great for three months, then they stop rebounding and trap moisture against the finish. Cotton flat-weaves dry faster and last longer, but they slide. The compromise that actually worked was a two-mat layout: a thin woven cotton rectangle in front of the sink for daily traffic, and a smaller high-pile mat by the shower that gets hung over the tub edge to dry.
What I would not repeat was the rubber-backed rug phase. The backing kept the mat locked in place, which seemed smart until I lifted it six months later and found the vinyl had bonded to the rental’s original finish, leaving ghost marks that cost most of my security deposit. Grip pads that sit under a washable mat separate the functions: hold still, then replace when worn without damaging what you do not own.
Fixture Upgrades You Can Revert
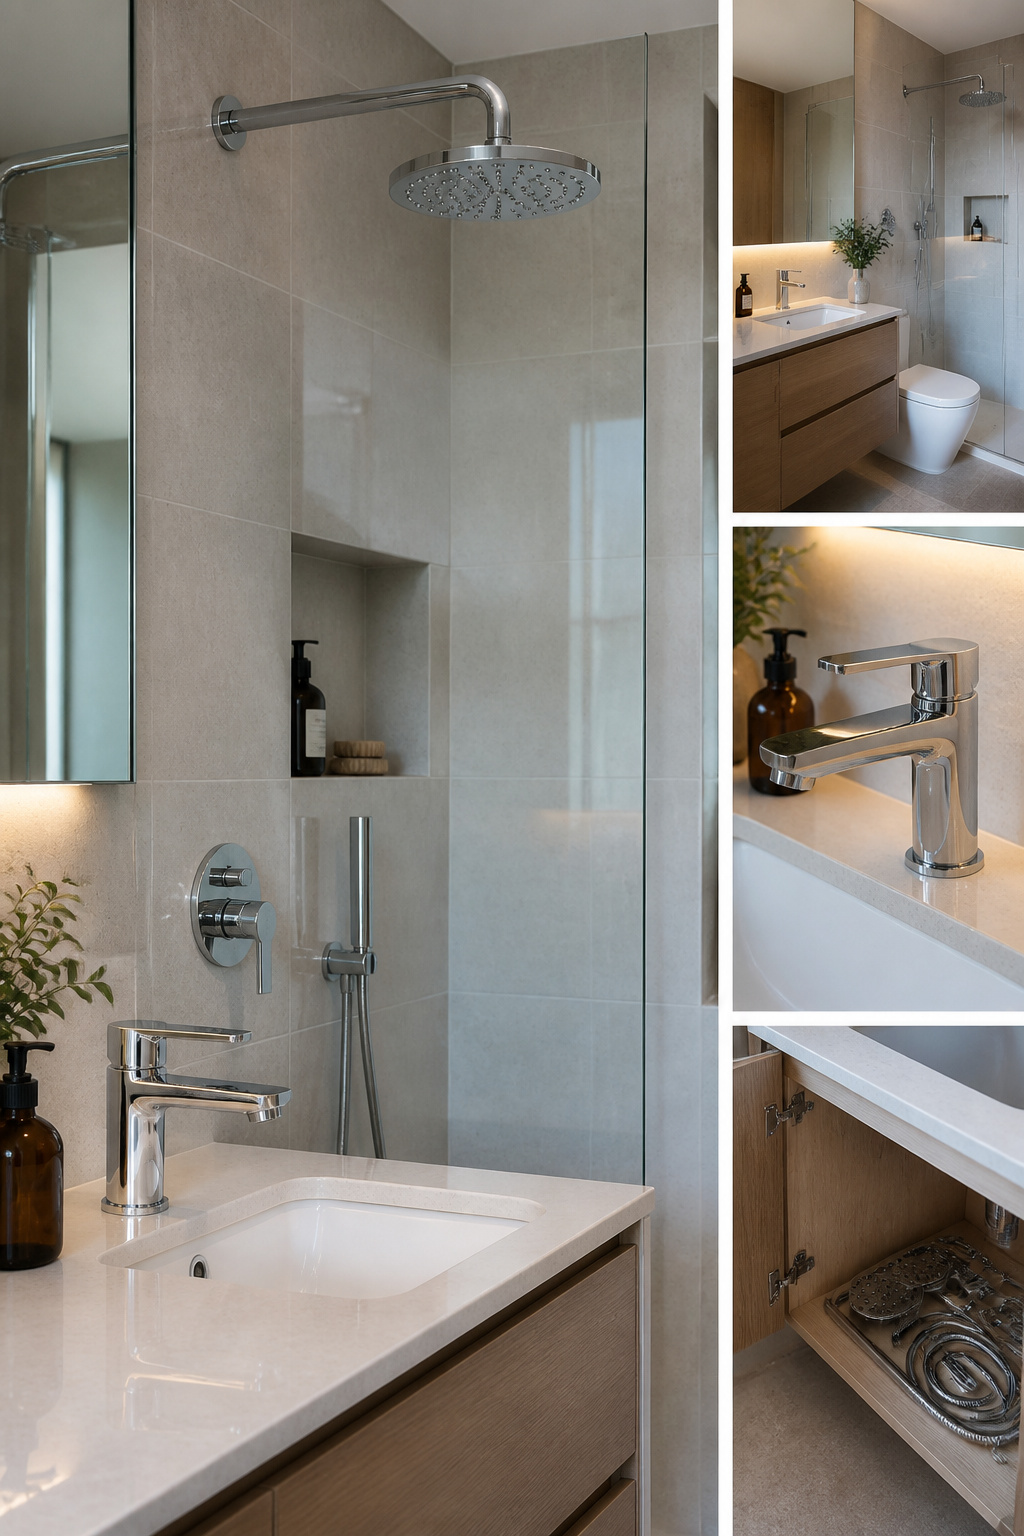
The showerhead in my last apartment started every morning with a weak, scattered spray that hit more wall than skin. Swapping it for a $15 rainfall head with multiple settings took four minutes, no tools beyond the grip that came in the box. The water pressure improved enough that I stopped dreading the rinse cycle.
Landlords vary on fixtures, so the safe move is storing the original parts where you will actually find them. I kept mine in a labeled shoebox on the top closet shelf, not the bathroom cabinet where humidity warps cardboard and I would eventually shove it aside for toiletries. The aerator on the sink faucet went the same route, replaced with a low-flow version that looked identical from above but cut the splash that used to soak my shirtfront.
Reinstalling the originals at move-out takes those same four minutes. Having them intact and locatable matters more than the upgrade itself, since replacement fees run higher than the cost of the whole project.
What Order to Tackle These In
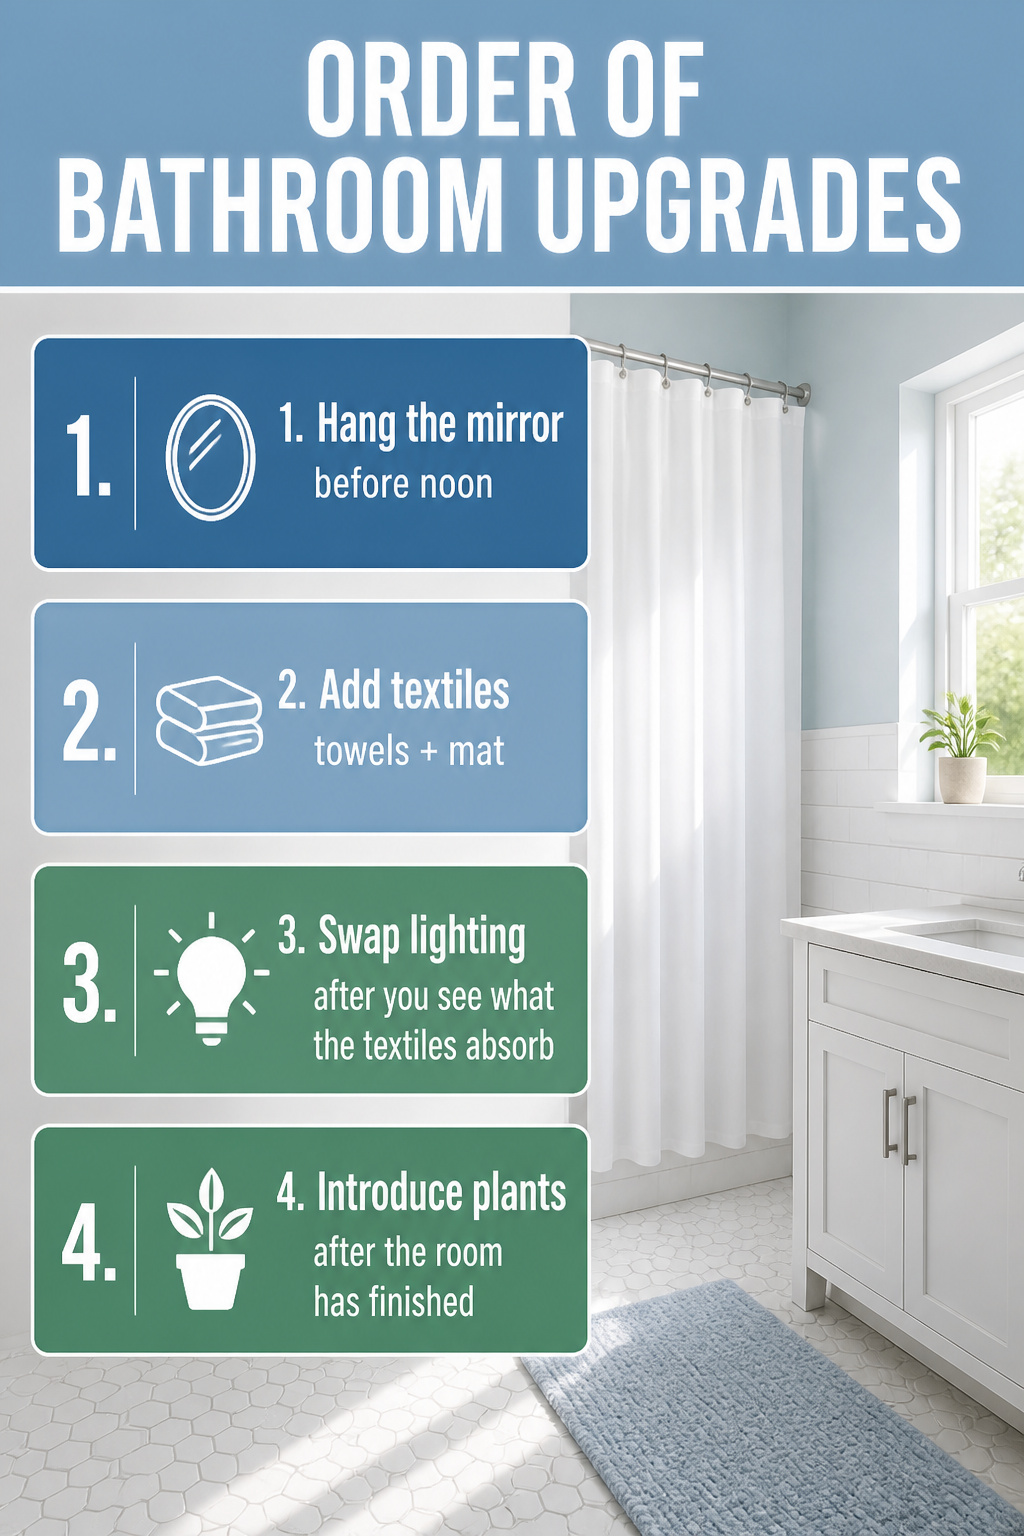
A weekend reno collapses fast if you start with the wrong thing. Paint the walls first and you’ll curse yourself when the new shower curtain pools against wet trim.
Start with the mirror and curtain. Those two alone usually eat up half the visual noise in a 5×8 foot bath, and neither needs tools a renter can’t use. Hang the mirror before noon so you catch how the light actually falls.
Textiles come next: towels, a mat that covers the spot where the tile cracked. By Saturday afternoon the room already reads differently, which matters more than it should. Motivation is a real supply.
Lighting last among the easy wins. Swap the bulb or the fixture after you see what the textiles absorb.
I once watered a pothos Sunday morning, before the wall paint behind the shelf had cured. The drip left a pale streak I now hide behind a soap dish. Let the room finish before you add anything living.
Frequently Asked Questions
What are some small apartment bathroom ideas?
Floating shelves with adhesive brackets, a light warm color palette with two colors max, decorative towels in rotation, a properly hung mirror, pothos plants, peel-and-stick wallpaper on the dry wall behind the toilet, a cotton duck shower curtain hung high, wire storage baskets, warm 2700K puck lights, acrylic-framed art prints, an open-frame over-the-toilet rack, woven cotton rugs, and reversible fixture upgrades like a $15 rainfall showerhead.
How can I make my small bathroom feel bigger?
Hang a large mirror with its bottom edge no higher than six inches above the sink so the wall appears to keep going. Paint walls warm white and ceilings crisp white, using only two colors total. Raise the shower curtain rod near the ceiling and use floor-length fabric so the eye reads full vertical height. Keep the palette minimal; a bold accent wall will visually cut the room in half.
What are the best plants for a bathroom?
Pothos tolerates low light and prefers humidity, making it ideal for windowless apartment bathrooms. Ferns need more light than ambient hallway glow provides and usually fail. Start with a cheap pothos from any nursery, water it in the sink and let it drain fully before returning it to its saucer, and upgrade only after you learn what survives your actual conditions.
How can I decorate my bathroom on a budget?
Peel-and-stick wallpaper runs about $23 per roll and covers the toilet wall in under an hour. Digital art downloads cost $4, print at a pharmacy kiosk, and slide into a store-bought acrylic frame hung with damage-free strips. Turkish cotton display towels run $12 and rotate with daily-use sets. A $40 salvage mirror and an $18 cotton duck curtain read as far more expensive than they are.