You’ll start by gathering 2×4 lumber and assembling a sturdy box frame with exterior glue and screws.
Next, enclose it with plywood and frame the top, leaving a central hole for your fire tray.
Then, rip cedar slats with 45-degree miters and attach them around the exterior for a polished look.
Install a propane tank door with magnets and add casters for mobility.
Finally, apply protective finish, fill your burner pan with lava rocks, and test all connections.
This construction method produces a functional fire table that will last for years.
Prepare Your Materials and Build the Frame
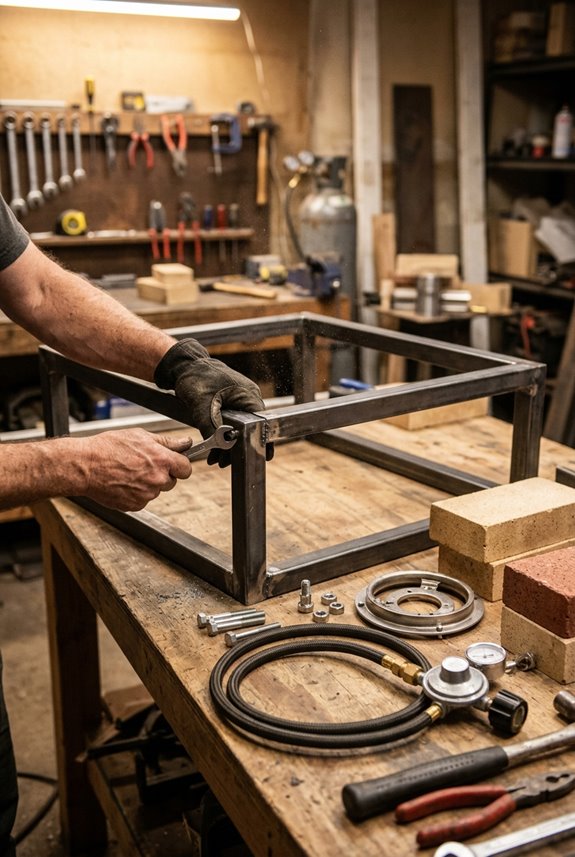
Gather Your 2×4 Materials
You’ll need 2×4 lumber cut to size. A dry-fit layout shows how everything fits together before permanent assembly.
Construct Your Wooden Frame
Arrange your 2x4s into a large box shape. This creates your frame construction base. Use exterior glue and screws at all joints for durability.
Strengthen Your Frame
Apply the top overlap method by letting outer boards cover bottom joints. This increases structural strength significantly.
Plan Tank Orientation
Position your propane tank horizontally inside the frame. This reduces your fire pit’s overall height and improves appearance.
Your weather-resistant frame is now complete and ready for the exterior plywood box and finishing touches.

12 pcs Accessory Set: Our fire pit pan burner kit comes with a 4ft extended connection hose and a 4.4ft propane regulator hose, igniter, and valve, all certified by CSA for safety. No need for additional purchases, this comprehensive set is ready to use right out of the box.

Premium Materials: The drop in burner for outdoor fire pit constructed of #304 stainless steel allows it to withstand extremely cold and hot weather and is not easy to be damaged, modern and stylish, providing maximum rust resistance, heat resistance and long life

Round Fire Pit Ring Burner Dimensions - 13 Inch diameter round fire pan and 9 inch burner ring, rated for up to 88000 BTU’S . The firepit design to round burner male 1/2 Inch gas inlet and the fire pit ring prior to be installed by the factory and all plumbing is hidden below the tray for professional finish.
Enclose the Box Body and Frame the Top
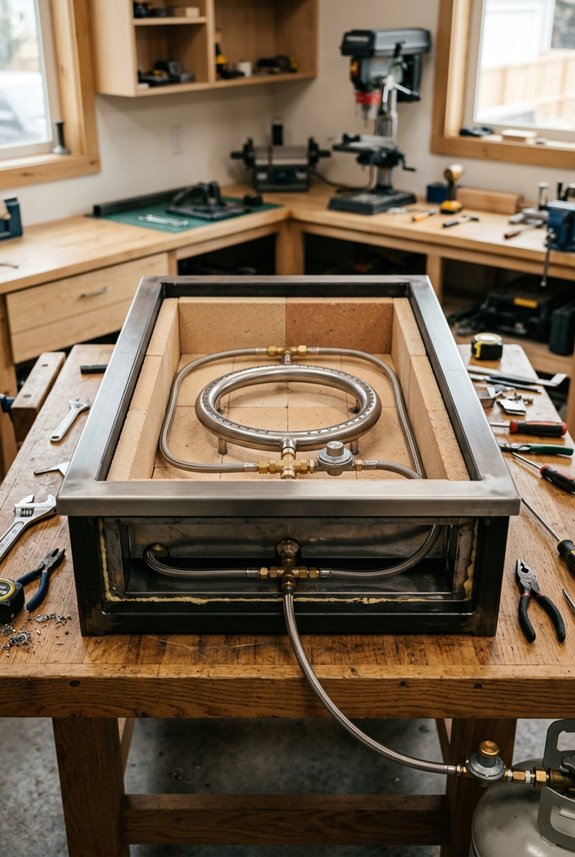
How’s your frame looking. Now we’ll enclose it. Start with a dry-fit of your exterior plywood around the frame to confirm everything aligns properly. Once you’re satisfied with the layout, glue and screw the joints together using trim head screws.
Next, attach your top frame to the bottom framing with trim head screws while clamps hold pieces steady. The outer top boards should overlap the bottom joints for extra strength and rigidity. The top frame must support the top panel and fire tray weight.
Cut your top exterior plywood and paint the top side. Leave a central hole for your propane fire tray insertion. Your box body is now structurally sound and ready for the next step.

Split Door Design for Easy Access : Unique split-door construction allows flexible opening without disturbing other cylinders. Ideal propane tank storage cage for tight spaces, frequent access, and organized cylinder management

🪟【Specifications】Overall Size: 17"W x 23"H x 16"D, Cut-out Size: 15"W x 21"H, accommodates a 20 Pound Propane Tank or a 7 Gallon Wastebasket.

Overall Dimensions: 30"W x 23" H x 23" D, Cut out: 28-1/2" W x 20-1/2"H.
Create and Apply Cedar Slats for the Exterior
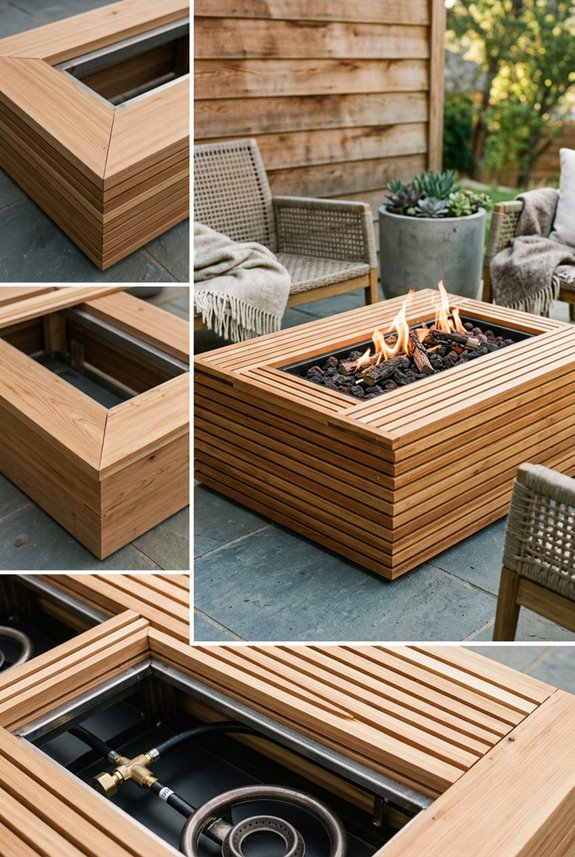
What’s the secret to a polished fire pit exterior? Western red cedar slats with perfectly mitered edges.
Rip each 1×4 board into two slats for your fire pit exterior. Cut 45-degree miters on each piece to create that stunning waterfall look. This angled cut ensures tight vertical alignment from bottom to top.
Attachment Steps:
- Apply exterior wood glue to the exterior box
- Use trim head screws with predrilling to prevent plywood splitting
- Space slats evenly using a scrap spacer for consistent spacing gaps
- Work around the entire body systematically
Plan your inner cut and central hole opening now for the fire tray. This ensures your cedar slats meet the top framing securely. Careful slat attachment prevents costly mistakes and structural issues later.

Natural Volcanic Material: Authentic red lava rocks with vibrant hues, formed by volcanic activity. Contains no additives or artificial colorants. Reusable and durable for long-term enjoyment. Ideal for creating rich color accents in fireplaces and fire pits

Size: Lightweight natural volcanic rocks ranging in size from 1"-2" with porous surface. (Stones are naturally occurring and may vary in size)

[Straight From Nature] These aren't made in a factory, they're real volcanic rocks. Deep black and vibrant red, straight from the earth. No dyes, no weird additives. Just natural stone that you can reuse year after year
Build the Propane Tank Door and Add Casters
Now that your cedar exterior looks beautiful, it’s time to hide what’s underneath. You’ll create a propane tank door using vertical paneling with straight boards secured with DAP Dyna Grip adhesive before brad-nailing everything together.
The Removable Panel System
Install magnets to hold your removable magnet panel in place. Align corner hardware so screws match up with magnet positions for a clean, functional design.
Design for Access and Mobility
Build an overhang that extends past your fire pit’s body. This creates space for casters while keeping your door mechanism unobstructed. Install casters after slats are in place, allowing your entire structure to roll smoothly. Your fire pit becomes mobile, making it easy to move around your yard.

[Beautiful & Humanized] The fire pit table comes with 1 grill which disassemble freely. You can barbecue, keep food warm or put the pan to cook on them. The side of the wood-burning fire pit is created with a modern geometric cut-out design that catches firelight for creating fun shadows. The drilled design and log grate promotes airflow and keeps the fire strong.

[Beautiful & Humanized] The fire pit table comes with 1 grill which disassemble freely. You can barbecue, keep food warm or put the pan to cook on them. The side of the wood-burning fire pit is created with a modern geometric cut-out design that catches firelight for creating fun shadows. The drilled design and log grate promotes airflow and keeps the fire strong.

[2-IN-1&Easy to Assemble] OutVue gas firepit is equipped with a metal lid.When propane fire pit is burning, the fire table has enough rim for food and drinks, you can have a table while enjoying warm. When it not burn and cover the lid, firepit will become a 47 inch outdoor dining & coffee table. OutVue fire pit creates more table space for you to enjoy a meal or party in warm. It's easy to assemble fire pits with clear manual and accessories bag.
Apply Finish and Set Up Your Fire Table
Your fire pit’s nearly complete. You’re ready for the final touches.
Finishing Your Fire Table
- Apply Total Boat Gleam 2.0 to your cedar slats using an HVLP spray for UV-resistant coverage that protects against weathering and fading.
- Fill your burner pan with lava rocks or fire glass, staying no more than 1 inch above the burner for proper flame distribution and safety.
- Secure your final layer of stones and top layer, leaving clear space for your ignition panel and gas connections.
Before You Light It Up
Test all propane and gas connections thoroughly. Keep a fire extinguisher nearby during use. These final steps ensure your fire table runs safely and reliably for years of use with friends and family.

Maine Ornamental High Pyramid Western Red Cedar Post Cap

✅ #1 ROYALS GRADE – PREMIUM APPEARANCE QUALITY Royals grade shingles offer a high‑quality appearance with fewer imperfections, making them ideal for visible exterior siding and architectural projects.

Made with Western Red Cedar