
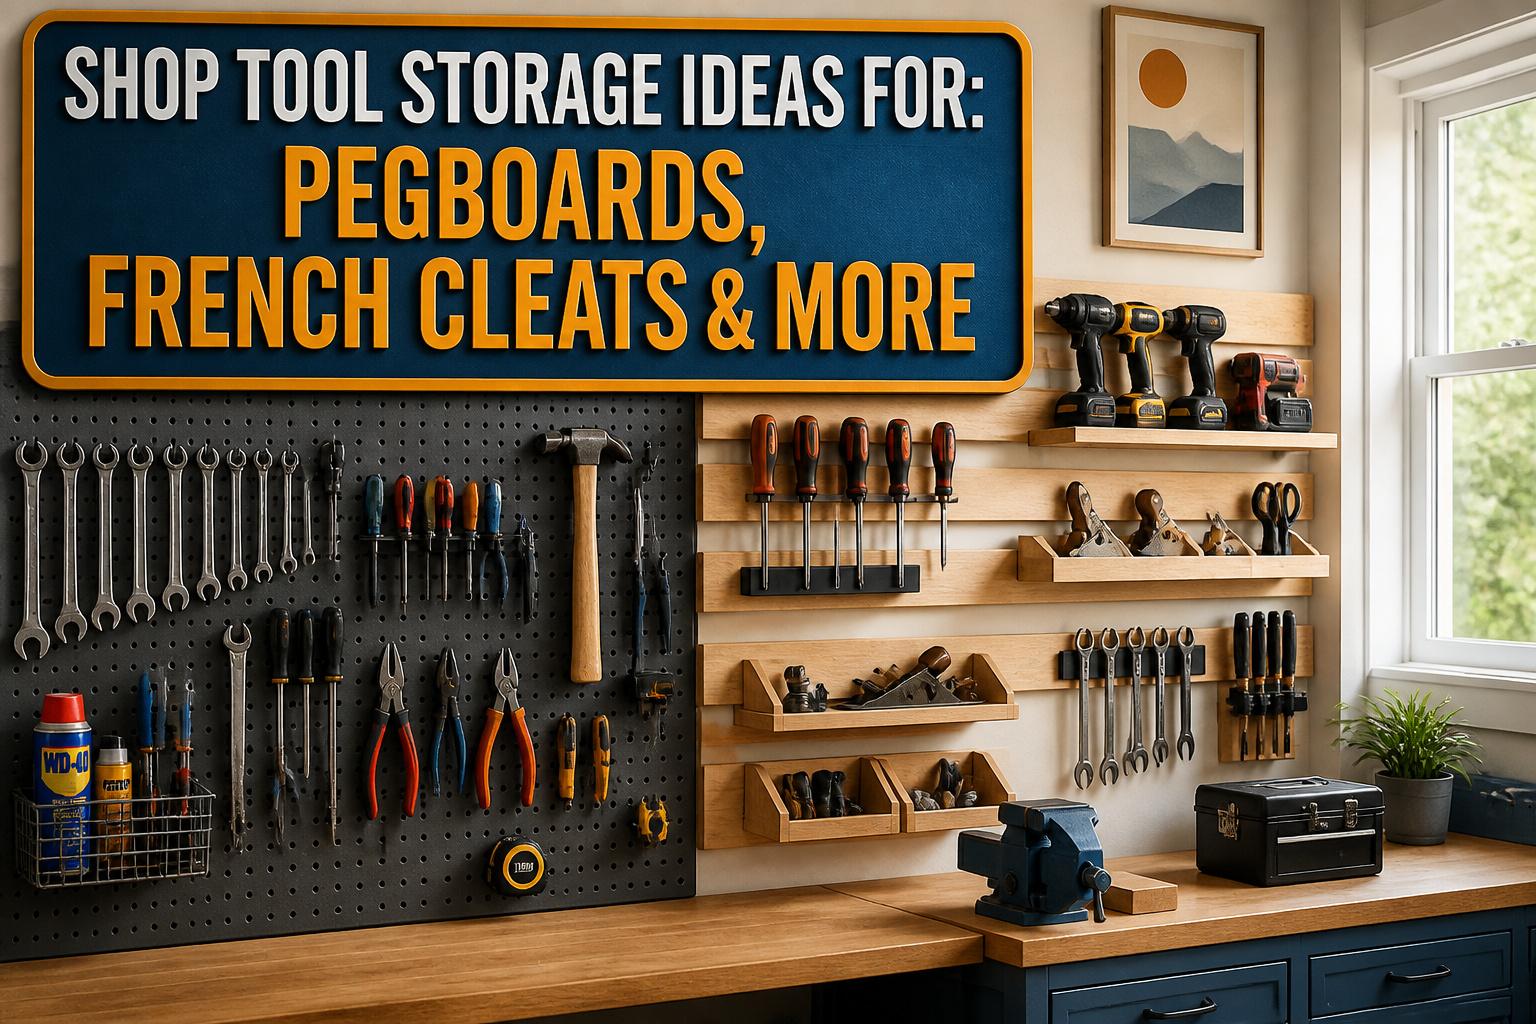
The right shop tool storage idea depends on whether you are optimizing for wall space, floor space, or the space above your head. A pegboard sheet turns dead wall into a full tool display for under $50, but the 1/4-inch fiberboard holes swell loose in humid garages unless you step up to metal. That moisture threat runs through every system in this list, from magnetic strips to 600-pound overhead racks, and the shops that last are the ones that plan for it before the rust starts.
1. Pegboards
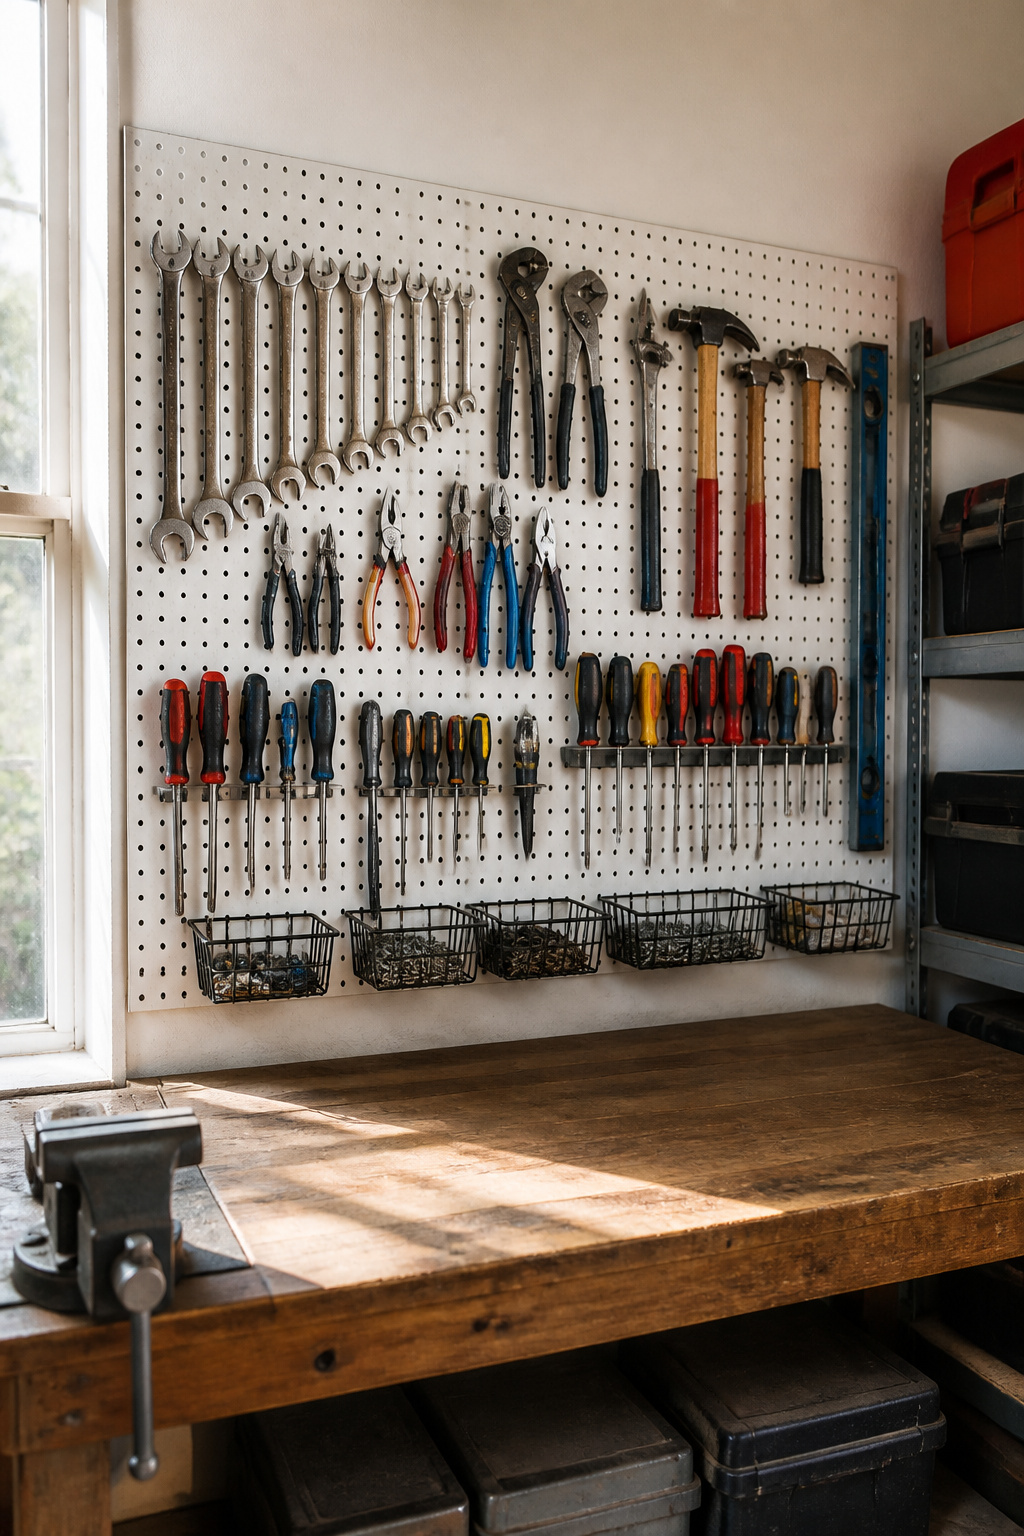
Pegboard is the most frequently cited shop tool storage idea across the sources, and for good reason. A 4-by-8-foot sheet above the workbench turns dead wall into a full tool display you can read at a glance. Hooks, shelves, and baskets let you move from trowels to saw blades without committing to one layout.
Leave 6 inches between the board edge and your first hole to keep heavier tools from tipping the panel. For most hand tools, 4 inches between hooks keeps handles from knocking without wasting space. The standard 1/4-inch hole fits the common hook, though metal pegboard outlasts fiberboard in humid garages where moisture swells the holes loose. Spacers behind the board are non-negotiable; without that gap, the hardware cannot seat.
2. Magnetic Strips
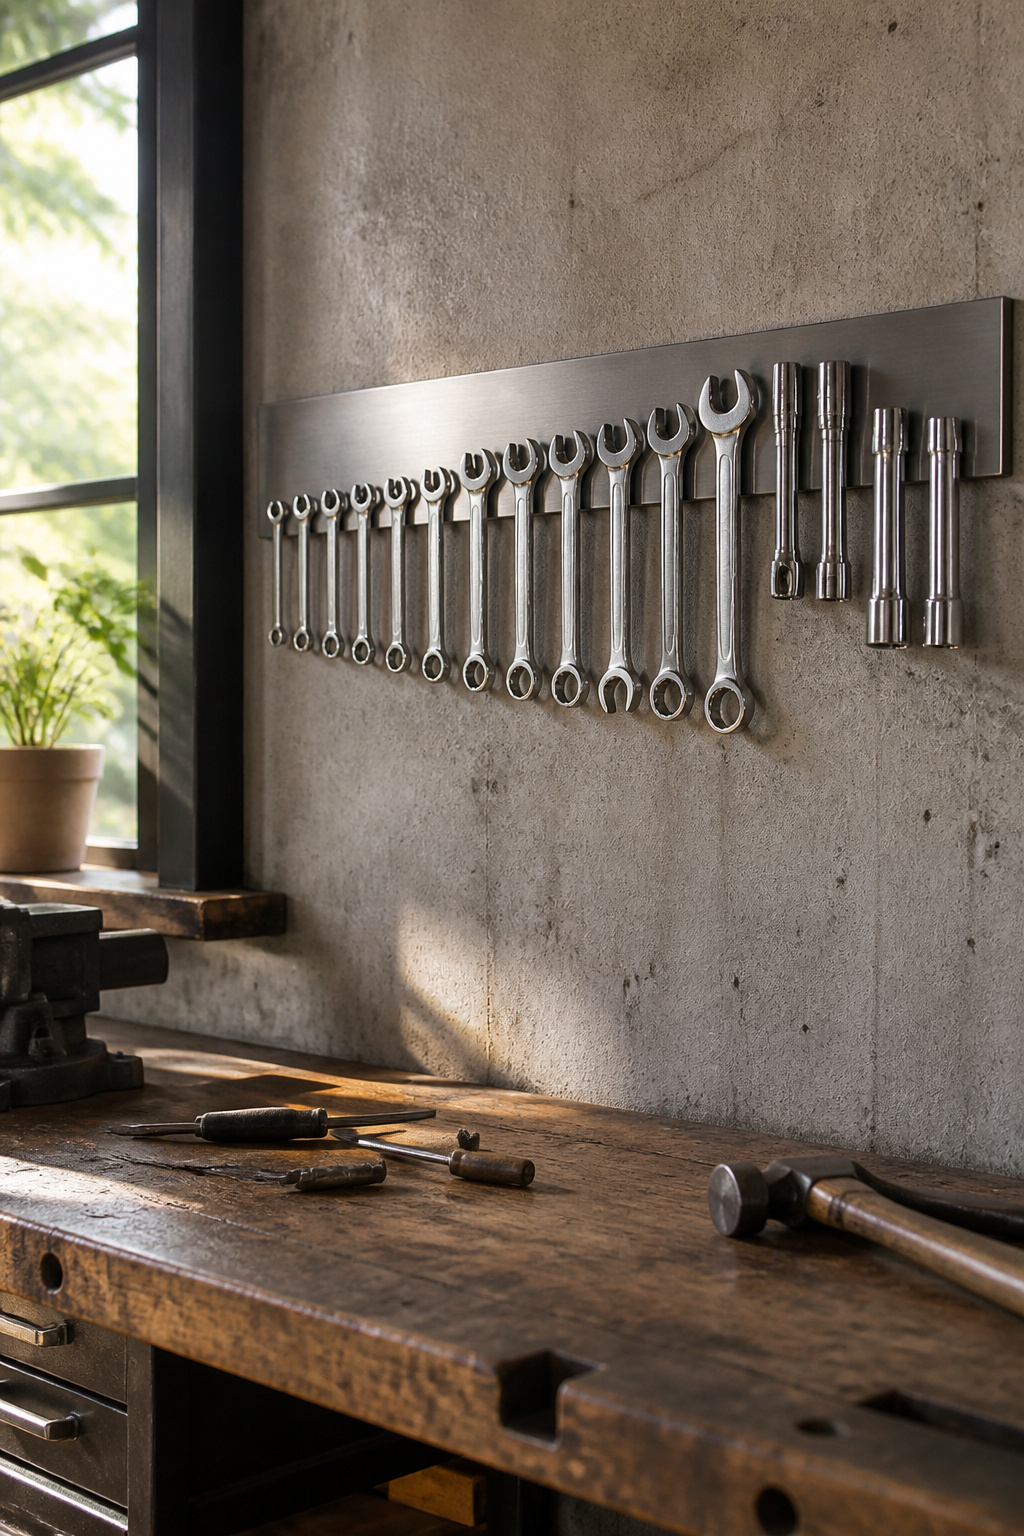
A magnetic strip turns any nearby wall into a grab-and-go rack for wrenches, ratchets, or sockets you reach for constantly. The Ernst Wrench Organizer, priced at $16.10, holds up to 20 wrenches from ¼ inch to 1 ½ inches and includes labels so you can spot a missing size at a glance. Keep magnetic storage away from electronic tools and precision instruments, since magnetic fields can damage sensitive components. For smaller metal bits, kitchen knife magnets or magnetic tins with clear lids work without the bulk of a full organizer. Harbor Freight sells basic strips around $5 if you want to test the idea before committing to a whole wall. The real payoff is cutting the walk to your tool chest: mount one where you actually work, load it with duplicates of your most-used items, and the minutes you save add up fast.
3. Tool Chests and Cabinets
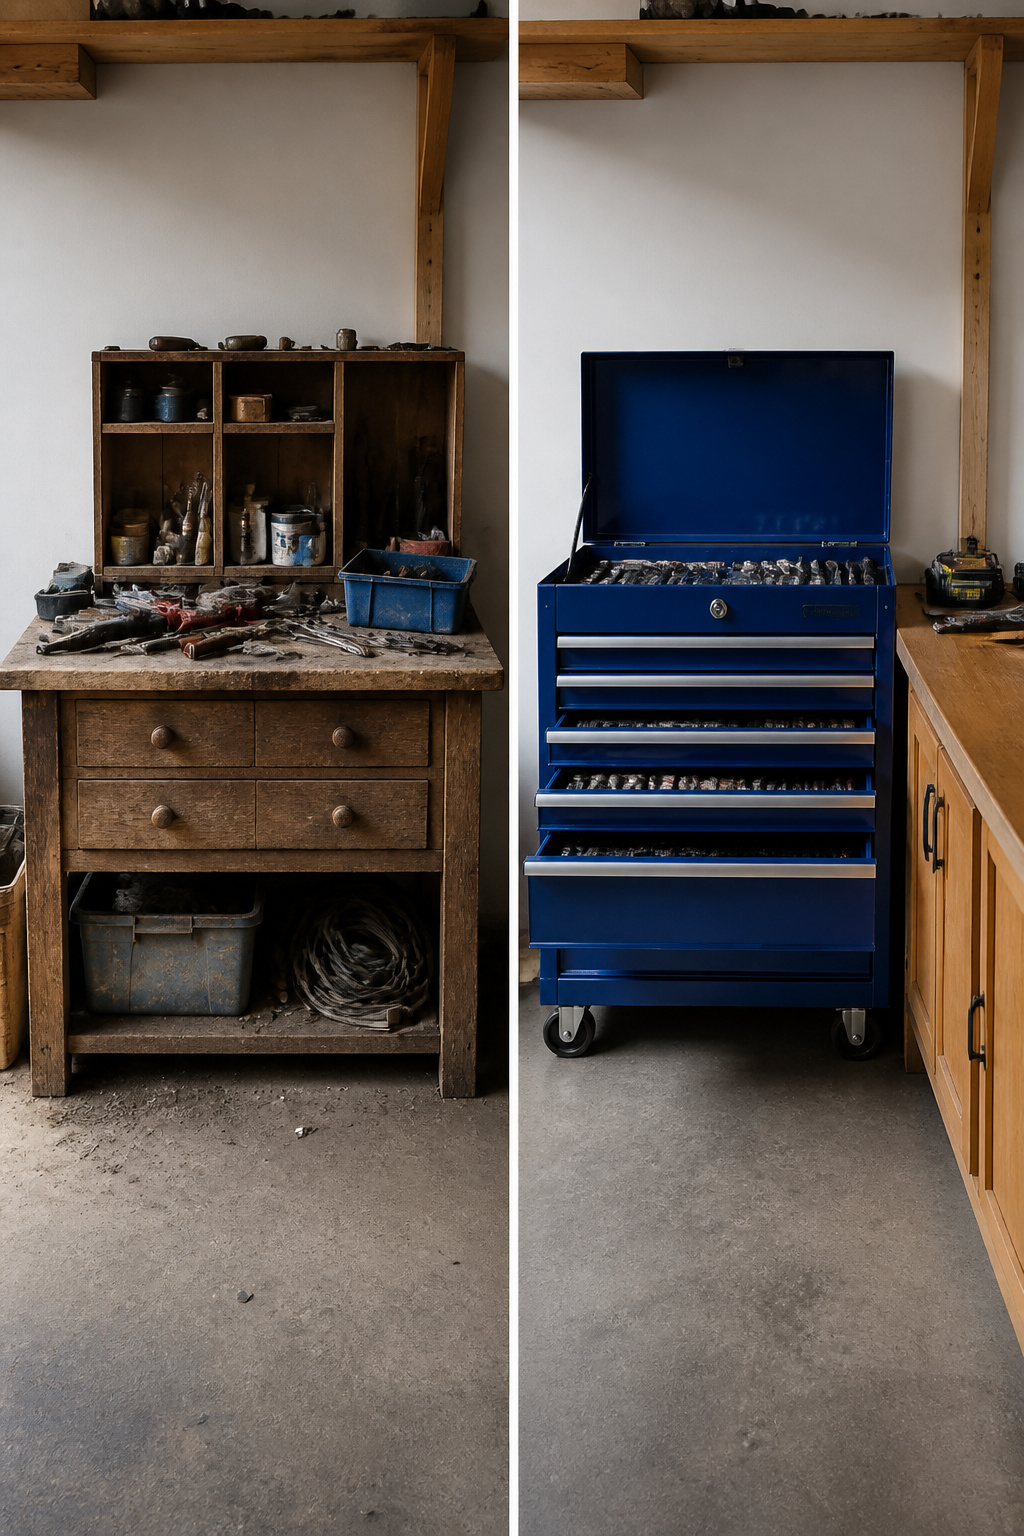
Enclosed storage is where the money goes when you want tools to last. Dust, moisture, and the occasional dropped wrench do more damage than most people realize, and a cabinet or chest stops all three.
The Trusco 2-Level Toolbox at $75.99 is the one that usually wins in head-to-head reviews. All-metal construction with a blue enamel finish, and the handles stay comfortable even loaded. For a step down in price, the Craftsman Tool Chest at $65.98 gives you three shallow drawers plus a hinged top compartment; the drawers hold 25 pounds fully extended, and the padlock hasp is a real hasp, not an afterthought.
For something lighter, the Bosch L-Boxx system stacks and latches without fighting you. The plastic is plenty durable for home use, and the top handle keeps small parts from reorganizing themselves every time you carry it. The Milwaukee Packout line is more modular and tougher, but you pay for that twice over compared to similar systems, and the weight adds up fast if you are moving tools around a house rather than rolling them onto a job site.
4. French Cleats
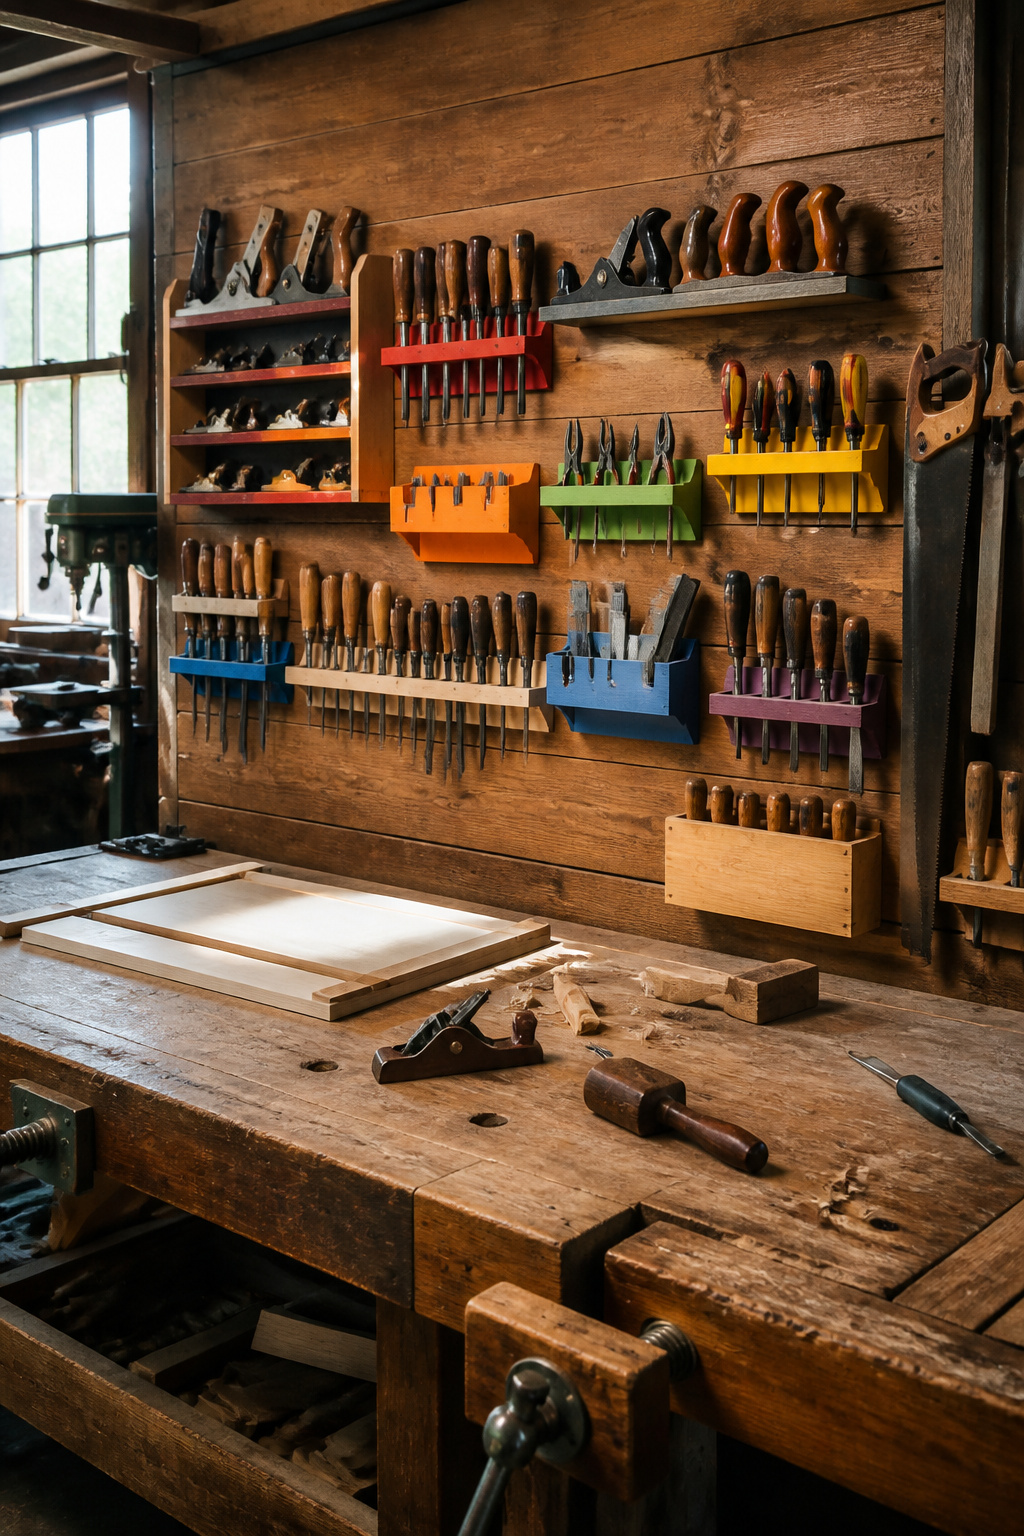
A French cleat system starts with one long strip screwed level to the wall, its top edge cut at a 30-degree angle. Every tool holder gets a matching cleat on its back. The two wedges lock together by gravity alone, so a drill holder or shelf slides in and stays put until you lift it off. Rearranging takes seconds, which matters when your collection outgrows the layout twice a year.
Hardwood like maple grips the wall cleat better than pine under real weight. Pine compresses; the angle loosens, and a heavy miter saw cradle eventually creeps downward. Maple costs more upfront, but the same holders survive three garage reorganizations instead of one.
The flexibility cuts both ways. A French cleat wall looks busy, every holder a different depth and color, and the gap behind each piece collects sawdust fast. If you want showroom clean, this is not the system. If you want to move your router table from the left wall to the right on a Saturday afternoon, nothing else comes close.
5. Rails
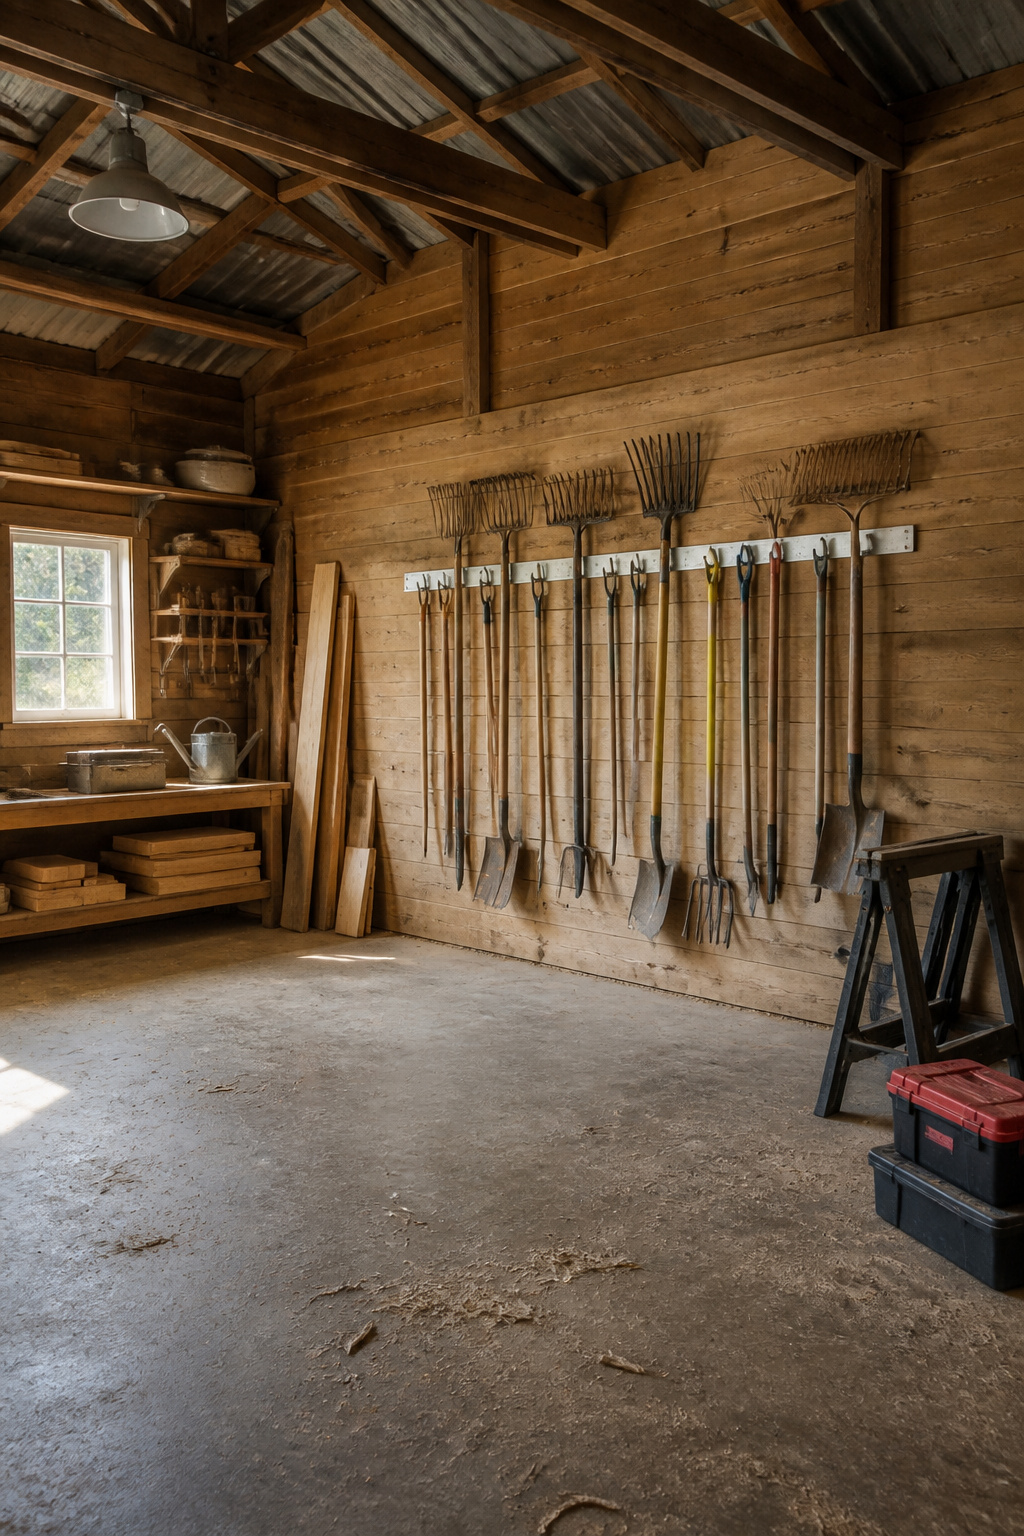
Wall-mounted rails strip tool storage down to a single horizontal bar, and that simplicity is exactly why they win in tight vertical spaces. Where a pegboard eats up wall depth and visual clutter, a rail hangs flush and lets long-handled tools sit in a single row without overlapping. S-hooks or custom hangers slide along the bar, so the same 48-inch length that holds four shovels today can be re-spaced for clamps tomorrow.
I have seen these ganged end-to-end across a full garage wall, but the smarter move in a small shop is stacking two rails at different heights: one for rakes and brooms, another lower for hand tools. The Imillet system that mounts directly to studs uses spring closures rated to 6.5 pounds per tool, which covers most long-handled yard gear without the bulk of a full rack. At $16.98 per unit, running two or three still lands under fifty dollars.
Rails keep tools visible and off the floor, though they do demand more forethought than a pegboard’s infinite holes. You are choosing what deserves that front-row spot, and everything else goes elsewhere.
6. Rolling Carts
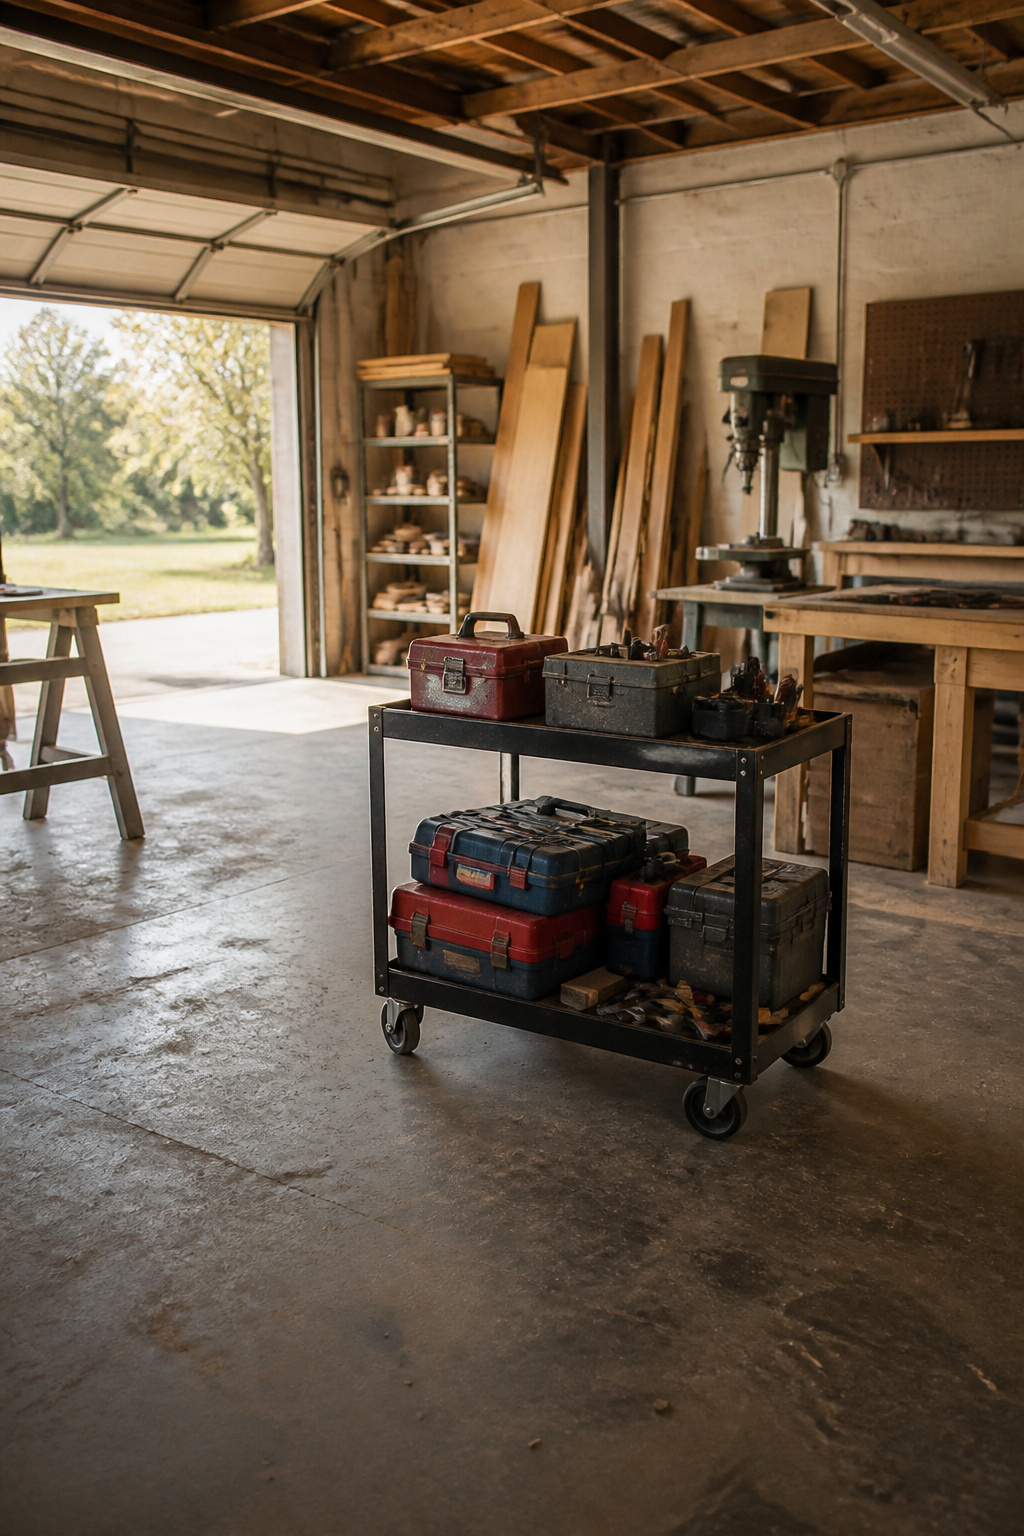
A rolling cart sorts tools by type and rolls to wherever the work happens, which beats walking back to a wall every time you need a different driver bit. Locking casters and a lower shelf for weight keep the thing from becoming a tipping hazard once it is loaded; the stability matters more than the extra square feet it eats on the floor. The tradeoff is real: mobility costs floor space, and a top-heavy cart is worse than no cart at all. For a weekend budget, a simple metal frame with two shelves and four locking wheels usually runs under what a single specialty cabinet asks, and it adapts faster than fixed storage when the project moves from the garage to the driveway.
7. Small Part Holders
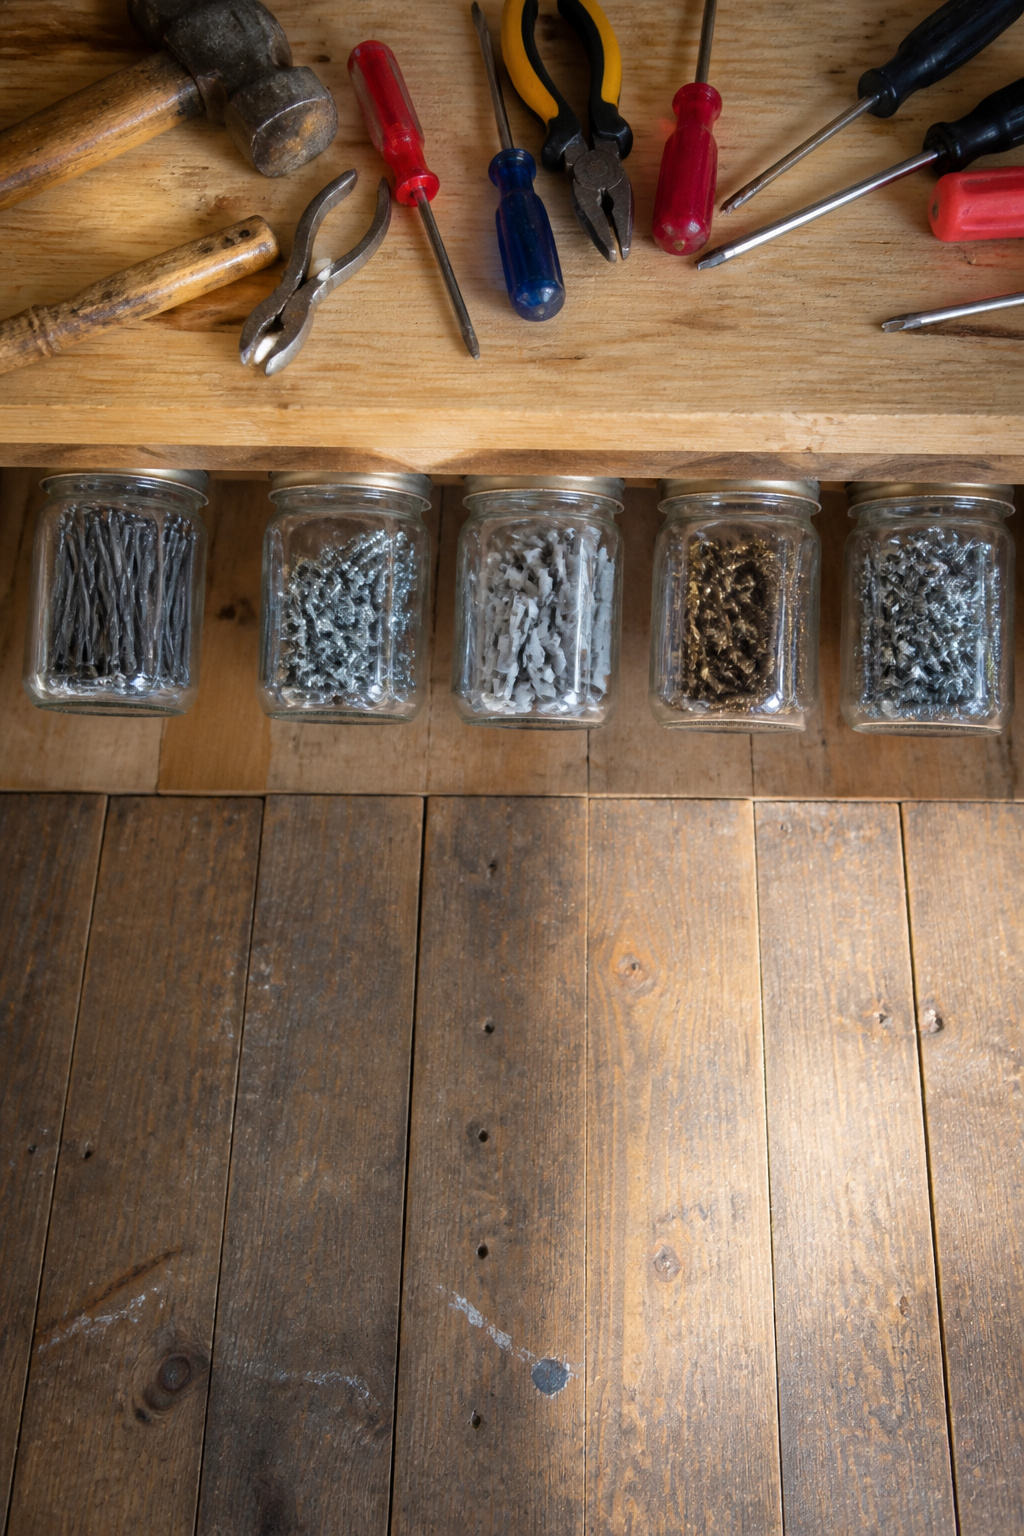
The small parts that come with any tool, the driver bits, the hex keys, the bags of fasteners, those are what stop a Saturday project cold. Grouping by type beats grouping by project every time, because a wall anchor needed for blinds looks identical to the one needed for a shelf, and searching a project bag means emptying three of them onto the bench.
Screwable jars are the cheapest way to claim dead space. A 16-ounce peanut butter jar with a standard mouth fits the common jar-lid screws available at any hardware store. Fix the lids to the underside of a shelf, screw the jar up into it, and nails or screws hang there without swallowing drawer space. Clear glass or plastic lets you see contents at a glance, which matters when you own six species of wall anchor and they all look like white plastic in a white jar.
Flexible plastic bit holders handle longer screwdriver bits and the non-hex ones that slip through other organizers. A multi-bit organizer corrals the shorter driver bits. For tool parts and pieces, a Plano-style box works, or small plastic bins inside cabinet drawers if you prefer to keep the bench surface clear. Stackable bins or wall-mounted bins are the alternative when drawers fill up.
The older method, dropping fasteners into old coffee cans or sandwich bags, fails because mixed hardware is nearly as bad as lost hardware. Sort by type, store by type, and the right piece finds your hand in under a minute.
8. Office Storage Solutions
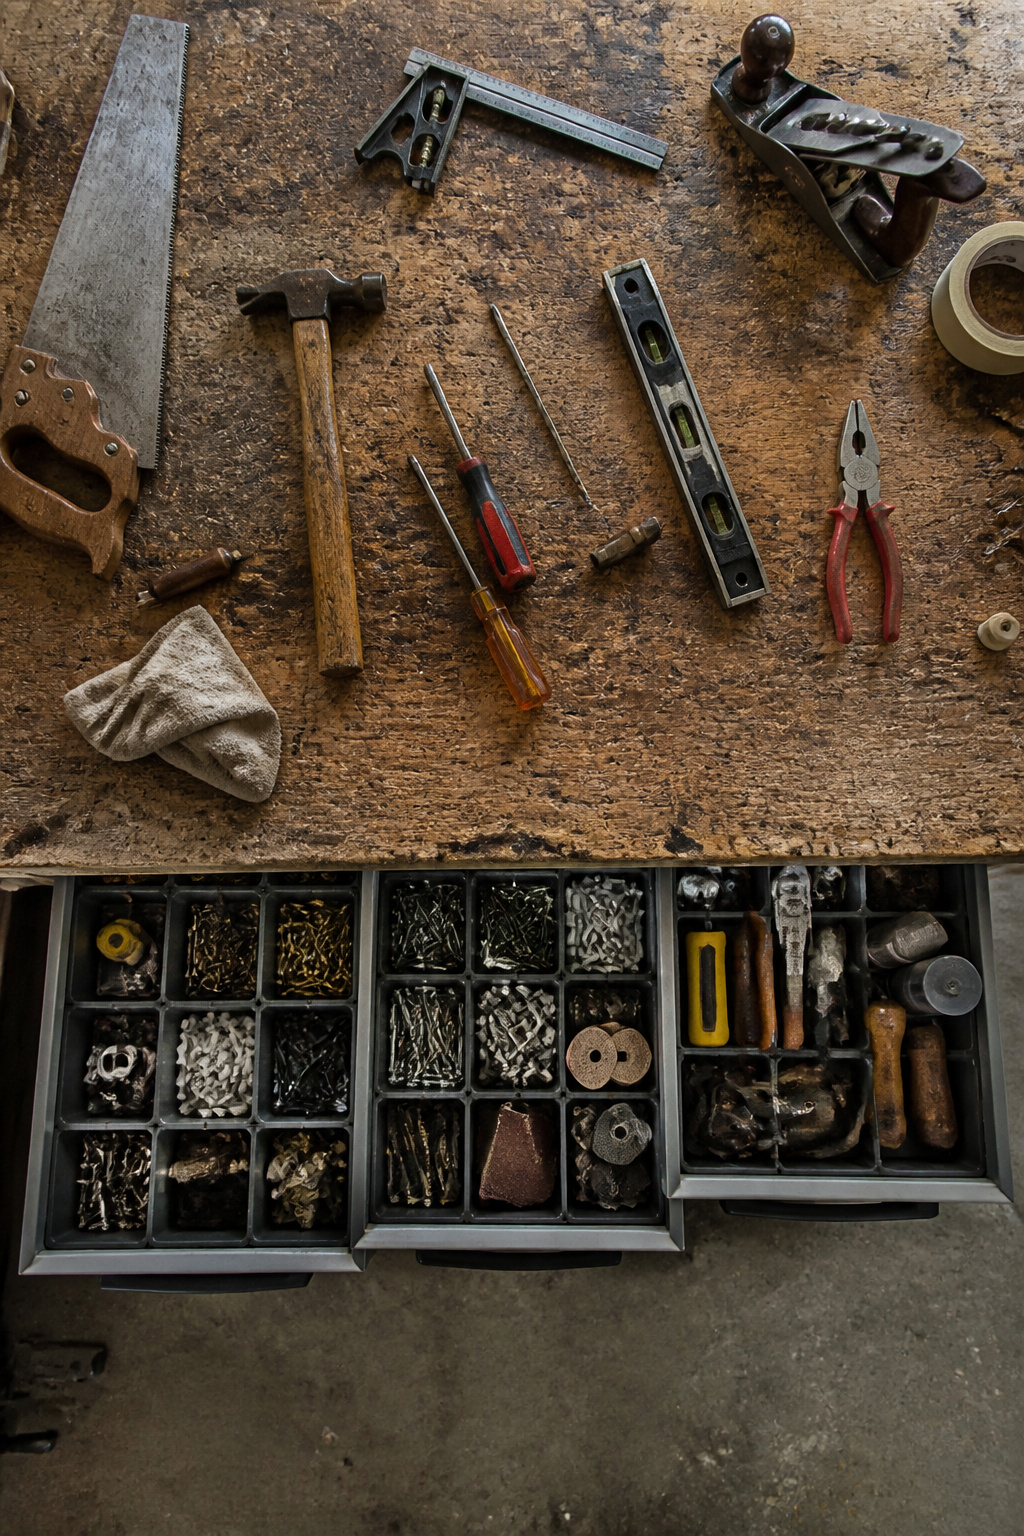
Office supplies already built for sorting paper and pens slide right into shop duty without much fuss. I keep a set of shallow drawer organizers from Staples or Target under my bench for socket sets, and the whole lineup ran under $15. The compartments are sized for hardware that otherwise rolls into a pile.
The same logic works upright. Back-of-door fabric organizers, the kind with clear pockets made for shoes or accessories, hang on cabinet or entry doors to catch gloves, tape measures, and smaller hand tools where they stay visible. No mounting hardware beyond the hooks that come with it.
Letter trays stack neatly for sandpaper sheets by grit, and a metal pen cup on the bench corrals drill bits better than rummaging through a coffee can. Plastic bins still win for fasteners, nails, and washers, either nested in a drawer or stacked on a shelf. The small Iris USA hardware cabinets with 44 drawers, 12 of them at 4 by 6 by 2 inches and 32 at 1.75 by 6 by 1.5 inches, mount to wall or sit on the bench at $39.99 if the budget stretches.
9. DIY Tool Cabinets
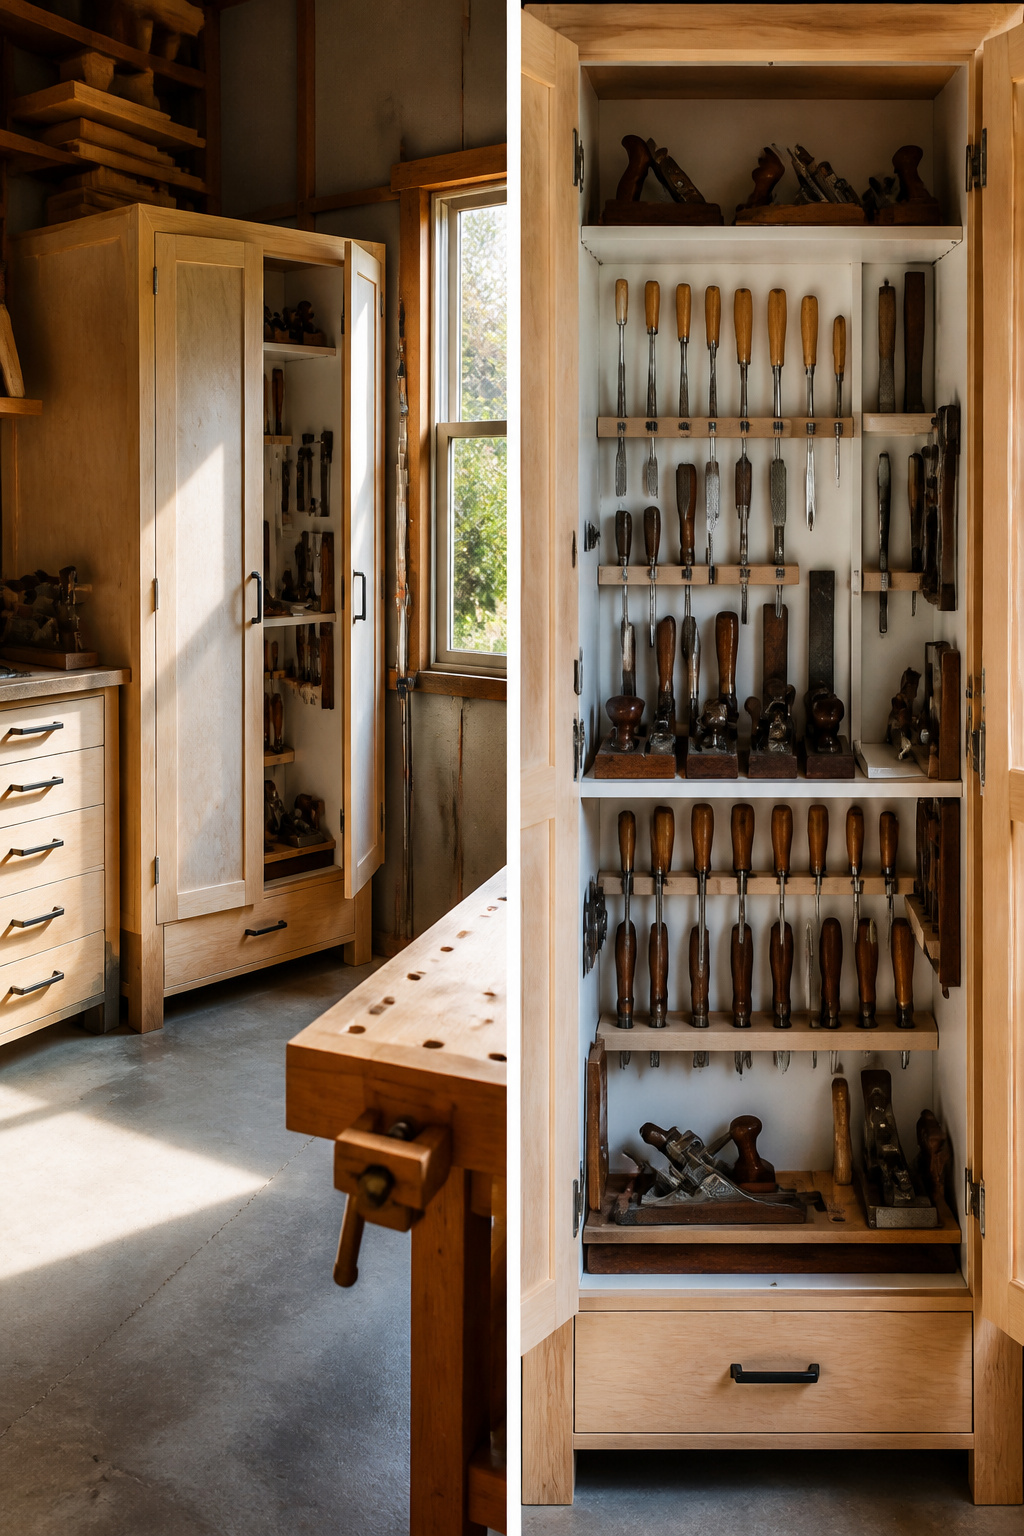
Rolling carts earn their keep when a project spreads across the driveway, but DIY tool cabinets are where the collection lives permanently. I frame mine with 2x4s and skin them in 1/2-inch plywood, a combination that stays square under real weight without the cost of commercial-grade steel. The real payoff comes in the layout: measuring each tool first, then building the shelf height and drawer depth around what actually sits there, eliminates the dead zones that prefab cabinets always seem to hide in their corners. Paint the interior white before loading anything in. The difference in how fast you spot a misplaced chisel is immediate, and the hours of squinting into a dark cavity add up faster than the extra coat of paint takes to dry.
10. Broom Holders
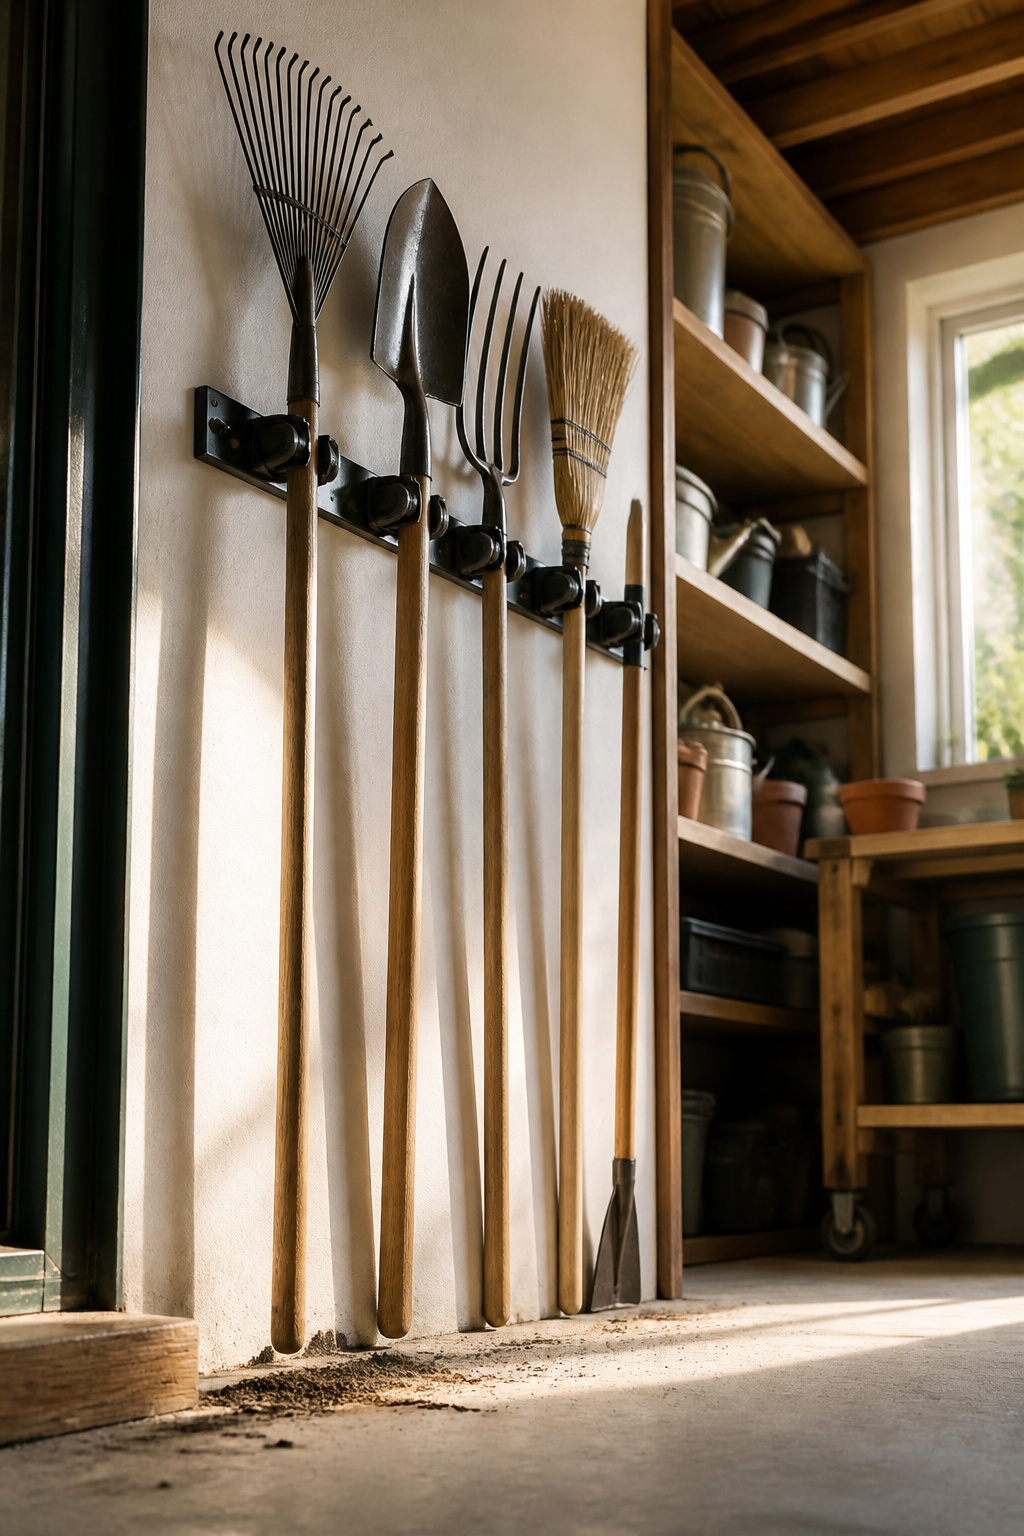
Wall-mounted holders keep rakes, shovels, and brooms off the floor and within easy reach. The spring-loaded rubber grips on the Imillet rack outperform simple hooks for heavier garden tools, securing each handle with positive spring closures rated for up to 6.5 pounds per tool. That tension matters when a loaded shovel wants to slide.
Mounting height depends on what you are optimizing for. Forty-eight inches puts tool heads at a comfortable grab height for most adults. Seventy-two inches flips the orientation, handles down, which keeps the floor completely clear and works well in narrow passages where you are already ducking under existing shelving. Either way, the rack itself mounts directly to studs, so you are not trusting drywall anchors with a loaded garden fork.
The Imillet holder runs about $17 and comes as a pair of racks you can set end-to-end, stack vertically, or split across different walls. For a weekend project on a real budget, that flexibility matters more than a custom slatwall system that costs multiples more.
11. Overhead Storage
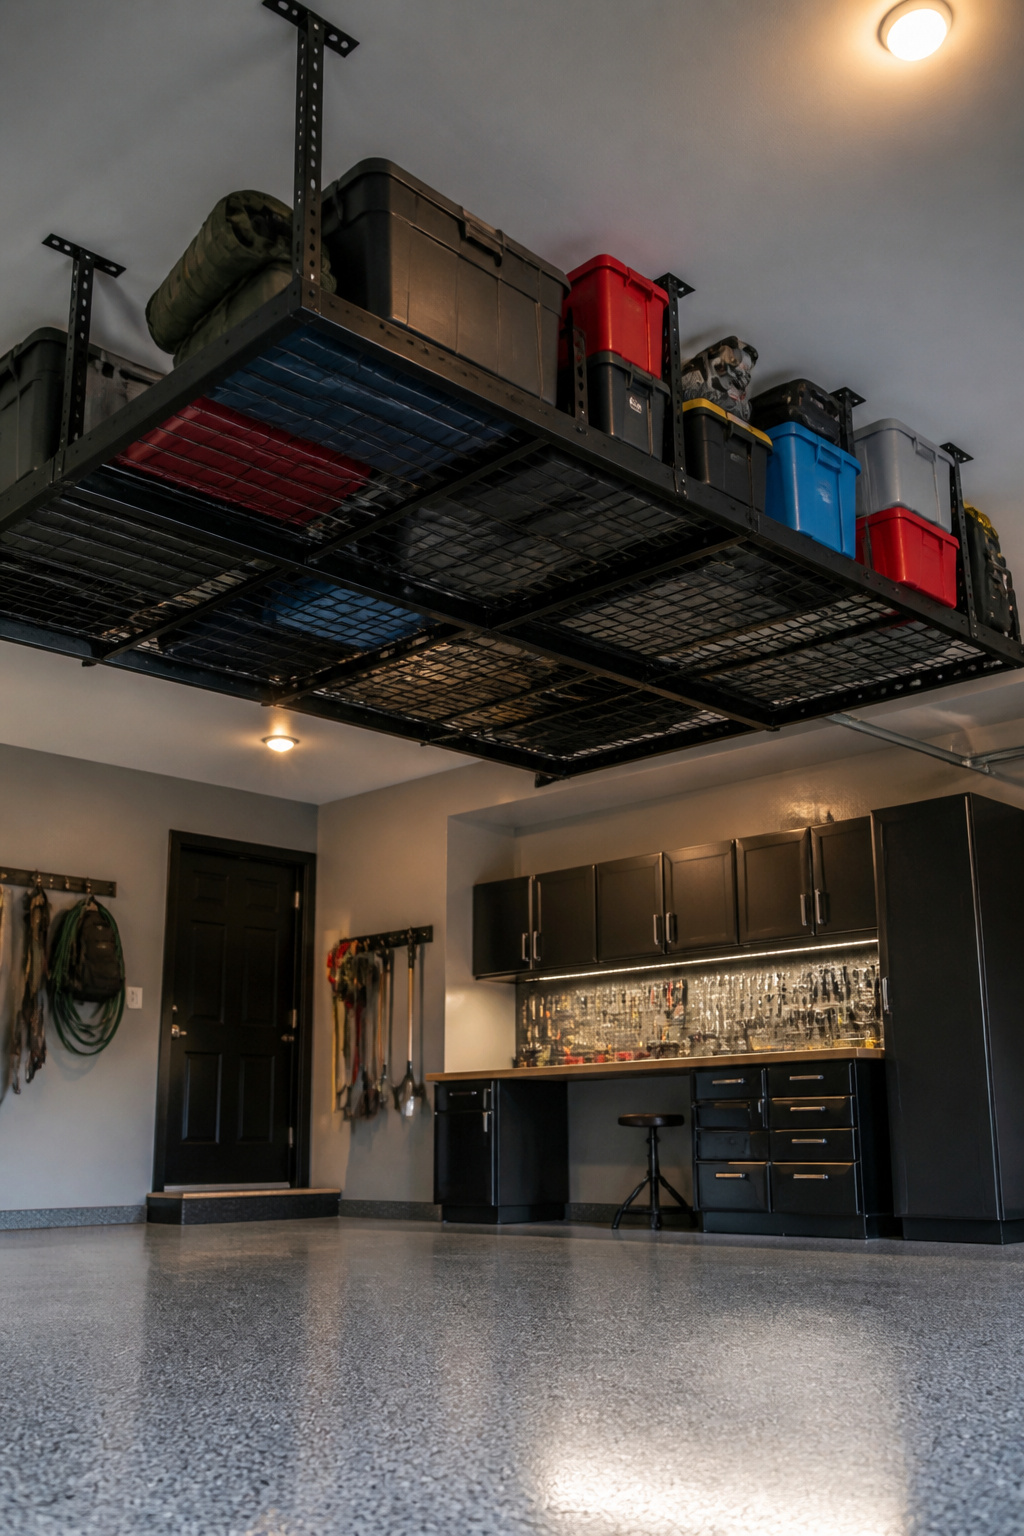
Ceiling space turns into dead air unless you claim it. The tools you touch twice a year, holiday decorations, the wet-dry vac that only comes out for water heater panic, those are the candidates for overhead racks. A Fleximounts Overhead Garage Storage Rack holds up to 600 pounds on heavy-duty rolled-steel construction, with brackets that adjust from 22 to 40 inches high so you can tuck it tight to the ceiling or drop it lower over a parking spot. At 96 inches long by 48 inches wide, it spans two joists and swallows bulky loads that would choke wall systems.
The space above a car or workbench doesn’t have to go to waste.
— Bob Vila
That overhead placement means humidity protection matters more here than anywhere else in your shop. Warm air rises, carries moisture, and settles on cold steel. A light coat of oil and a desiccant bucket underneath the rack beats rust later. Installation demands ceiling joists, never drywall anchors, and a second pair of hands for the lift. The $131.09 price is less than a mid-grade drill, and the floor space you recover pays the rent.
12. Shoe Racks
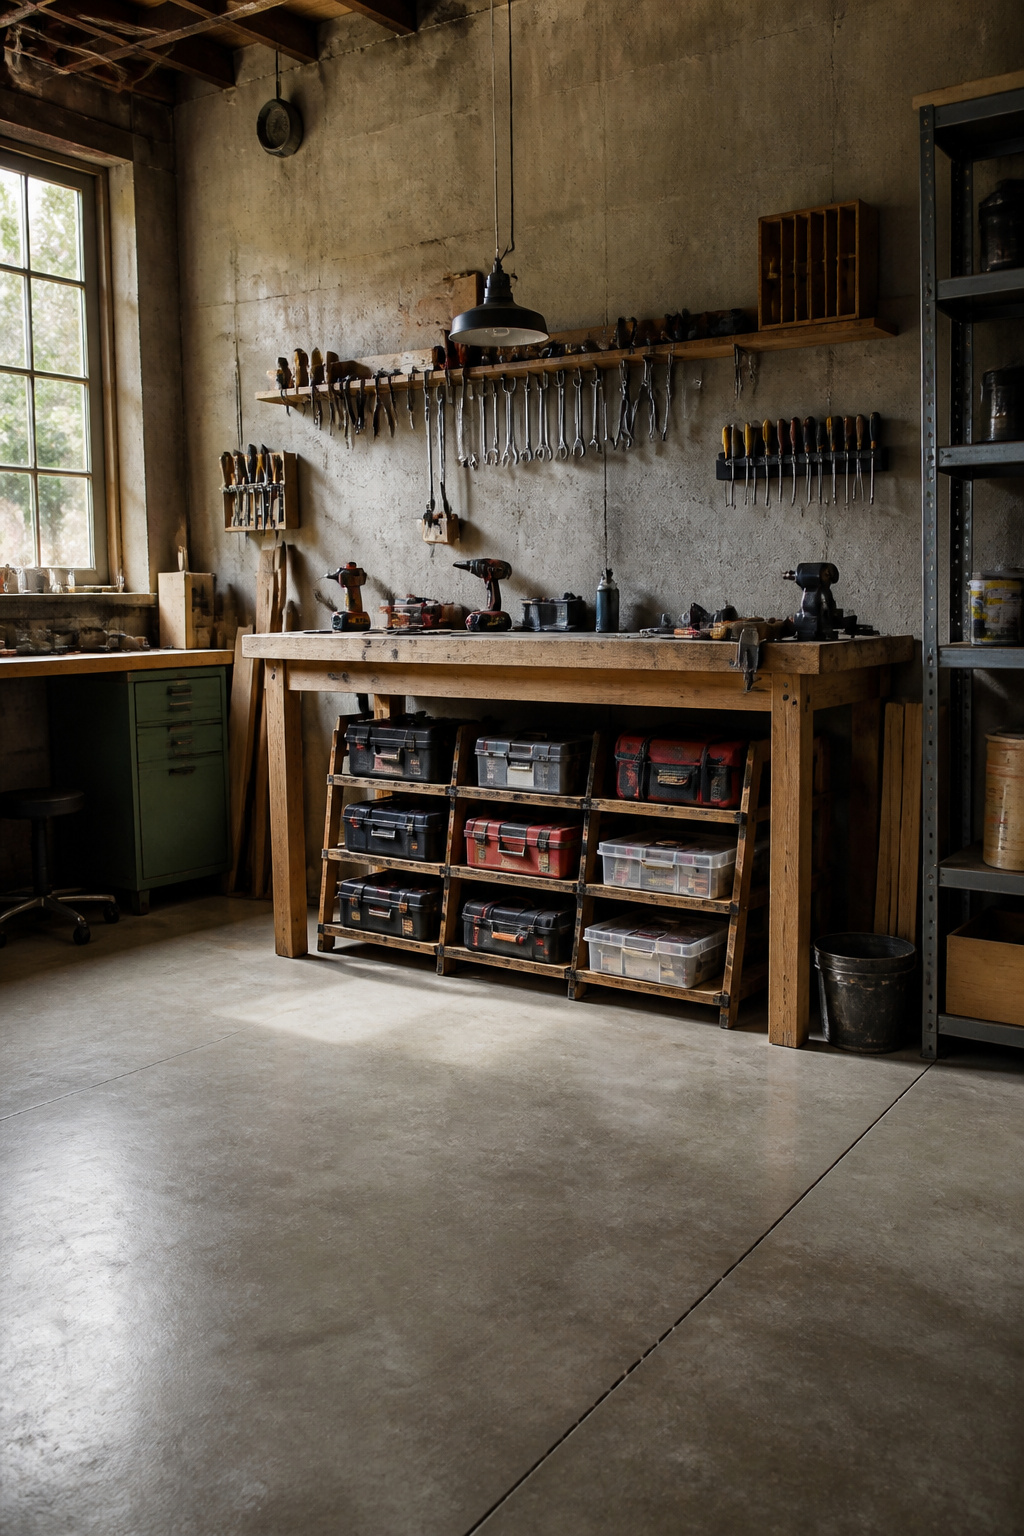
Expandable bamboo or metal shoe racks slide into the dead zone under workshop shelves and inside cabinets where toolboxes usually get stacked out of reach. The standard depth on most of these racks matches the 18-inch cabinet depth common in kitchen and garage cabinetry, so they sit flush instead of jutting into your knee space. I like them for the same reason they work for shoes: each shelf stays visible and accessible. Instead of lifting three boxes to reach the bottom one, you pull out the single rack you need. Tall shoe racks with a coat-rack top also fit this logic if you have standing height to spare; hang longer tools like rakes or hammers above, keep the fastener boxes and paint trays below. The whole setup costs less than a single drawer slide kit and installs in the time it takes to measure twice.
13. Umbrella Stands
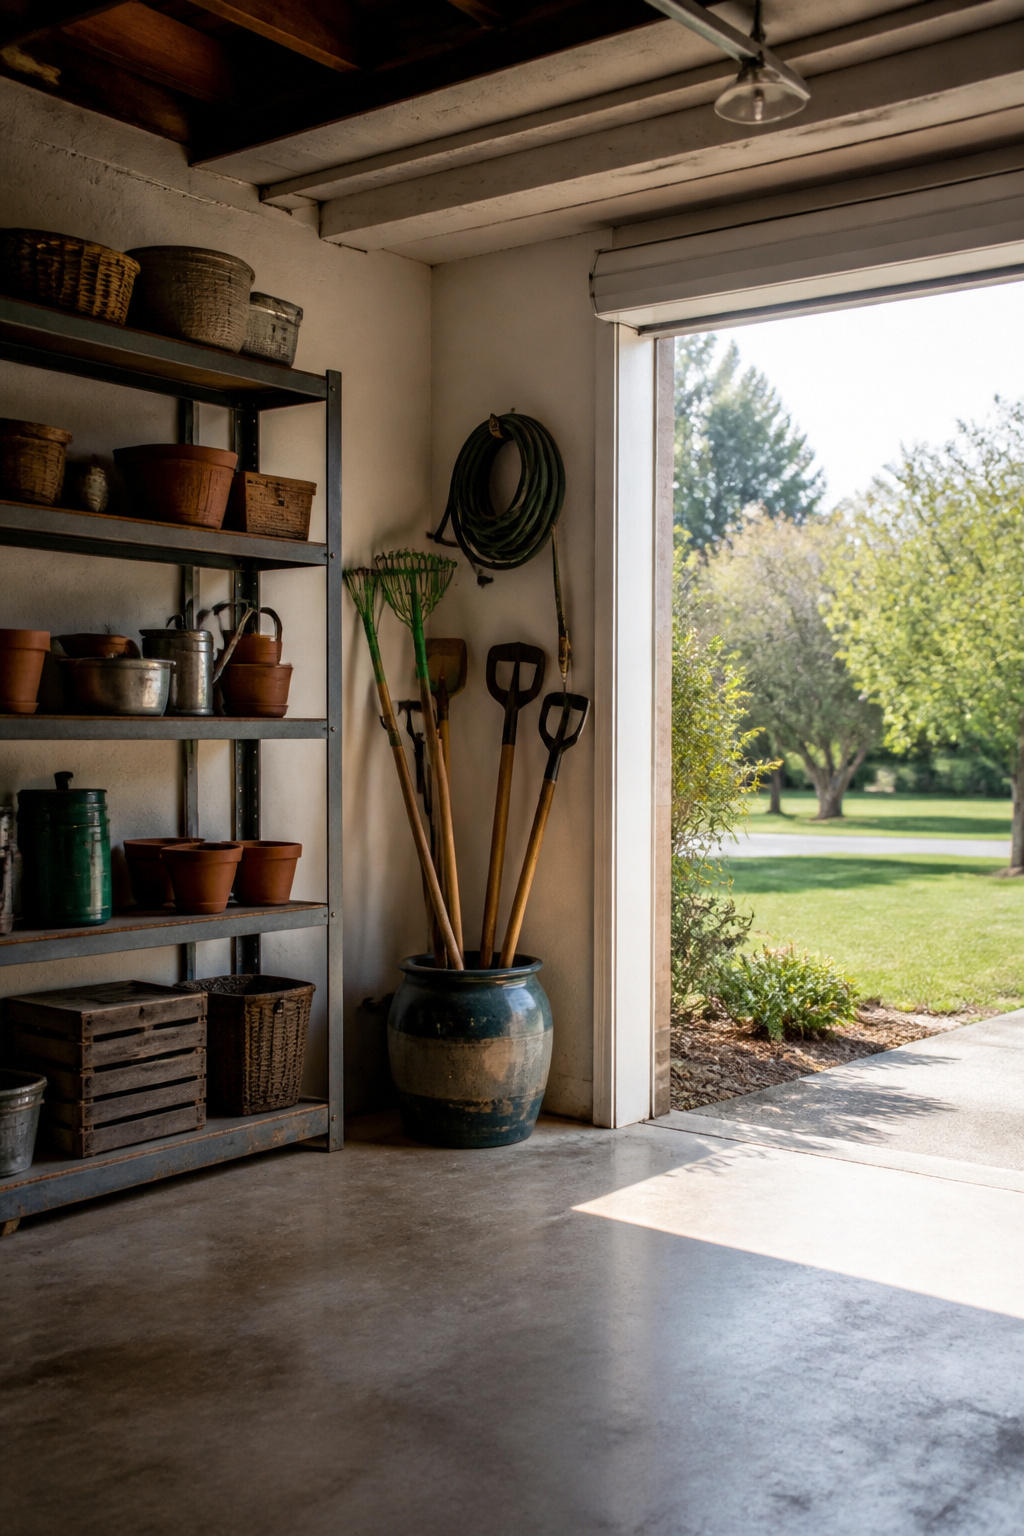
An umbrella stand tucked into the corner of a garage keeps long-handled shovels, hoes, and rakes upright and off the concrete. The floor stays clear, and the tools stop leaning into each other in a tangle that scratches handles and wastes the five minutes you spend pulling one free.
The catch is weight. A hollow stand or light resin base tips when a heavy shovel goes in handle-first. Ceramic or concrete bases solve this, and the stand stays put even when you drop a tool in without thinking. I would skip the cute thrifted makeover unless the thing already weighs ten pounds empty; looks matter less than not chasing it across the floor.
Three to five long-handled tools is the practical ceiling. Past that, the handles crowd together, you lose the quick grab-and-go, and you are back to the same mess you started with. For a small set of garden tools used on weekends, this is the cheapest footprint you will find.
Organize by How Often You Reach
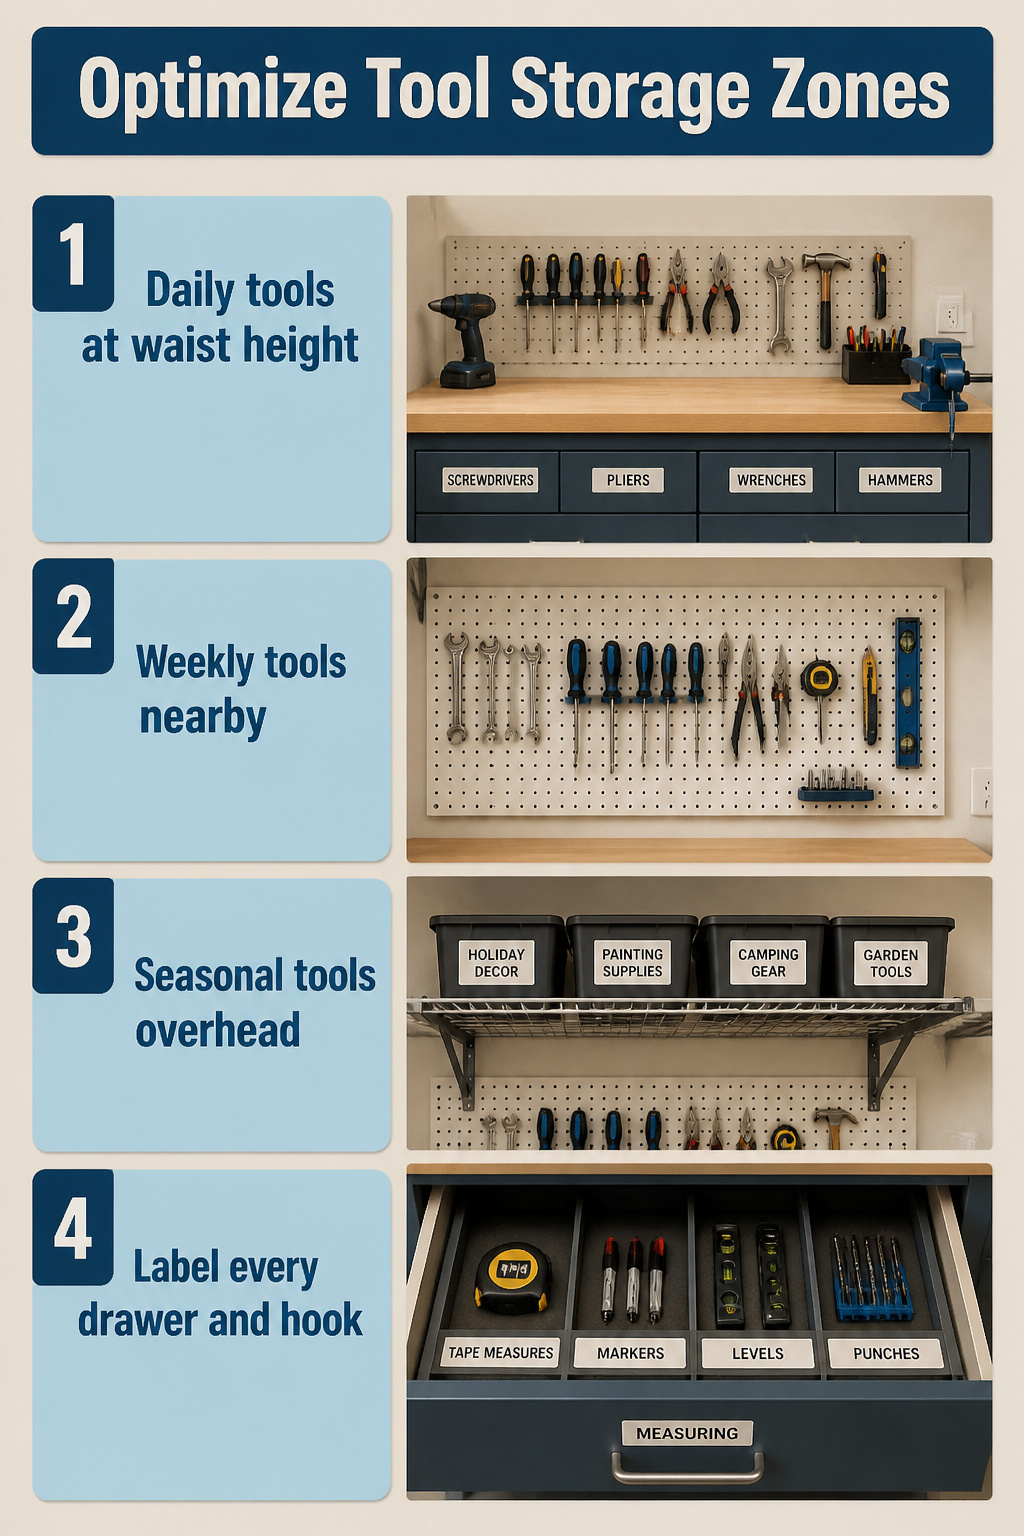
The zone system only works if you are honest about how often you actually touch each tool. Daily drivers belong at waist height, within arm’s reach, where you can grab a Phillips head without breaking stride. Weekly tools live on pegboards or rails just above or beside that core zone; the slight reach is a built-in filter that keeps the daily strip uncluttered. Seasonal and specialty tools go overhead or in cabinet backs, out of the sight line but not out of mind.
Label the face of every drawer, bin, and hook. A zone system degrades fast when a tape measure migrates to the drill shelf because you were in a hurry. Clear labels make the return path obvious; color-coding by category speeds retrieval even more. In-drawer dividers or rubber lining keep sorted tools from sliding into chaos every time a drawer opens and closes. The fifteen seconds you spend putting a tool back in its labeled home saves the ten minutes of hunting you will spend tomorrow if you do not.
What Humidity Does to Storage
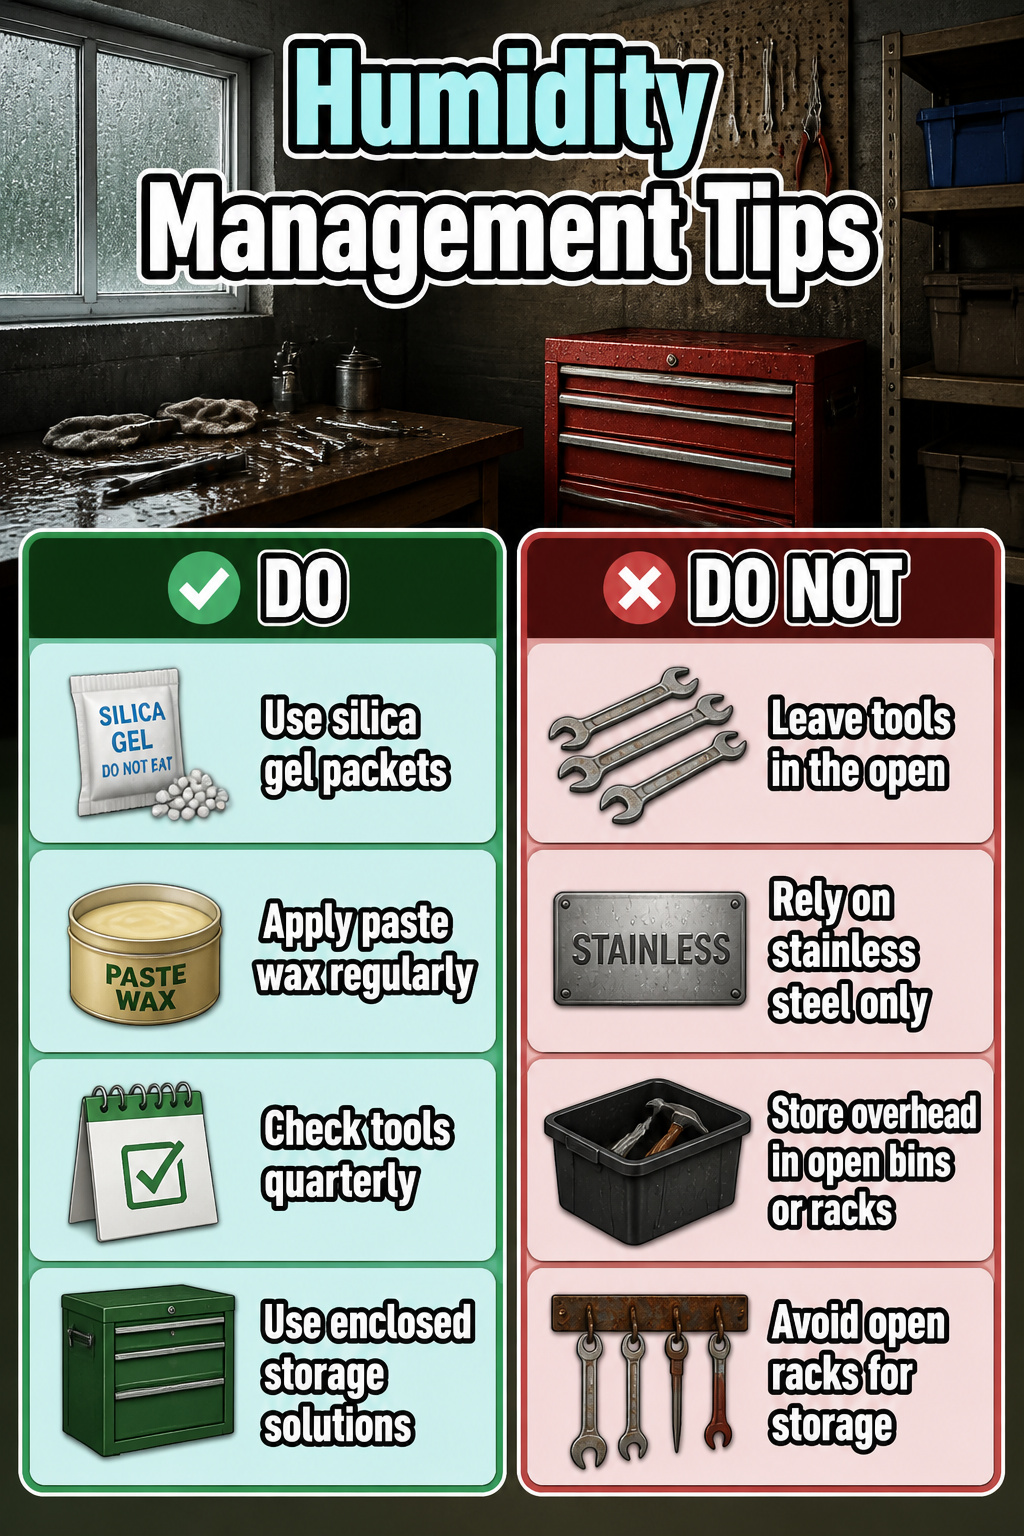
Metal rusts faster in a garage than most people expect. Humidity drives condensation onto every surface, and tools left out in the open collect water droplets even when the weather looks dry. Stainless steel resists better than carbon steel, but "stainless" is a relative term in a damp space.
Silica gel packets in drawers pull moisture away from the tools you store most carefully. Replace or recharge them on a schedule, not when you remember. Paste wax on unpainted metal surfaces adds a breathable barrier that beads water without trapping it underneath. A thin coat every few months takes ten minutes and costs a few dollars.
Checking stored tools quarterly catches rust before it pits the metal. Lift them out, look at the contact points where they rest, and wipe any film you find.
Enclosed storage changes the math. A tool chest or cabinet slows humidity swings and keeps airborne moisture from settling directly on your wrenches and blades. Overhead storage sits in the worst air in the room, warm and damp, and tools left up there rust first. If you must store overhead, use sealed bins with desiccant inside, not open hooks or racks.
Portable Against Fixed Storage
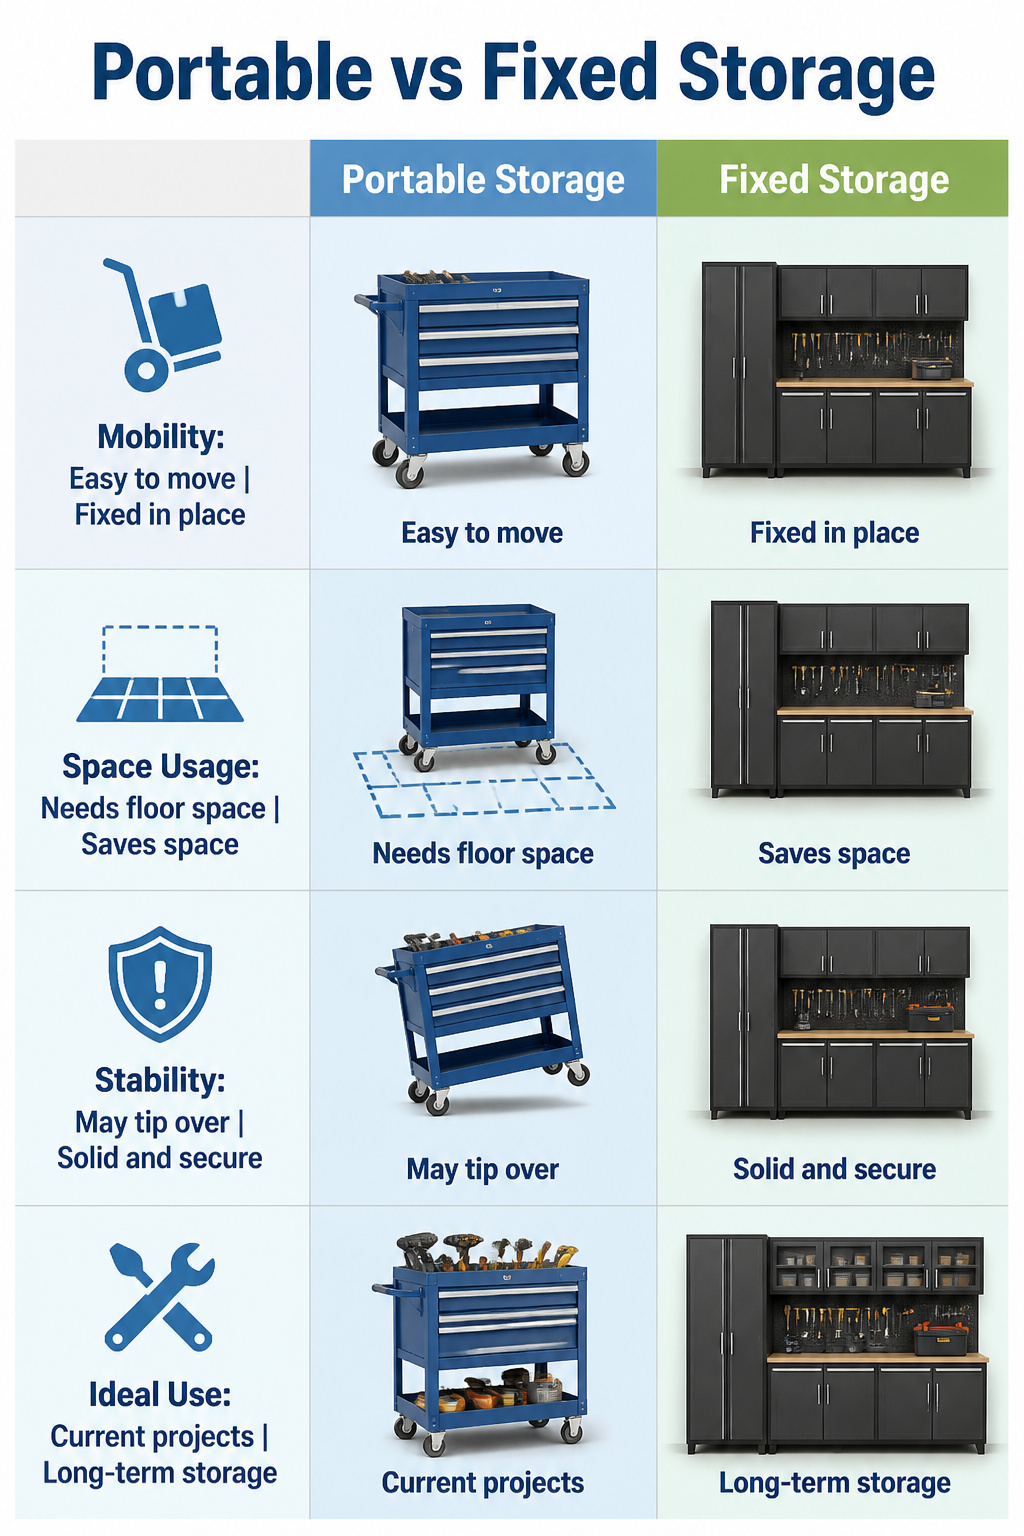
Rolling carts bring the tool to the job, which sounds perfect until you are reaching for a driver on a slope or working around four swivel casters in a tight corner. The cart tips if you lean on it, and it eats floor space whether it is full or empty. Wall systems and cabinets stay put. They hold more, stay level, and never roll away when you need a third hand. The catch is the walk. Every cut means a trip across the shop, and that friction adds up fast when you are in a rhythm.
Most home shops need both. A cart handles the active project, the handful of tools you are cycling through right now. Fixed storage holds everything else, the ninety percent sitting idle. The mistake is buying one large rolling chest and calling it done. Soon the cart becomes a mobile junk drawer, heavy enough to drag but too crowded to sort. Better to split the load: keep the wall or cabinet as home base, and let the cart earn its keep as a temporary outpost that gets emptied every night.
Custom Foam for Tool Trays
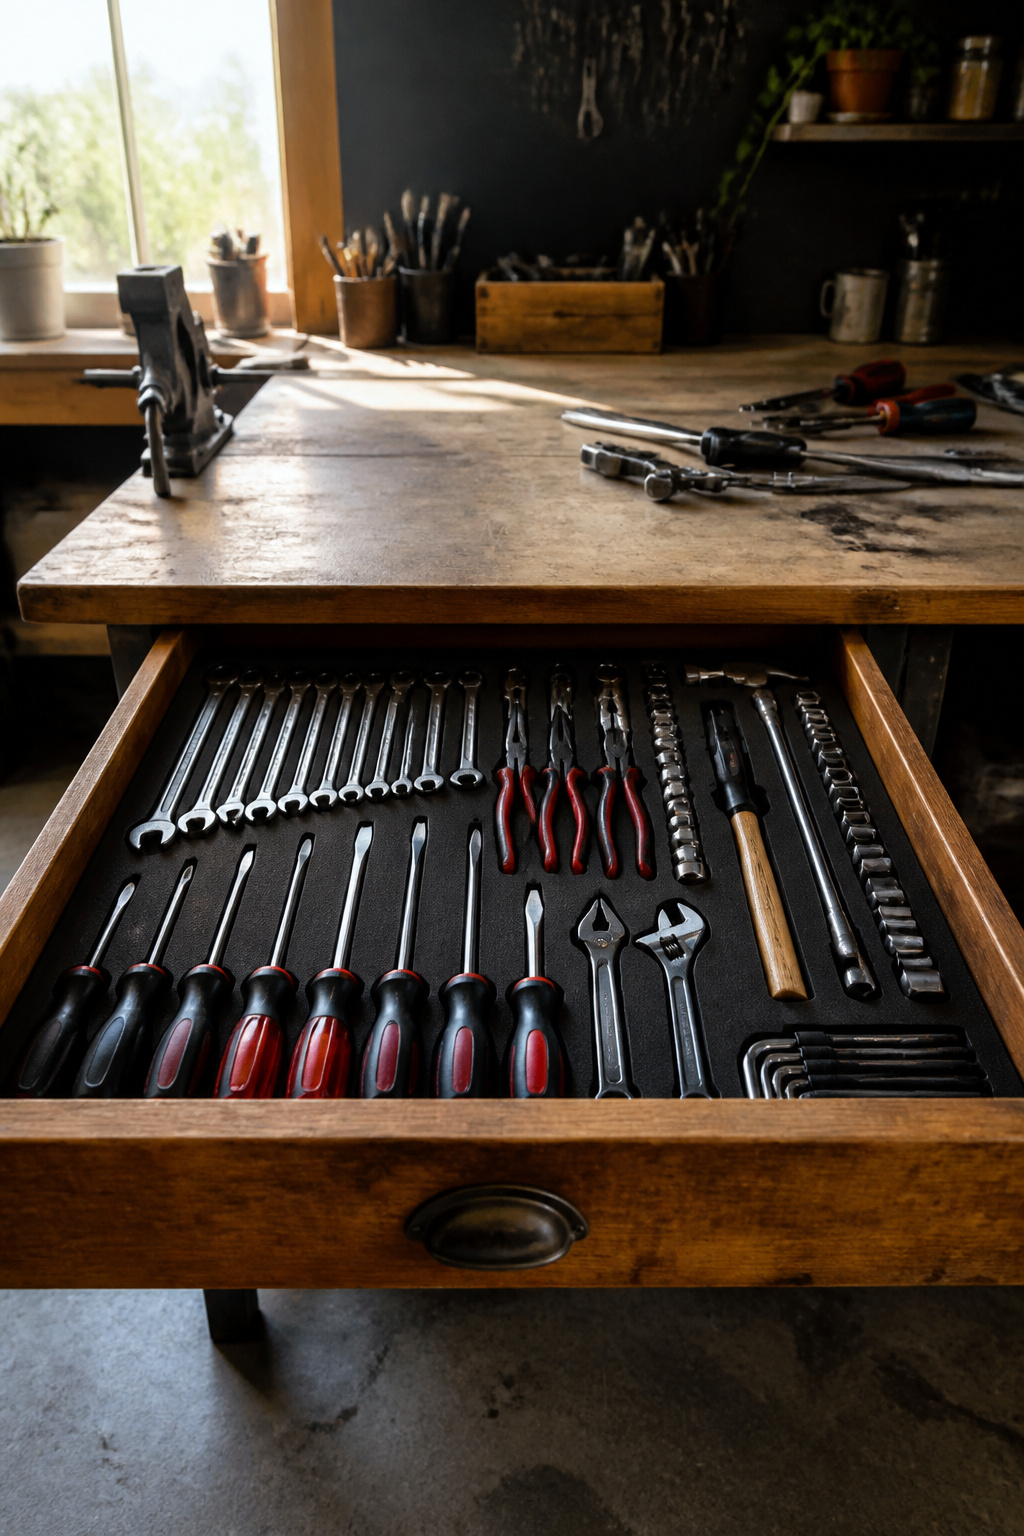
Kaizen foam runs about $30 to $50 for a standard toolbox drawer, where a pre-cut insert from the manufacturer lands closer to $80 to $150. The trade is time: my first drawer took the better part of an afternoon, and the second one moved faster once I stopped second-guessing the depth on every tool.
The foam comes in 1/4-inch layers you peel away like a topography map. I laid each tool on the sheet, traced the outline with a Sharpie, then worked a fresh utility knife blade straight down. The trick is cutting one layer deeper than the next so sockets sit shallow and ratchets sit proud enough to grab. A straightedge keeps the walls clean; without one, my first wrench pocket looked like a dog chewed it.
Three hours for that first drawer felt steep until I opened it six months later and every tool still sat where I left it. For the price of one commercial insert, I outfitted two drawers and a small parts case. The foam shows wear eventually, especially where screwdrivers get stabbed in daily, but replacement sheets cost less than starting over.
Outdoor Storage for Overflow
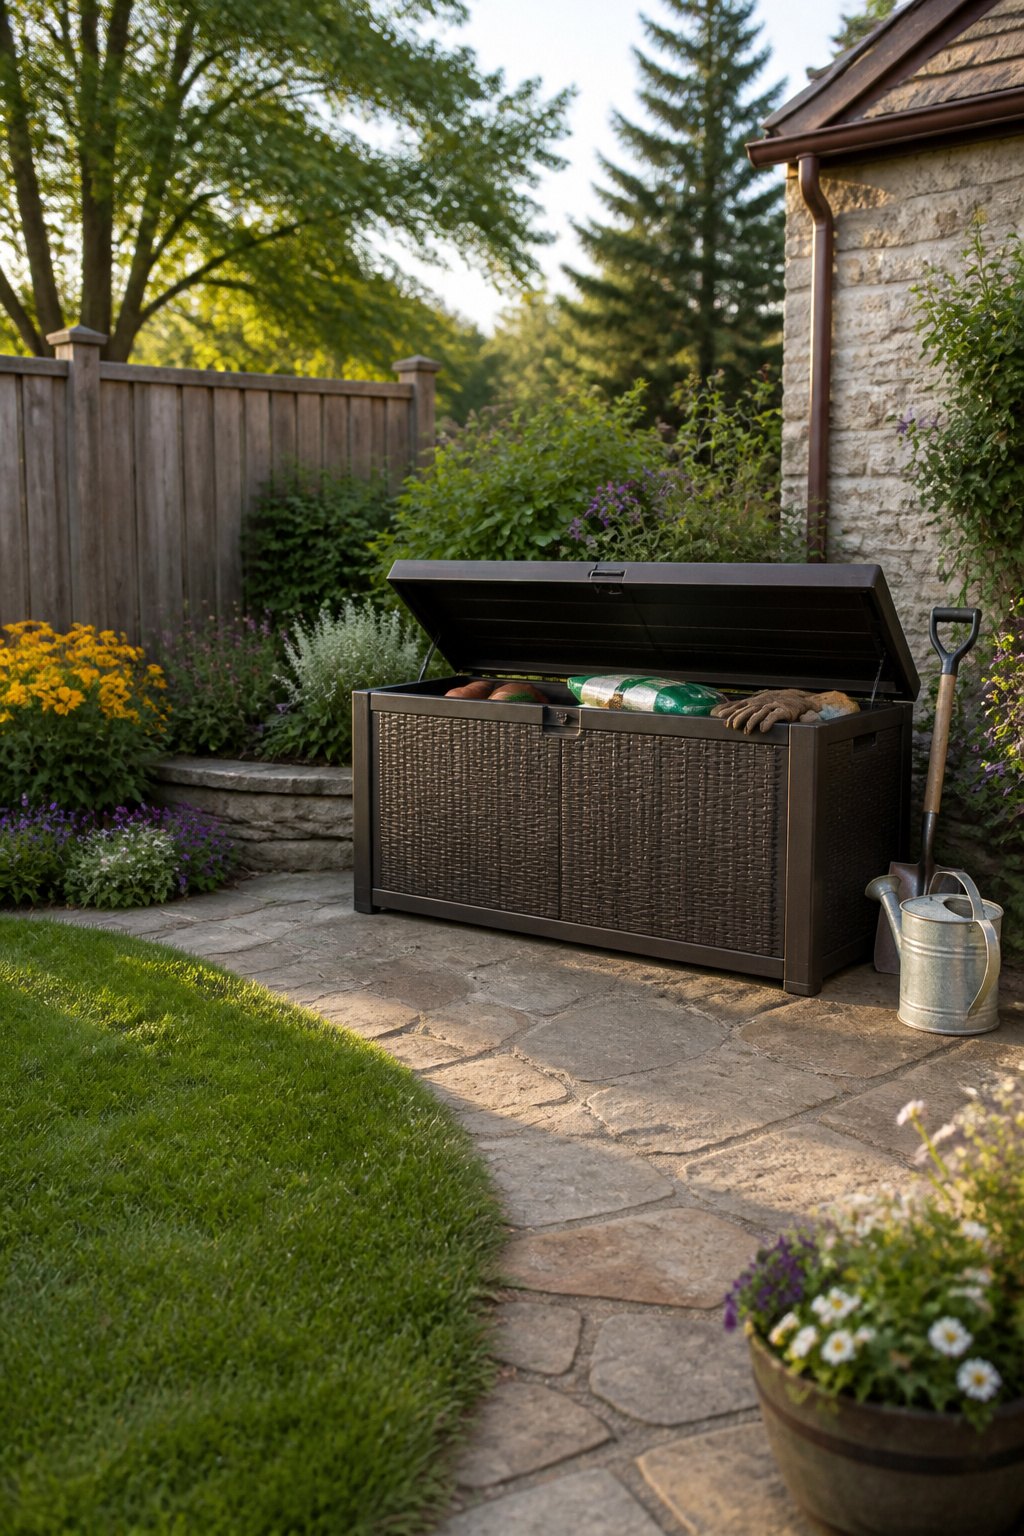
Some tools simply refuse to fit inside a shop that already holds a table saw and a workbench. The Vevor Outdoor Storage Box starts at $48.99 for the 100-gallon size and runs up to a 230-gallon capacity, which turns a cramped corner of the yard into usable overflow space for garden tools, potting supplies, or the seasonal equipment that migrates in and out each year.
The box is built from vinyl tarpaulin, a material that holds its shape against weather without warping or cracking. Three sizes are available: 100-gallon, 150-gallon, and 230-gallon, with the largest measuring roughly 58 by 34 by 43 inches. That range matters because outdoor storage fails on two predictable points. Security keeps honest people honest; weather sealing keeps the contents usable. A box that lacks either becomes a frustration you walk past twice a week.
Frequently Asked Questions
What are the best shop tool storage ideas?
Pegboards, French cleats, magnetic strips, and rolling carts are the most flexible systems for most home shops. Pegboards turn dead wall into full tool displays you can read at a glance, while French cleats let you rearrange holders in seconds when your collection grows. For tools you reach for constantly, a magnetic strip mounted where you actually work cuts the walk to your chest and saves minutes that add up fast.
How can I organize my tools effectively?
Group by type and frequency of use, then label every drawer, bin, and hook so tools find their way home. Daily drivers belong at waist height within arm’s reach; weekly tools sit on pegboards or rails just above that zone; seasonal and specialty gear goes overhead or in cabinet backs. In-drawer dividers or rubber lining keep sorted tools from sliding into chaos every time a drawer opens.
What are some DIY tool storage solutions?
Frame a custom cabinet with 2x4s and 1/2-inch plywood, then build shelf height and drawer depth around each tool’s actual dimensions to eliminate dead zones. Paint the interior white before loading anything in; the difference in how fast you spot a misplaced chisel is immediate. For smaller projects, screw jar lids under a shelf and store nails or screws in clear peanut butter jars that twist up into place.