

The right broom closet design depends on whether you own the wall behind it. Homeowners can cut into studs for a 16-inch deep recessed cabinet that hides plumbing risks, while renters hang $15 tension organizers over existing doors without a single hole. Either route demands the same first step: pulling every tool out and measuring what you actually use before buying a bracket.
1. Between-the-Studs Broom Closet
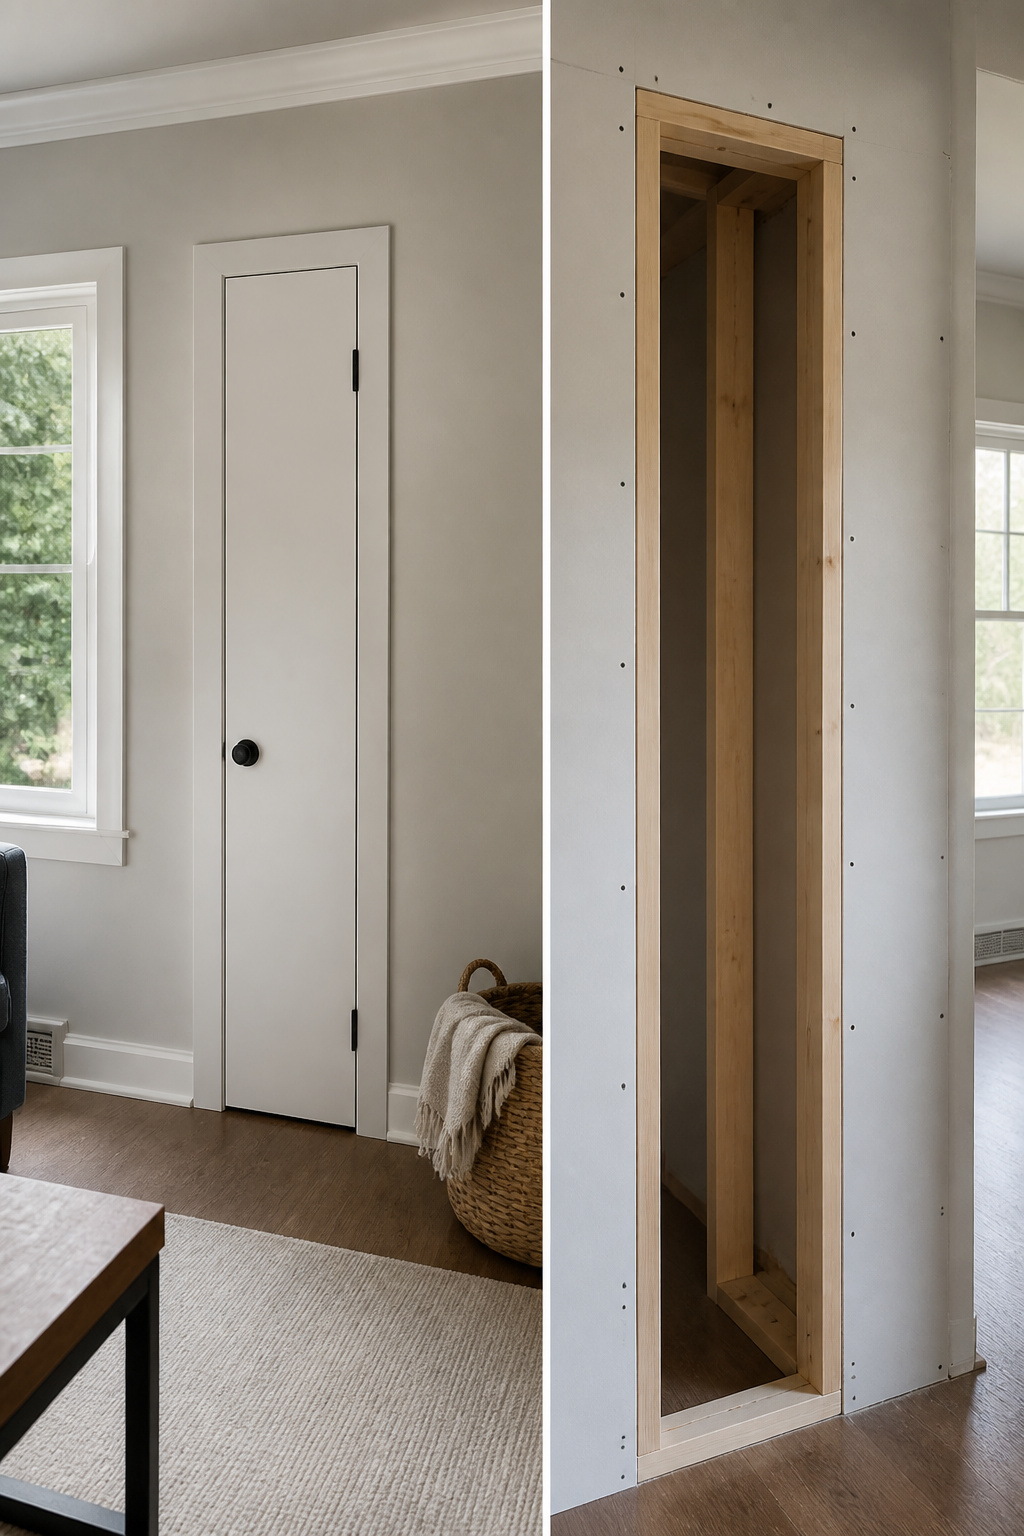
The wall you are staring at probably holds six inches of hollow space between the studs, and that is where a broom closet can live without stealing floor area from the room. The standard height runs about 72 inches, with a 16-inch width and depth as the starting point for planning, though cutting drywall and framing a small storage area in the wall lets you adjust to whatever the stud spacing allows.
Mark the studs first, then cut the header and footer to span the opening and fit studs between them at the planned height. Build the frame flat on the floor, stand it into place, and secure it to existing framing if you have it. Where the new wall lands between studs, mollies or wall anchors through the header and footer into the drywall behind will hold, but they are a compromise; three along the stud and four along the header boards is the pattern that keeps the box from shifting. A pre-hung door finishes it, leveled and screwed to the 2-by-4 frame.
The depth is the real limit. At 16 inches you clear a standard broom handle, which sits near 65 inches tall, but anything deeper risks plumbing or wiring you did not know was there. Cut a small inspection hole before you commit to the full opening.
2. Pull-Out Pantry Cabinet
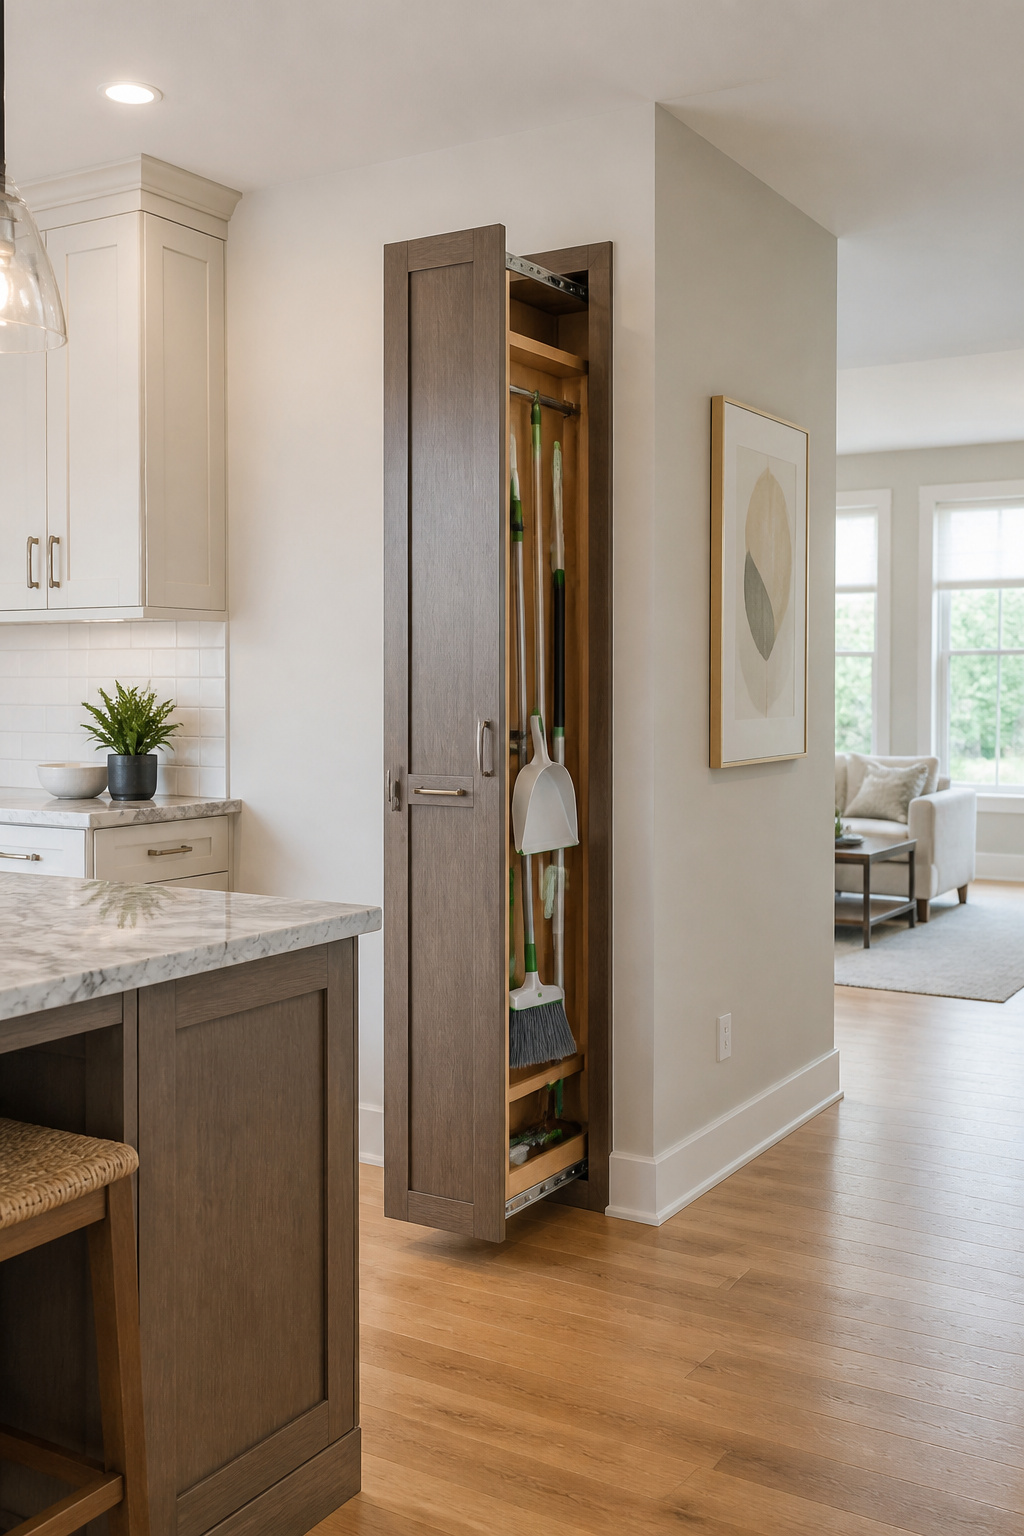
A pull-out pantry cabinet keeps brooms and mops completely out of sight while staying within arm’s reach of where you actually need them. I like this option for kitchens because the mess of daily cleaning lives right next to the floor you’re most likely to spill on, not scattered across a hallway closet on the other side of the apartment.
The cost lands between $150 and $400 depending on whether you buy ready-made or go custom. A tall cabinet with a broom organizer kit inside the door is the faster route, usually installable in a few hours. Custom built-ins take closer to a weekend but let you match existing cabinetry and hardware exactly.
Place it near your main kitchen workspace, not tucked behind a dining table where you’ll bump chairs pulling it open. Measure your tallest tool before committing to either route; a standard mop handle tops out around 60 inches and will not fit in every prefab unit without angling. Add a soft-close mechanism if you’re opening this daily, it keeps the hardware from rattling and the door from swinging back into your knees.
3. Wall-Mounted Hook Rack
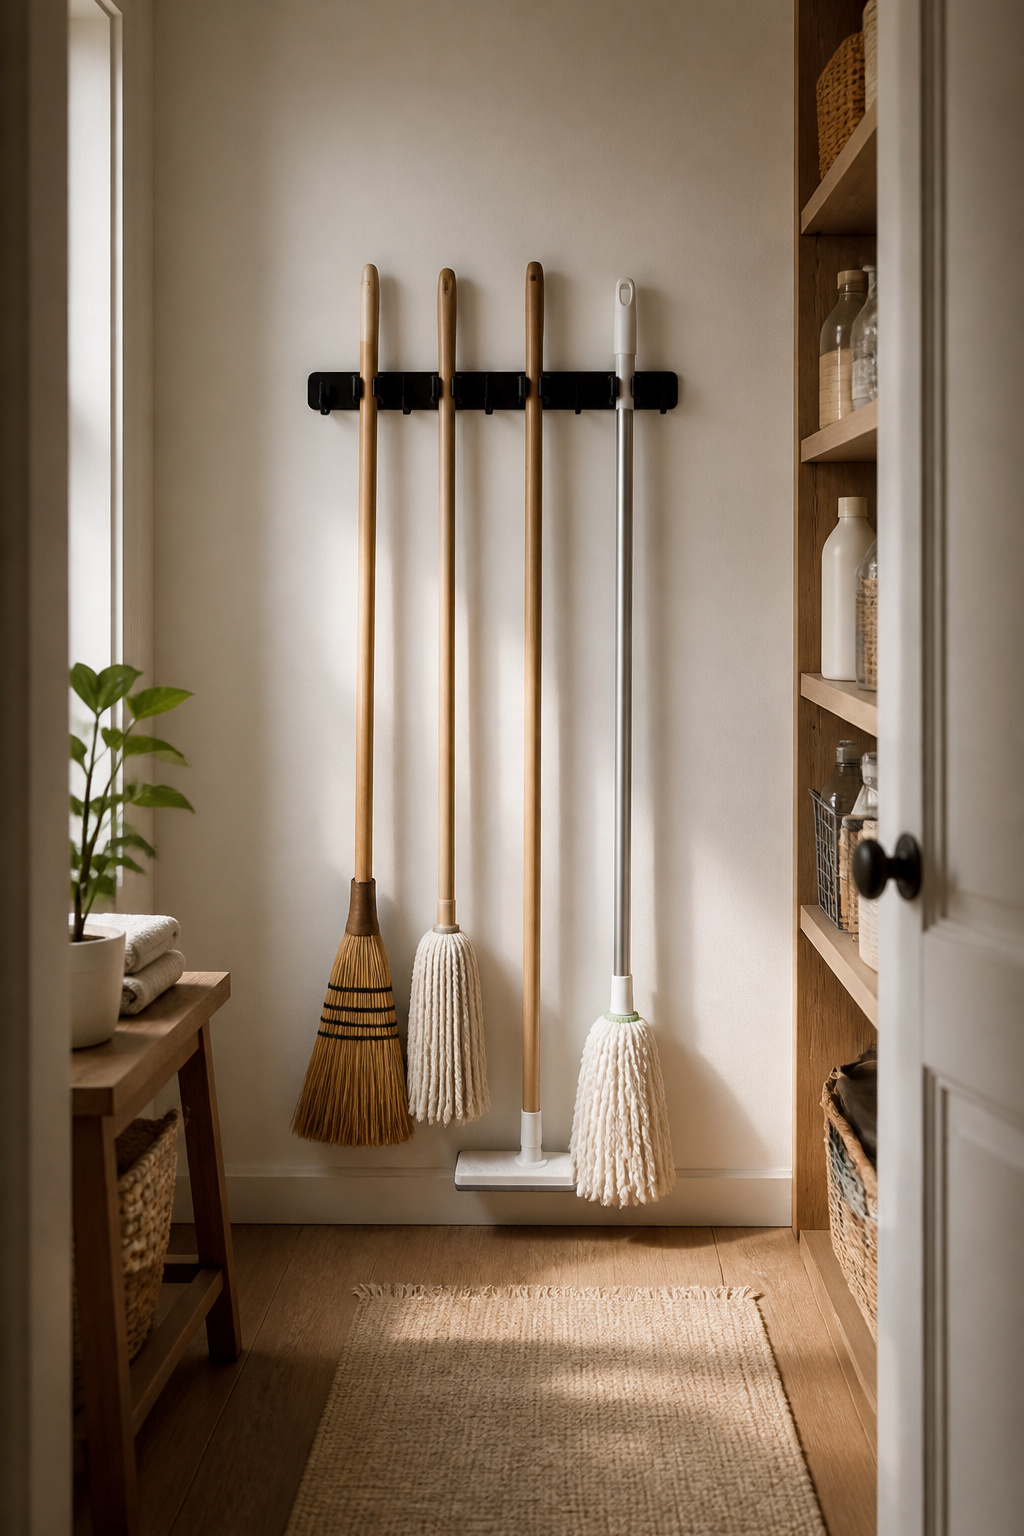
A basic wall-mounted hook rack is the cheapest fix for broom storage, running $10 to $25 and taking under half an hour to install. Lifting brooms and mops off the floor instantly makes the space feel more organized, even if the closet itself stays the same cramped rectangle it always was.
Mounting into wall studs matters if you’re hanging anything heavier than a standard broom. Matte black or brass finishes look surprisingly finished for hardware this cheap. Center the tallest tools so nothing drags.
Renters or anyone in a small apartment where drilling is off the table can use adhesive hooks instead. Test the weight rating before trusting a heavier mop, and peel them off slowly when you move out so the paint stays put. The cost stays the same either way.
4. Adjustable Shelving
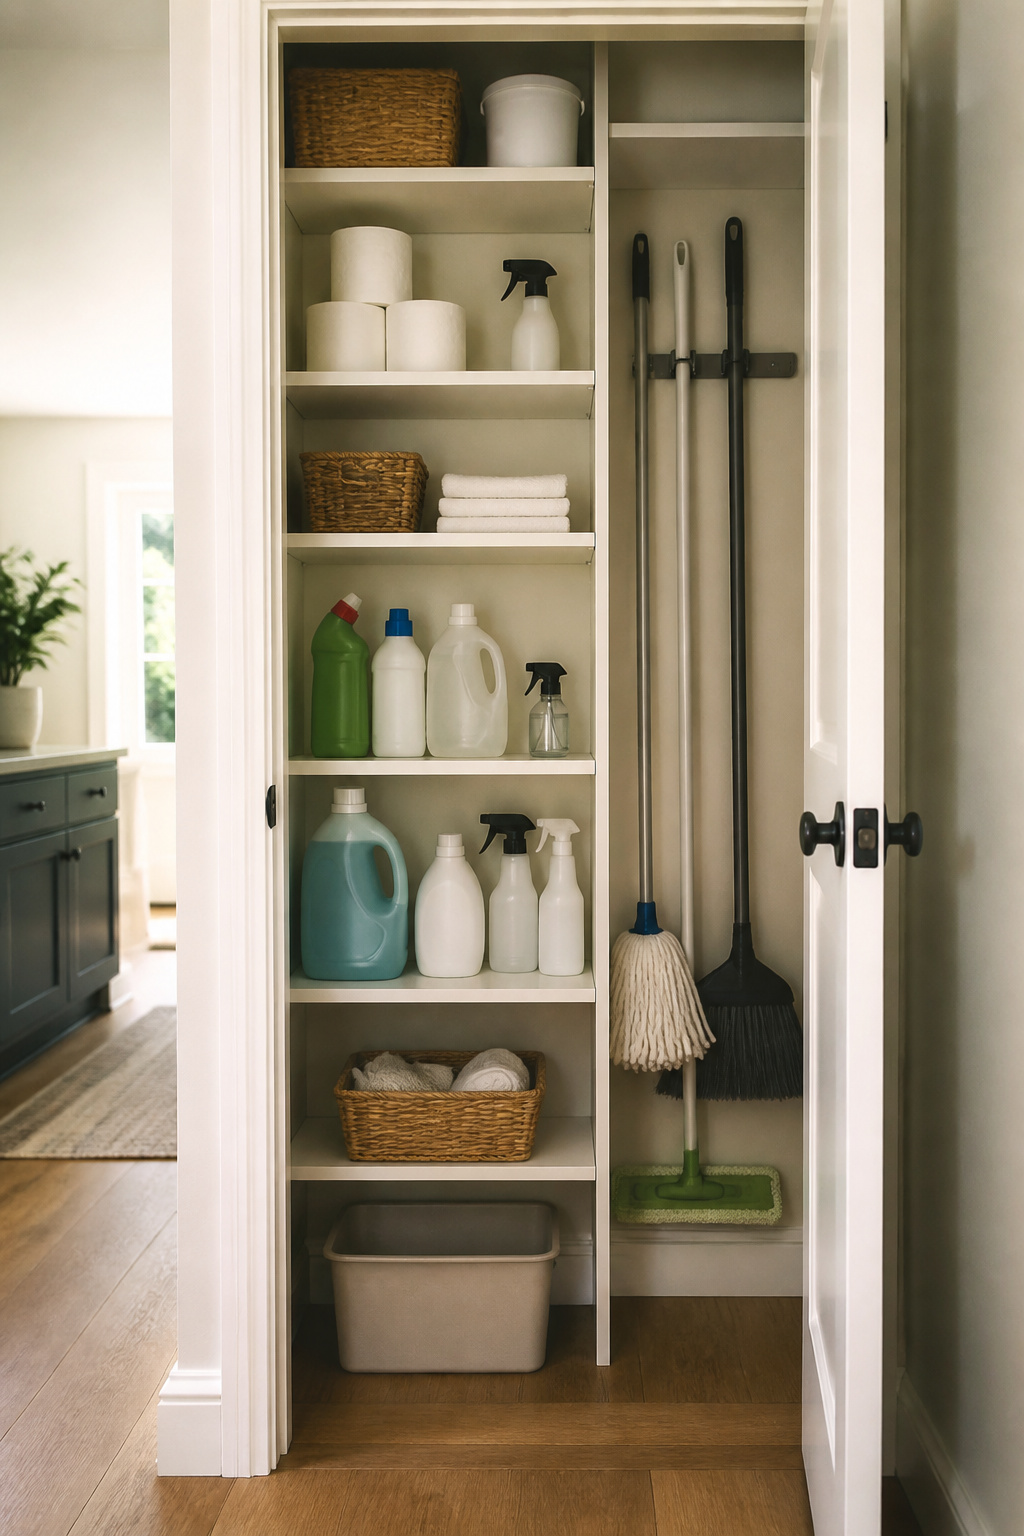
The tallest bottle in my current cleaning lineup is a 14-inch refill jug, and next month it might be a spray canister half that height. Adjustable shelving is what keeps a narrow broom closet from becoming a Jenga tower of half-empty containers. A split layout works best here: hang mops and brooms on one wall, then run adjustable shelves on the other for bottles, rags, and the backup stock you grabbed on sale.
Vertical space above the tool heads usually goes to waste. Move a shelf pin one notch higher and that zone becomes storage for seasonal supplies, the carpet cleaner you borrowed, or a stack of folded drop cloths. The shelf spacing that fits your spring setup in March should not dictate what you can reach in October.
Freestanding units secured to the wall work if you are renting and cannot drill into a cabinet carcass. The key is measuring the shelf depth against your actual bottles before you buy; a deep shelf sounds generous until you are knocking over the front row to reach what sits behind it.
5. Cubbies for Tall Tools
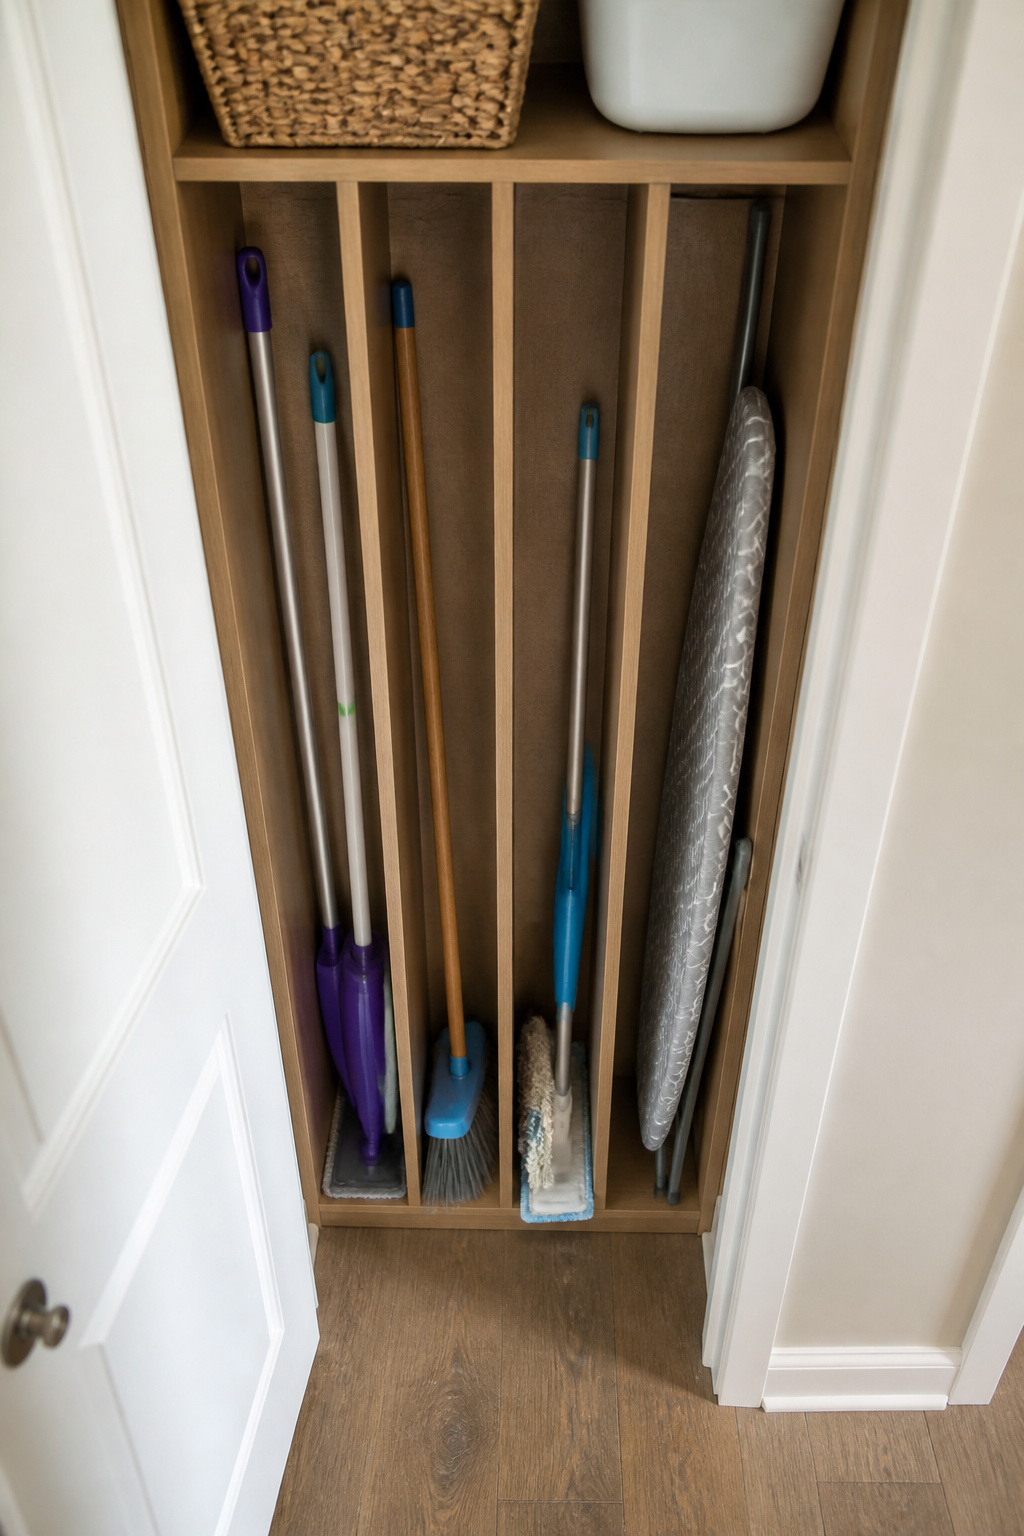
Slim cubby dividers give each tall tool its own lane so nothing leans on anything else. A broom grabbed in a hurry used to knock the mop into the dustpan tray and send the whole row clattering down in my last rental; the vertical partitions stop that domino effect because every handle stands alone.
Hooks leave tools dangling at angles, handles overlapping, heads bumping drywall. Cubbies keep the business end up and the footprint narrow; an ironing board, broom, and mop each slide into a skinny slot maybe four inches across, no hardware fighting for wall space. The slot width matters more than the slot height; too loose and the handle still drifts, too tight and you fight it every time you put the tool away.
Freestanding cabinets with dedicated vertical slots exist if you rent and cannot screw into studs, or you can build partitions from simple wooden boards cut to the depth of your closet. Either way, the gain is the same: you open the door, see the tool you need, and pull it without playing Jenga.
6. Over-the-Door Organizer
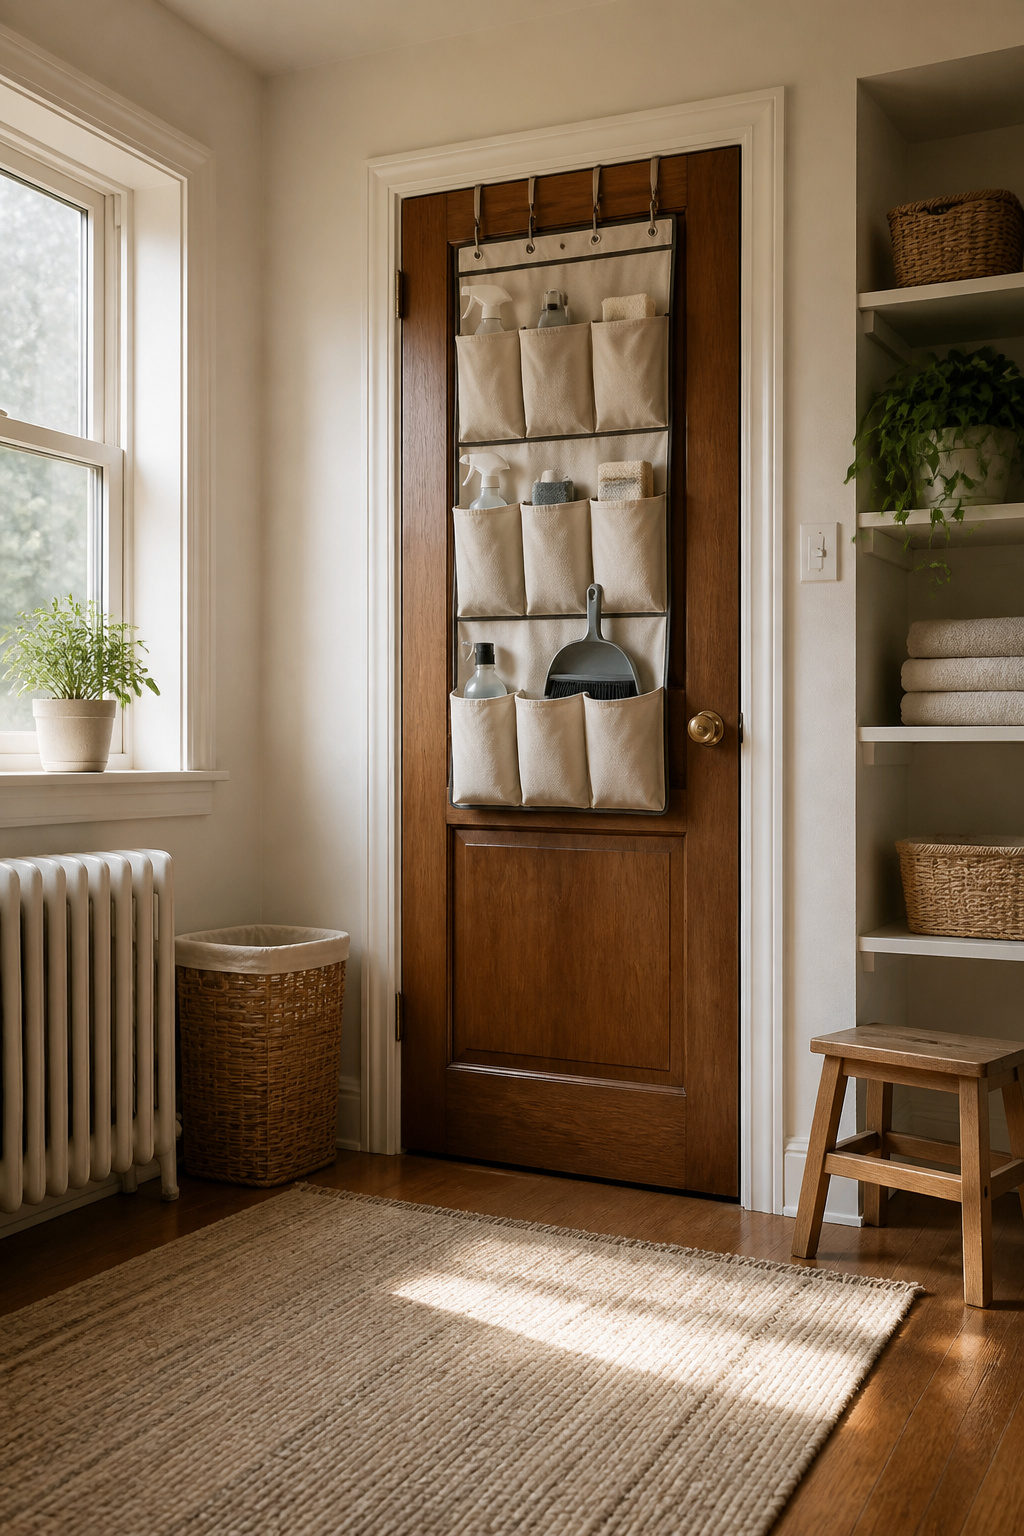
An over-the-door organizer turns the back of a pantry or closet door into storage that costs nothing in floor space. In a small apartment, that vertical strip is usually dead real estate; hanging a pocketed fabric organizer gives you slots for spray bottles, gloves, and the dustpan without a single hole in the wall. Most systems slip over the top rail and stay put on tension hooks, which makes them renter-friendly with no drilling in most cases.
The whole install takes about ten minutes and runs $15 to $35. The catch is door clearance: a bulky organizer can stop the door from closing fully, so measure the gap before you buy.
7. Multi-Functional Murphy Table
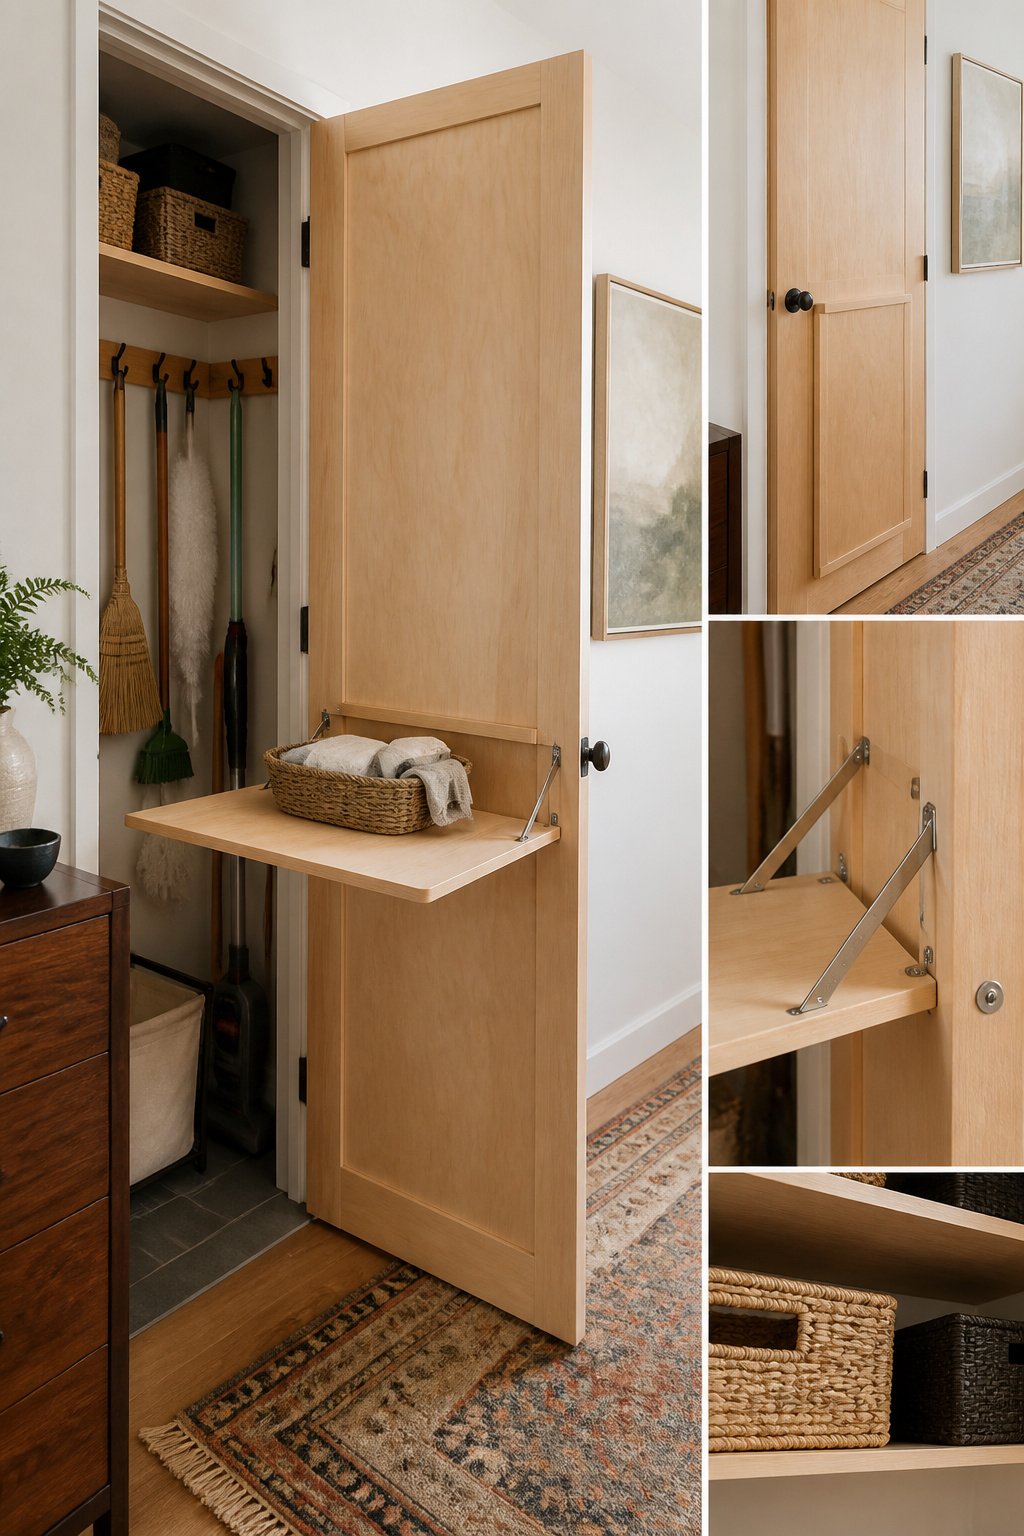
A fold-down table mounted to the inside of a broom closet door turns dead space into a staging surface that disappears the moment you close it. The brooms stay on their hooks, the vacuum stays upright in its corner, and the table only comes out when you are sorting laundry or folding towels.
The same wall that holds your cleaning tools can carry a hinged plywood leaf on two folding brackets. Open it and you have a 24-inch deep surface for pre-treating stains or stacking clean rags. Close it and the closet swallows the whole thing. In a laundry room, this matters because the alternative is hauling baskets to the kitchen table or the bed, which is exactly how clean clothes end up wrinkled on the sofa for two days.
Sources describe these as fold-down tables for sorting laundry or small benches for seating while folding, tucked away when not in use. The bench version is less useful here; a table works standing, which matches the quick tasks a broom closet supports. A narrow ledge, 12 inches deep, handles most staging without requiring the clearance a full folding station does.
The hardware is ordinary: two folding brackets from any hardware store, a piece of 3/4-inch plywood cut to fit your door width minus the frame, and a handful of screws into studs or solid blocking. Paint it the wall color and it reads as architecture, not furniture. Leave it raw plywood and it looks like the shop project it is.
What breaks this is weight. Brackets rated for 50 pounds sound generous until you set a basket of wet towels on the ledge and lean on it to fold. Go heavier than you think you need, and screw into framing, not drywall anchors. The door itself is not the mount; the door frame or the adjacent wall is.
8. Hidden Door Panel
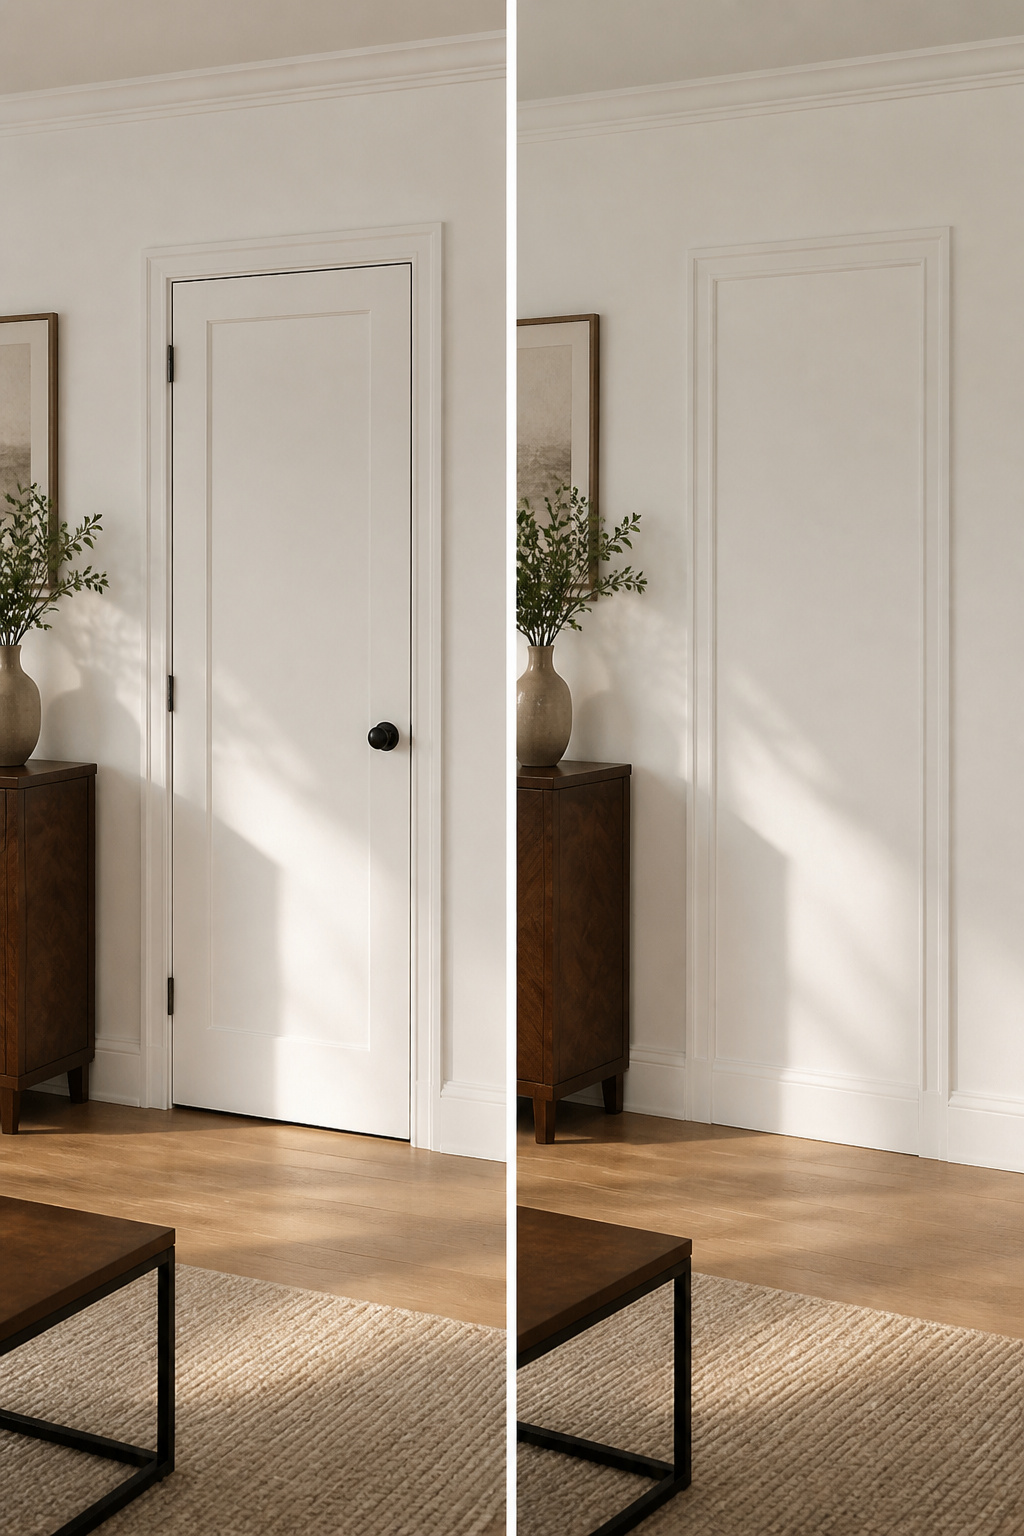
A hidden door panel turns the broom closet into something that reads as wall, not storage. The method is straightforward: paint the door the same color as the surrounding wall, add simple trim that matches the room’s existing paneling or baseboard, and let the door disappear into the architecture.
The hardware choice is where this gets tricky. Invisible hinges keep the line clean but add cost and complexity; a standard piano hinge painted to match is easier to live with and far simpler to adjust when the door swells or settles. Magnetic catches work better than knobs for maintaining the illusion, though you will need to push the panel in a specific spot to open it. That is the tradeoff: every bit of invisibility costs a fraction of accessibility. A guest will not find your cleaning supplies by accident, which is the point, but you will also fumble for the catch with an armload of laundry.
Between-the-studs framing helps here, since the shallow depth means the door sits nearly flush with the wall plane already. Without that recess, you are building out the surrounding trim to mask the door’s thickness, and the result can look like a bulkhead rather than a seamless surface.
9. Painted Interior Walls
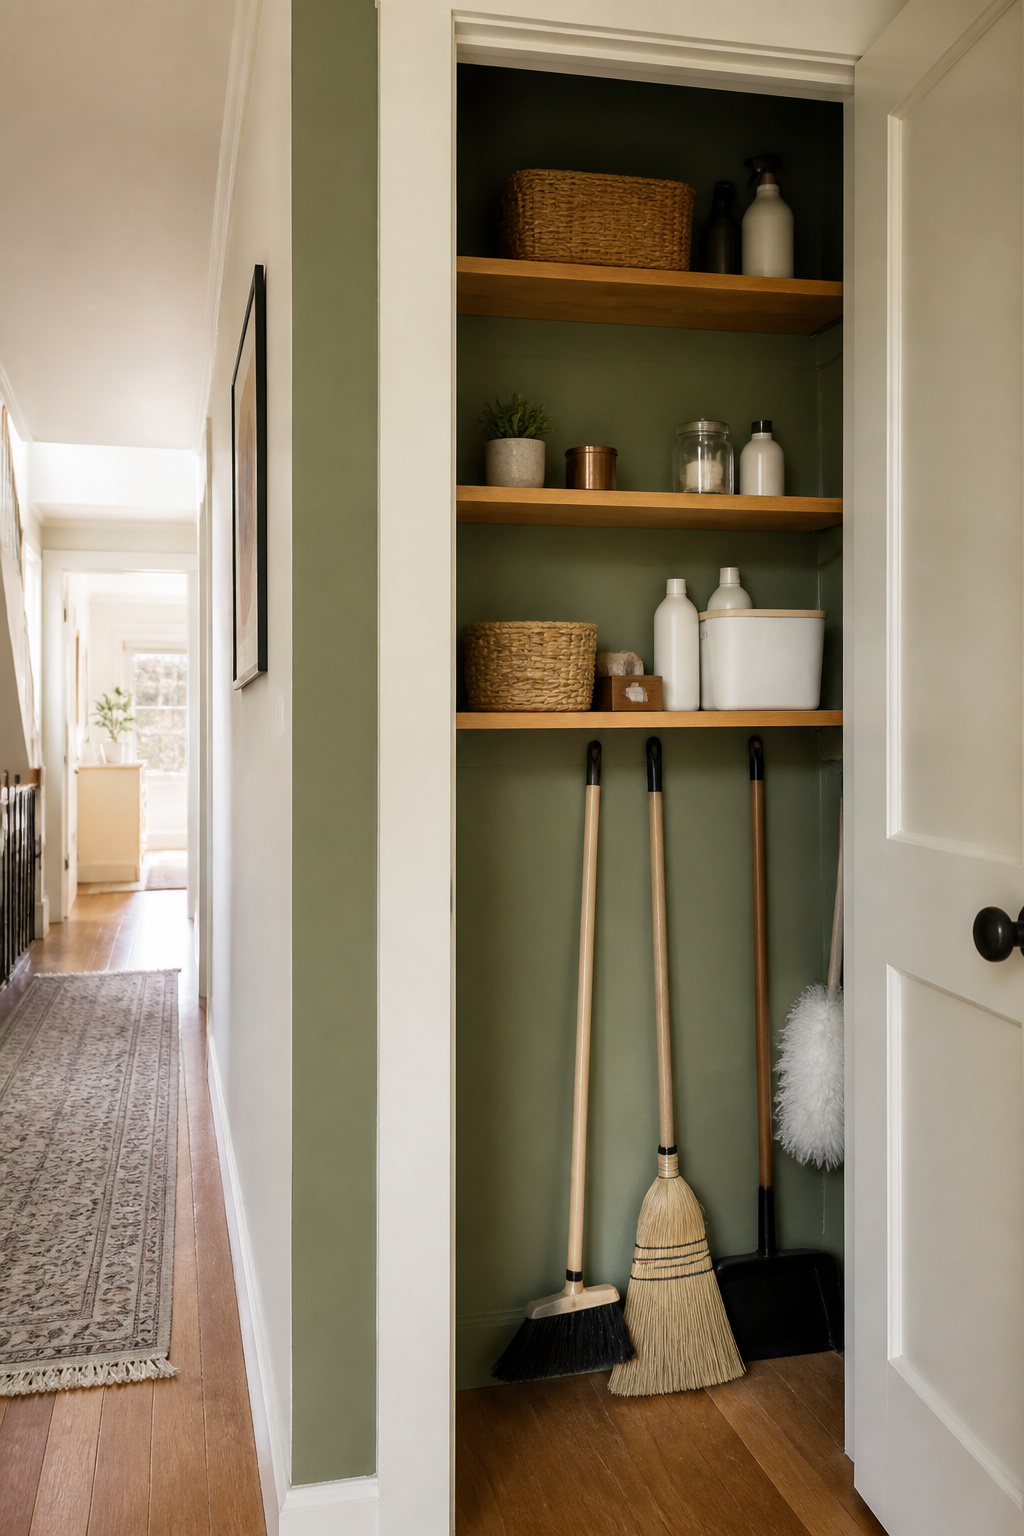
A coat of paint on the inside walls turns a broom closet from a dark box you avoid into something you actually open on purpose. Sage green works especially well here: it hides dust and scuff marks better than white, and against wood shelving or brass hardware it reads as intentional rather than utilitarian. Eggshell or satin finish holds up to the humidity swings and the occasional bump from a mop handle.
If you want something bolder, a striped back wall adds visual interest without demanding much square footage. Pastel pink chalk paint dries fast to a matte finish that feels fresh, or you can skip brushes entirely with striped peel-and-stick wallpaper. Expect to spend $15 to $30 on paint and set aside a weekend afternoon for prep and two coats. One practical note: an off-white trim keeps sage green from feeling heavy in a space that already lacks natural light.
10. Decorative Broom Display

A well-made straw or twig broom hung against a soft, coordinating wall color turns the tool itself into a quiet, intentional design detail. The storage still has to work, but one or two attractive brooms, placed with restraint, read as art; several scattered across the same wall just read as clutter.
The line sits at function. A broom you actually use, hung where you can grab it, earns its spot differently than a purely decorative piece bought for shape alone. Natural fiber brooms run $15–$40 if you are sourcing them for display, and they take about fifteen minutes to hang. Humidity is the limit here: mildew finds natural fibers fast, so this approach belongs in a dry closet or hallway, not a utility room with a washer running.
Declutter Before You Build
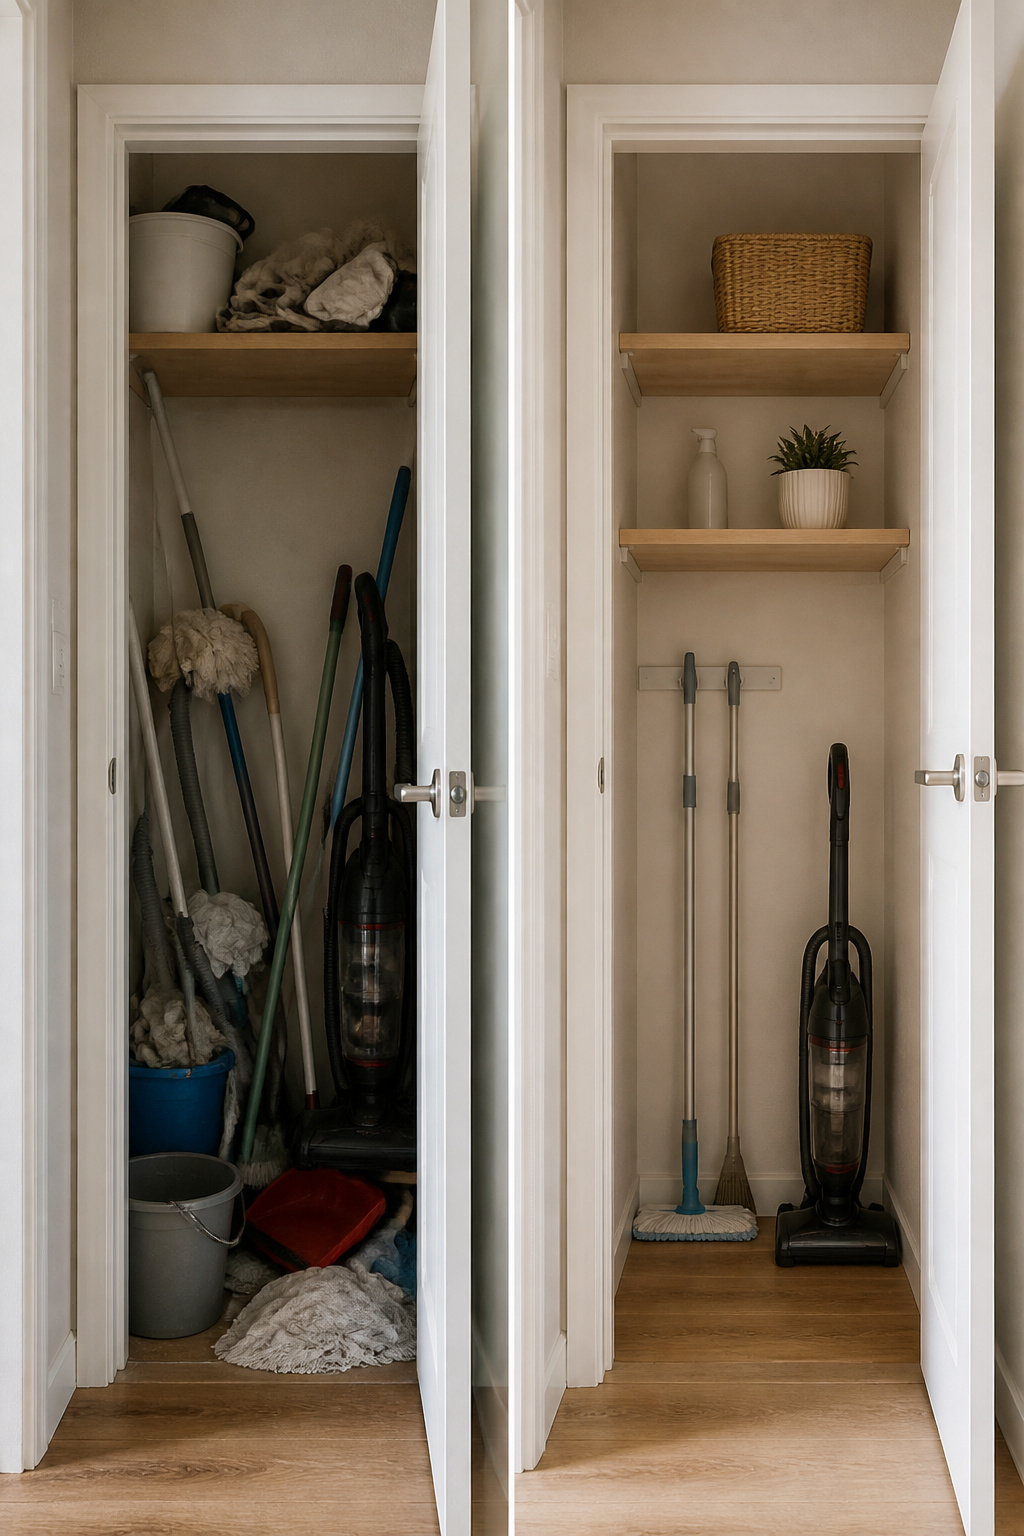
The biggest mistake in broom closet design is measuring the closet before measuring the stuff. I have watched people build beautiful systems around a vacuum that sticks out six inches past the shelf, or a mop bucket that no longer fits through the door. Pull everything out and group like items before you buy a single bracket. Kitchen cleaners stay under the sink, bathroom cleaners near the toilet, and only the tools you actually use weekly earn a spot in this closet. The floor of that space tells you the truth about what you reach for and what has sat untouched for two years. Once the keepers are sorted, measure their heights and widths, then build around them. A system built for the stuff you own beats a showroom photo every time.
Baskets, Bins and What Goes in Them
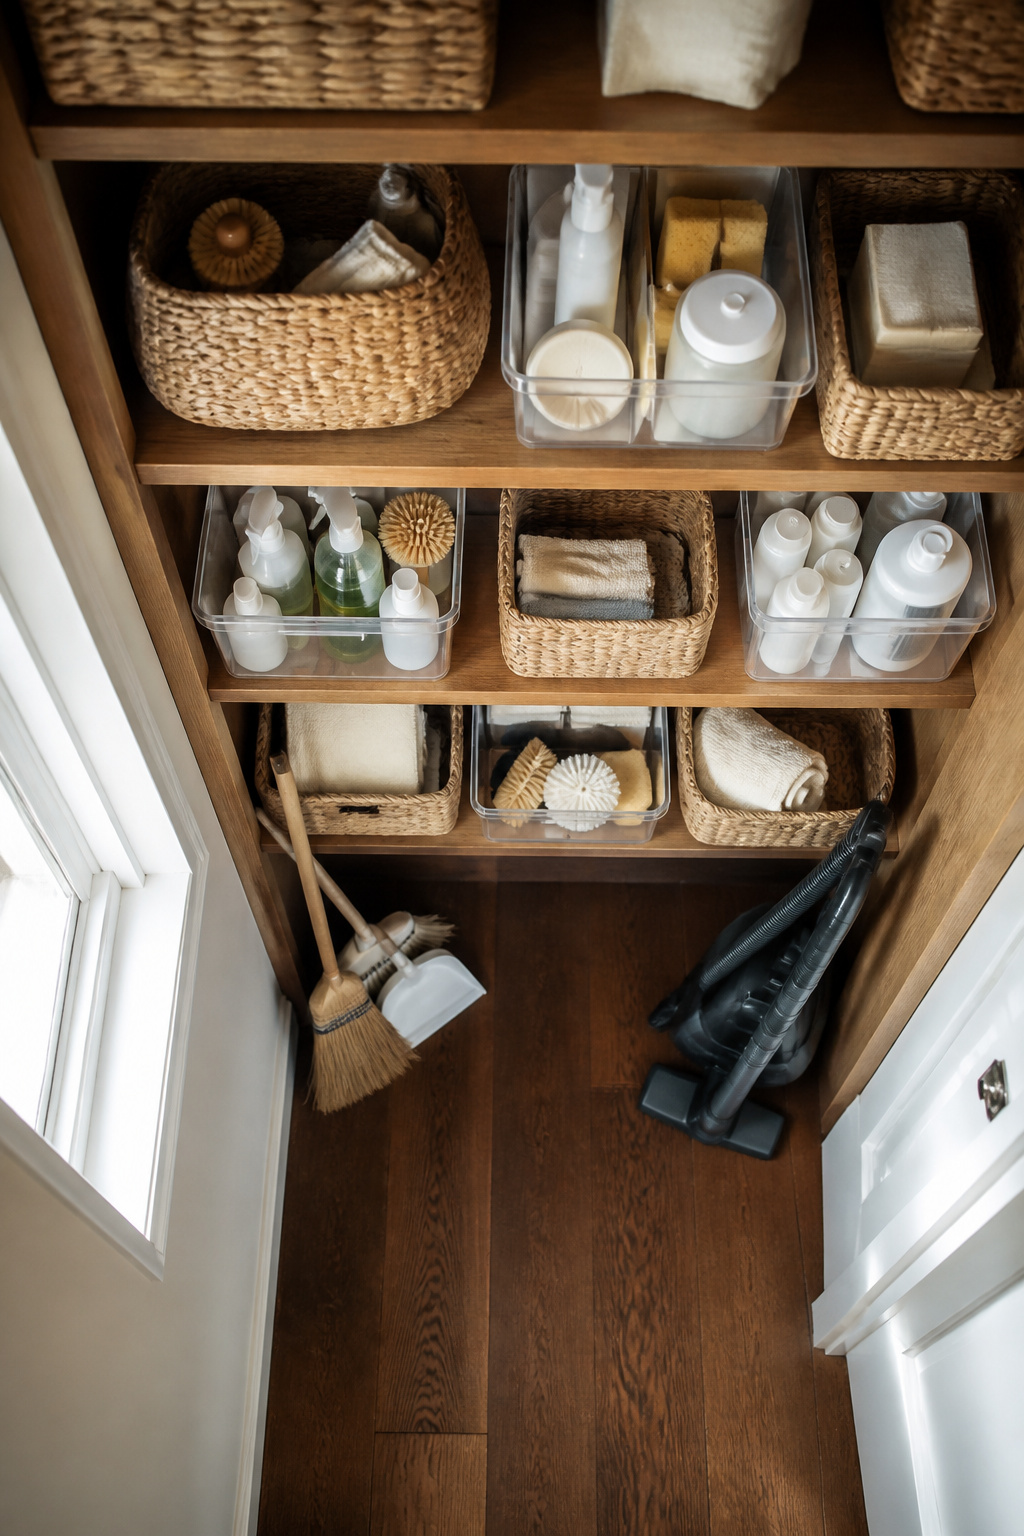
Clear bins earn their shelf space the morning you are hunting for refill tablets at 7 a.m. and can spot them through the side without pulling half the closet onto the floor. Opaque woven baskets look calmer on open shelving, but they only work if you label them honestly and build the habit of returning items to their assigned container after every use.
Sizing matters more than style here. A basket too large for what it holds becomes clutter itself, swallowing spray bottles and letting them knock around until the labels peel. Stick to two or three material types across the whole closet so the repetition reads as order, not a yard sale display. Leave breathing room between containers so the shelf does not look packed in.
The weekly reset takes five to ten minutes and costs nothing. Straighten baskets, wipe down hooks, return strays to their spots. Pair it with a specific day and it stays automatic. Skip it, and even the best-organized broom storage slides back into chaos within a month.
Vertical Space Above the Door
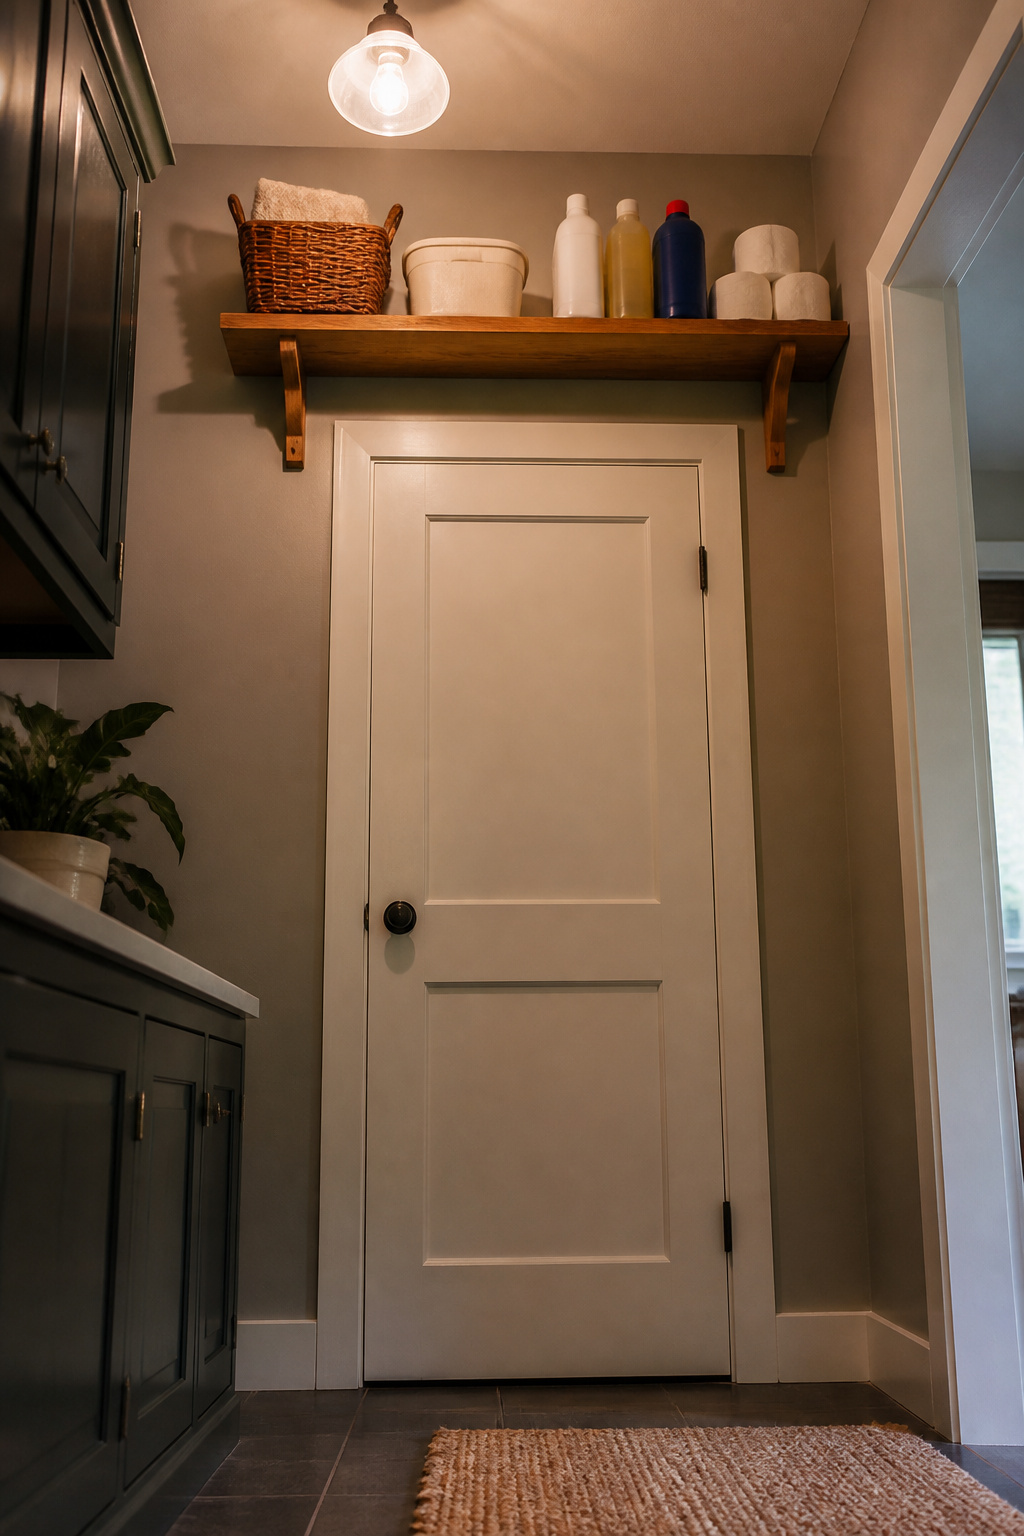
The dead space above a broom closet door is where seasonal supplies go to be forgotten, which is exactly the point. I mounted a simple pine shelf across the header after checking that the wall framing could take the load; drywall anchors rated for enough weight are non-negotiable here, because a falling shelf of cleaning solvent is the kind of mistake that costs more than the shelf itself. Aim for hardware that holds at least twice what you think the shelf will weigh, since you will inevitably set down a full bucket of floor wax and forget it.
What I actually store there turned out to be narrower than what I planned. Bulk refill bottles and the carpet shampooer attachments live on that shelf. The wide-mouthed container I bought for mop heads sits empty in a corner instead, because anything I need monthly ends up at eye level and anything up high needs to be truly occasional. The shelf earns its keep only if you are honest about how often you reach for something.
Frequently Asked Questions
What’s the cheapest way to store a broom?
A wall-mounted hook rack runs $10 to $25 and installs in under half an hour. Lifting brooms off the floor instantly makes a cramped closet feel more organized, even if the space itself stays the same size. Matte black or brass finishes look surprisingly finished for hardware this cheap.
How do I store a broom in a small apartment?
Over-the-door organizers or adhesive hooks work best because they need no drilling and use vertical space you are probably not using anyway. A fabric organizer with pockets slips over the top rail in about ten minutes and costs $15 to $35. If you go with adhesive hooks, test the weight rating before trusting a heavier mop and peel them off slowly when you move out so the paint stays put.
Where should I store brooms and mops in a kitchen?
A pull-out pantry cabinet or a small built-in nook near your main workspace keeps them accessible without cluttering the main area. The cost lands between $150 and $400 depending on whether you buy ready-made or go custom. Place it where you will not bump chairs pulling it open, and measure your tallest tool before committing; a standard mop handle tops out around 60 inches and will not fit in every prefab unit without angling.