
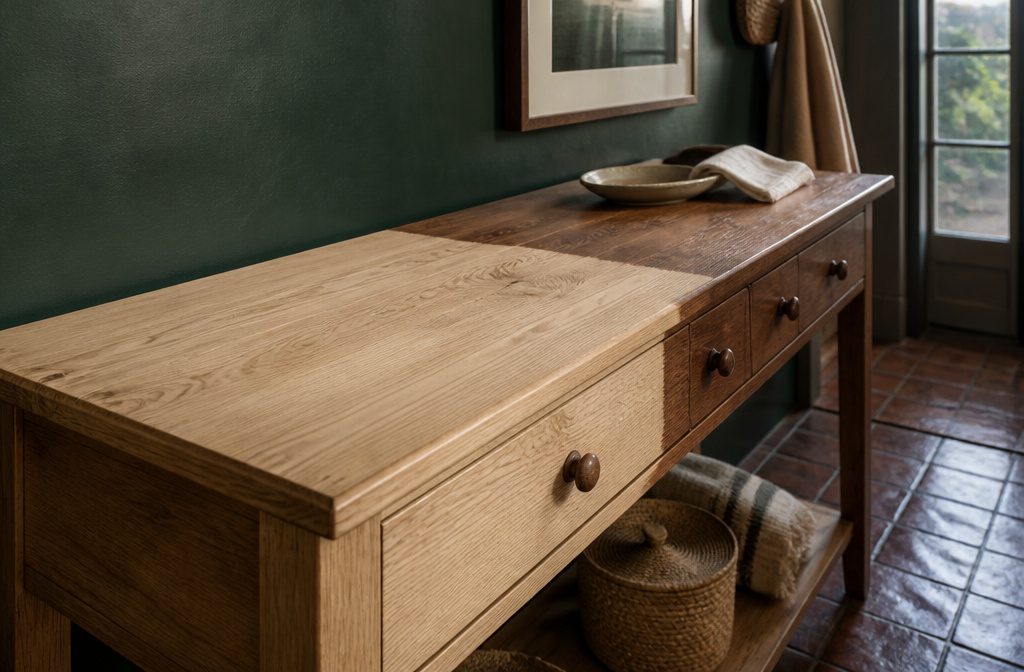
Sanding back to bare wood and refinishing takes a weekend.
Bleaching stretches over several days because you wait for the piece to dry completely before the first coat goes on, then wait a day or more between coats if the tone needs another pass.
Most people skip the drying stage and lock moisture under the finish, which clouds the result and undoes the lightening work.
1. Check What You Have: Wood Type, Finish and Veneer
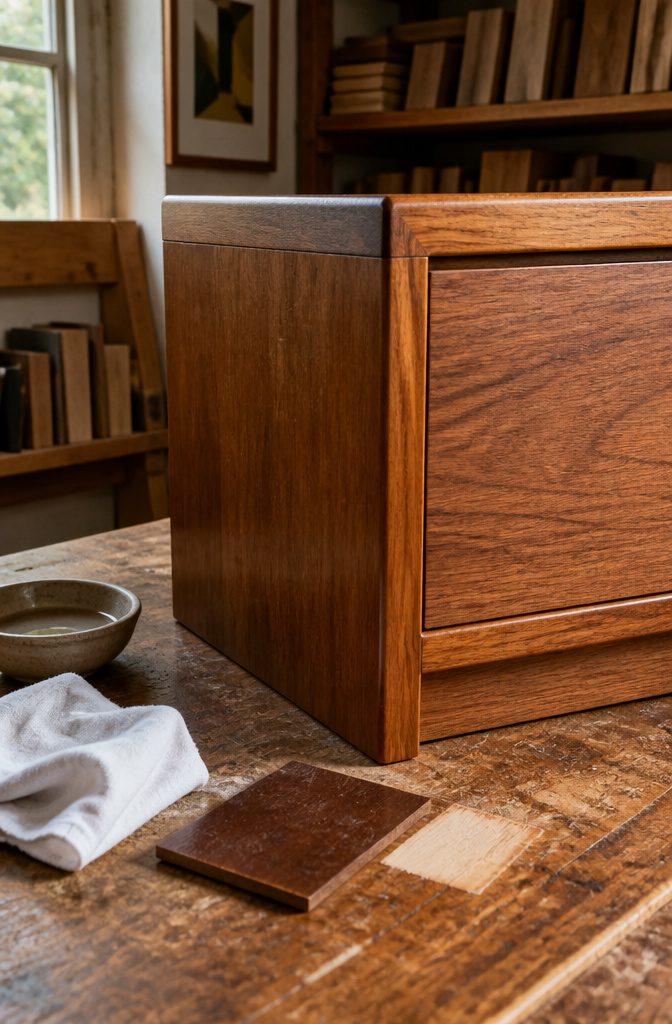
Before you lighten anything, work out whether you are dealing with solid timber or veneer.
Look at an edge or corner where two surfaces meet: solid wood shows grain running continuously over the turn, while veneer shows a thin layer with a faint seam where it meets the substrate beneath.
Veneer sits well under a millimetre thick, which means sanding through it exposes the board behind and ruins the piece.
Next, test whether the dark tone lives in the finish or in the wood itself.
Dampen a cloth with methylated spirit and rub a hidden spot. If colour transfers onto the cloth, you are looking at stain or dye sitting in the surface finish, and stripping alone may lift it.
If nothing comes off, the colour has soaked into the timber and you will need to sand or bleach to shift it.
Press a fingernail into an inconspicuous area to check hardness.
An indentation that forms easily tells you the timber is soft, which means it sands fast and unevenly and needs a lighter hand throughout. Stain type, species and how porous the wood is all affect how far lightening will go.
2. Clean and Strip the Existing Finish
Older furniture holds years of dust and wax that muddy the wood underneath, and you will not see the real tone until the surface is fully clean.
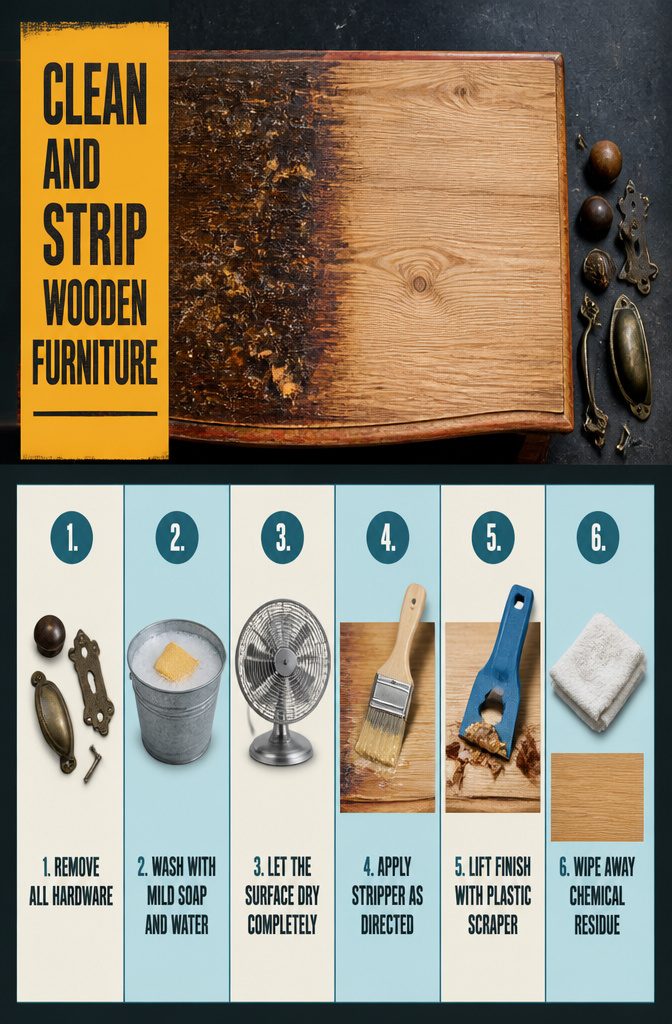
I wash the piece with mild soap and water, let it dry completely — no damp patches, no cool spots — and only then decide whether the finish needs to come off.
Remove all hardware before you start. Knobs and pulls trap stripper in their threads and make cleanup twice as long.
Apply a chemical stripper to the top coat. Leave the stripper in place per the manufacturer’s instructions. Remove the dissolved coating using a gentle plastic scraping tool, taking care not to harm the tinted wood surface, then wipe down the surface to remove any traces of the chemical.
When the finish is stubborn or you are working around spindles and carved details an orbital sander cannot reach, stripper does the job soap will not.
I use CitriStrip because it sits on the piece for up to 24 hours without forcing you to finish the whole removal in one afternoon.
Follow the stripper’s directions exactly, work with the grain, and use a plastic scraper rather than metal so you do not gouge the wood while lifting the old finish.
3. Try Steel Wool or Wash for a Surface Lighten
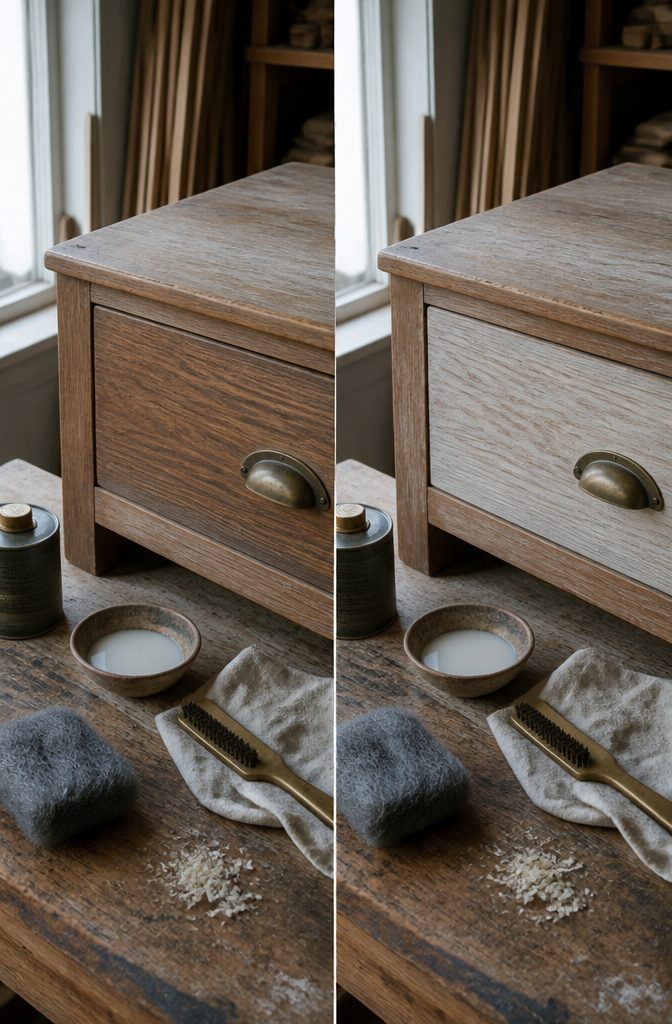
If stripping and sanding sound like more than the piece needs, 0000 steel wool dampened in warm water can lift surface stain without abrading the timber underneath.
Work the steel wool along the grain with light pressure, making several passes until the colour starts to fade. If it resists, add mineral spirits or turpentine to the cloth and keep going.
One caution: steel wool reacts with the tannins in oak and leaves black spots across the surface, so save this method for other species.
Liming wax offers another route if you want to soften the tone without stripping to bare wood. The wax sits in the open grain and leaves a pale, chalky highlight that works best on oak and ash.
Brush the grain open with a brass brush, work the wax in with a cloth, then wipe across the grain so pigment stays in the pores.
A diluted white or grey wash does something similar: thin light emulsion or chalk paint with water, apply thinly, then wipe back so the grain shows through. Both methods suit veneer, where sanding cuts through too quickly.
4. Sand Back to Bare Wood When the Piece Allows It

- Remove handles or hardware that will catch sandpaper, then start with 60 or 80 grit to strip thick varnish or stain as fast as possible. An orbital palm sander handles flat surfaces; a multi-tool or Dremel with grinding accessories reaches corners and grooves where the main tool can’t fit.
- Sand with the grain using light pressure. The harder you push, the more you risk marring the wood. Veneer is especially vulnerable; a few aggressive passes can sand through the thin layer entirely.
- Move up through 80, then 150, then 220 grit to smooth the surface. Some people run 80, 120, 220 instead. Either progression works as long as you step up gradually so each grit erases the scratches from the one before it.
- Wipe away all sanding dust with a tack cloth before you decide whether the raw wood is light enough on its own or needs bleach or a pale stain.
This route gives you the most natural, organic color, but it takes time on a large piece and only works when the wood beneath is solid or the veneer is thick enough to survive repeated passes.
5. Bleach in Controlled Applications When Sanding Is Not Enough
Household bleach will strip dye or surface stain, but it won’t change the wood’s natural color. That matters if you want the timber itself several shades lighter, not just the finish gone.
Two-part bleach made from sodium hydroxide and hydrogen peroxide goes deeper. Combined, the 2 create a chemical reaction that can alter the wood’s underlying tone, going beyond what was laid over it.
Oxalic acid is a third option, meant for localized problems: water marks, rust stains, iron discoloration, or the black spots that sometimes appear on weathered wood.
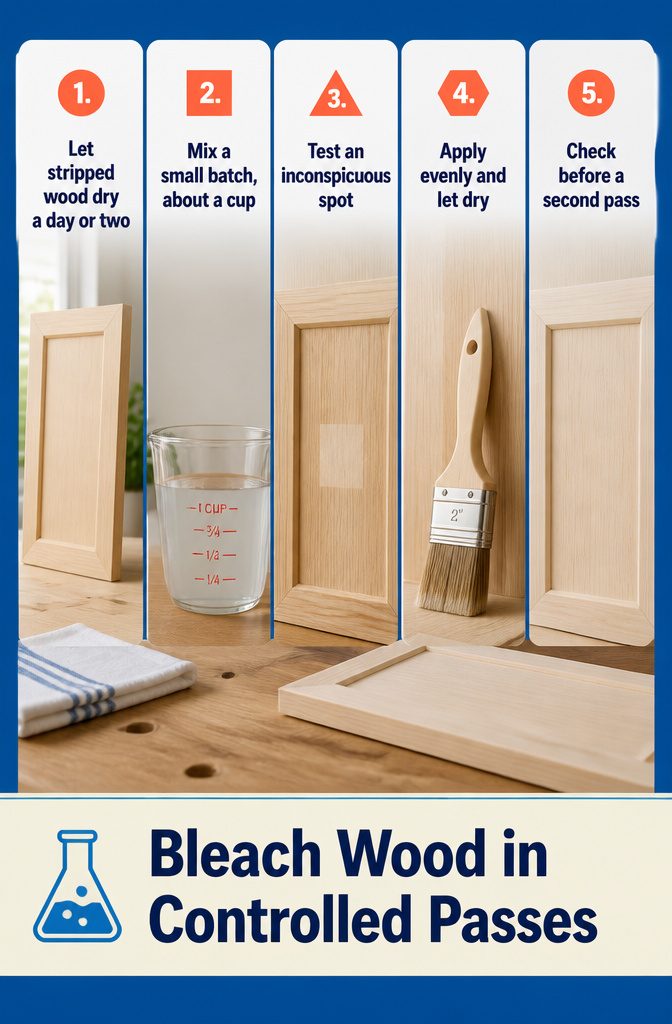
Wood must be fully dry before bleach touches it. Let the piece sit a day or two after stripping and sanding.
Damp wood looks darker than it is, and you can’t judge how far the bleach has gone until moisture is out. Mix smaller working batches, about a cup at a time, so the solution stays fresh.
Test an inconspicuous spot first to confirm the bleach does what you expect on that species. Apply evenly across the surface, let the coat dry completely, and check the result before deciding whether a second pass is needed.
6. Neutralize, Rinse and Dry the Bleached Surface
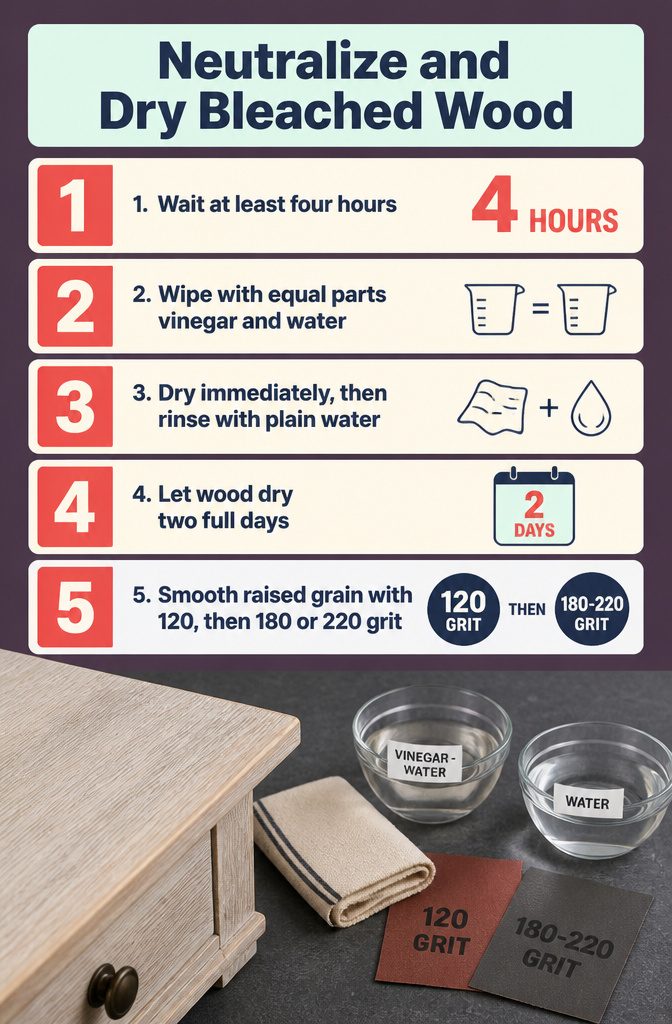
- Wait at least four hours after the last bleach application, then wipe the surface with a rag soaked in equal parts white vinegar and water. Some sources use one part vinegar to three parts water; both work to neutralize lingering bleach. Wipe dry immediately with a clean rag, then wipe again with plain water and dry thoroughly with a soft cloth.
- Let the piece dry completely for two full days before applying stain or finish. If you bleached more than once, wood needs to dry overnight between treatments before you move to the next round.
- Feel the surface once it is dry. Bleach raises the wood grain, leaving it rough to the touch. Sand lightly with 120-grit paper to knock down the raised fibers, then follow with 180- or 220-grit for smoothness. Wipe away dust with a tack cloth before finishing.
7. Choose a Finish That Holds the Pale Tone

Water-based clear finishes keep the pale tone stable, while oil-based varnishes and polyurethanes amber over time and bring back the yellow you just worked to remove.
If you used Flagstone stain by Varathane, follow with Minwax Finishing Wax in Natural: apply it with a rag in circular motion, let it sit for 15 minutes, then buff with a clean cloth. The wax seals without shifting the color.
Antique White stain neutralizes undertones if the piece still reads too warm. Pickling stain and color washes work the same way and can go over existing tone.
All of them need a test on a hidden spot first, because wood species absorb differently and you want to see the result before committing to the visible surface.
Water-based poly works over almost any stain or wash once dry.
That may take a few hours or a full 24, depending on humidity and how thick the layer went on. The sealer returns resilience after sanding or bleaching stripped the original topcoat.
Which Bleach Type Does What
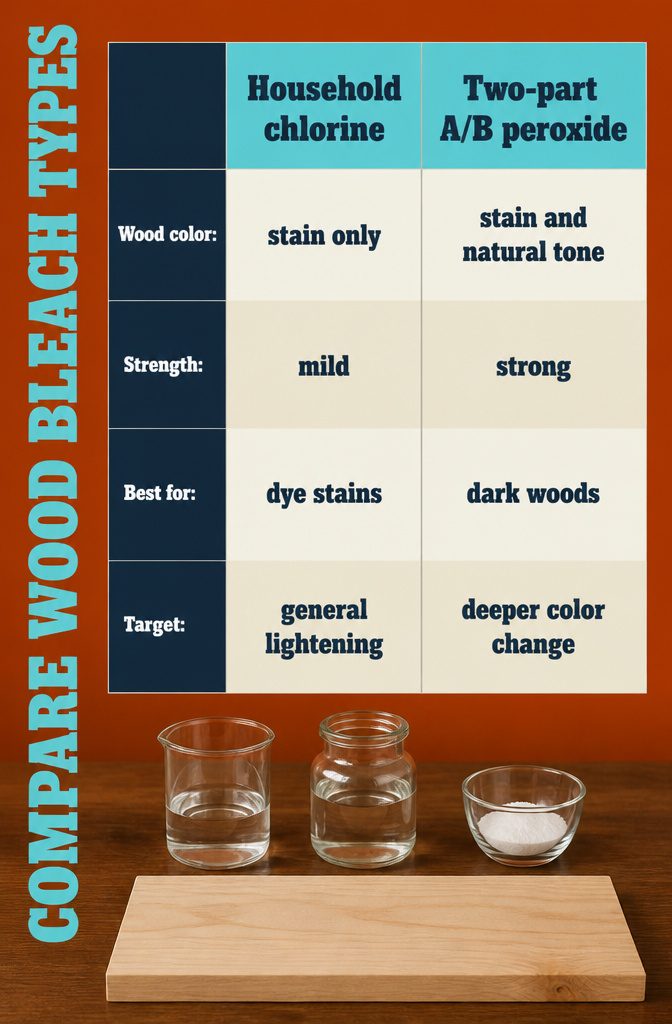
The three bleach types split by what they act on. Household chlorine bleach (the kind in your laundry room) removes dye or stain color from wood but leaves the wood’s own natural tone alone.
Two-part A/B bleach pairs sodium hydroxide with hydrogen peroxide in a chemical reaction strong enough to change the wood’s underlying color, not just surface stain.
Oxalic acid, mixed with water, targets specific marks: water stains, iron, rust, black spots, and the gray weathering that outdoor exposure leaves behind.
| Bleach Type | What It Removes | Strength | Best For |
|---|---|---|---|
| Household chlorine | Dye or stain color | Mild | General lightening, dye-based stains |
| Two-part A/B peroxide | Stain color and wood’s natural color | Strong | Dark-toned woods like cherry or mahogany |
| Oxalic acid | Water, iron, rust, black spots, weathering | Moderate | Specific stains, weathered wood |
For very dark woods, Zinsser Wood Bleach pulls color out while keeping grain visible. Savogran Wood Bleach uses oxalic acid and may need multiple passes to reach the tone you want, but it handles black spots well.
Wood Species That Take Bleach Well and Those That Don’t
Some woods will bleach to a pale, almost stripped look. Others hold their depth no matter what you throw at them, and a few become so washed out they lose all character.
Knowing which category your piece falls into saves you from pushing a finish too far or expecting a result the grain simply will not deliver.
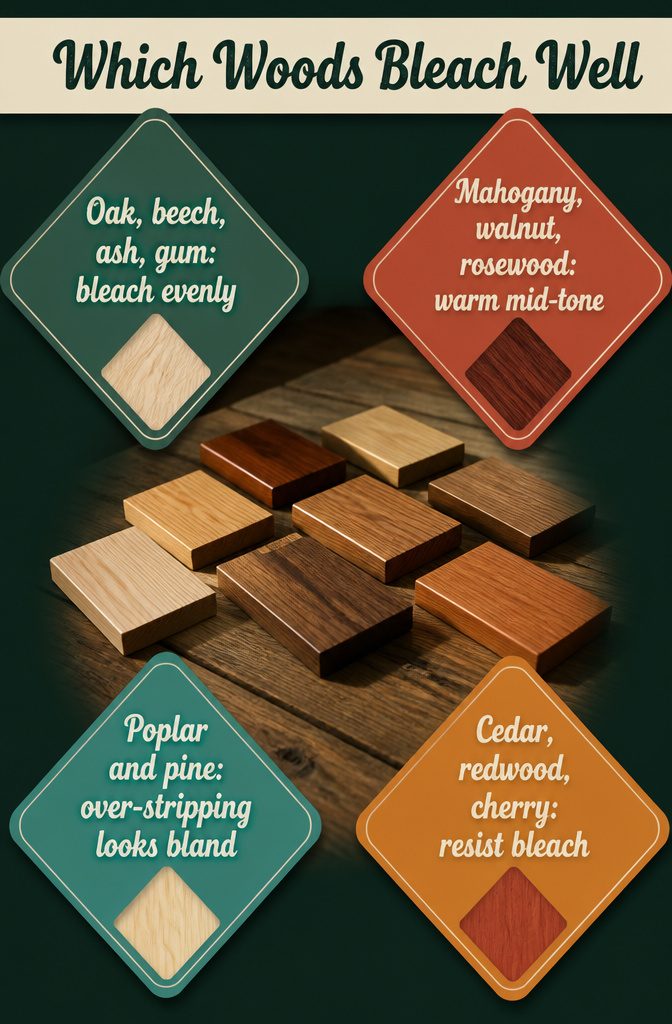
Oak, beech, ash and gum are the best candidates for bleaching.
They lighten evenly and can reach a genuinely pale tone without turning dull. Oak and ash respond well to both sanding and bleach, and pine follows close behind.
- Mahogany, walnut and rosewood stay mid-toned even after bleach. They are dark all the way through, and you will reach a warm mid tone at best, not a pale one.
- Poplar and pine may become lifeless if you strip too much natural color. They start light, and removing more can leave the surface bland.
- Cedar, redwood, rosewood and cherry resist bleach or take it poorly. They are poor candidates for lightening work.
How Long Each Method Takes

Each approach runs on its own clock, and the difference matters if you’re working to a deadline.
- Full sanding and refinishing takes a weekend — figure a day to strip and sand, then another for stain and topcoat with drying time between layers.
- Liming wax fits into an afternoon. You brush it on, work it into the grain, buff it clean, and you’re done.
- Stripping and bleaching stretches over several days, mostly because you’re waiting. The stripper needs time to work, the bare wood has to dry completely before bleach goes on — a day or two is typical — and bleach itself may need a day or more to dry between coats if the first pass didn’t lighten enough.
I plan around the drying stages more than the hands-on work. Bleaching a dresser means claiming the garage for most of a week, not an intense Saturday.
What to Do With Veneer or Board-Based Furniture

Veneer sits well under a millimeter thick, and machine sanding cuts through it before you notice the mistake.
I skip any method that relies on taking the surface back to bare wood when I know a piece is veneered or built from particleboard or MDF under that thin face layer.
Paint or a paint wash gives you full control of the final tone without the risk, and liming wax sits on the surface rather than requiring you to strip through it.
Paint wins for dependability here: you prep the surface, apply a coat or two, and the result holds regardless of what sits underneath.
A wash gives a softer, more translucent look but asks for a steadier hand. Both keep the veneer intact, which sanding will not.
Frequently Asked Questions
Can I lighten dark wood furniture without sanding?
Yes.
Liming wax, a diluted white wash or paint all lighten a piece without taking it back to bare timber. These methods are also the only safe options on veneer, where sanding risks cutting through the thin surface layer.
Can veneered furniture be lightened?
Yes, but avoid machine sanding since veneer sits well under a millimeter thick and cuts through quickly. Paint, a paint wash or liming wax will lighten the surface without stripping through to the substrate beneath.
Can you bleach wood furniture?
Yes. Two-part bleach can change the wood’s natural color, household chlorine bleach removes dye or surface stain, and oxalic acid targets water marks, rust and black spots.
Wood must be fully dry before bleach goes on, and all bleach needs neutralizing with a vinegar-water solution after.
How long do you leave bleach on wood to lighten it?
Wait at least 4 hours after the last bleach application before neutralizing with a vinegar-water solution.
The piece then needs to dry completely for 2 full days before you apply stain or finish. If you bleach more than once, allow overnight drying between treatments.
Can I apply household bleach on wood?
Yes, but it removes leftover dye rather than changing the wood’s natural color. Two-part bleach made from sodium hydroxide and hydrogen peroxide goes deeper and can alter the timber’s underlying tone, not just surface stain.
Why does my lightened wood look yellow again?
Oil-based varnishes and polyurethanes amber over time and bring back the yellow you just worked to remove. Water-based clear finishes keep the pale tone stable without shifting the color.
How long does it take to lighten a chest of drawers?
A full weekend for sanding and refinishing (a day to strip and sand, another for stain and topcoat), an afternoon for liming wax, and several days for stripping and bleaching. Bleaching takes longer mostly because of drying stages between coats.
What’s the safest way to lighten stained wood?
Sanding with dust protection or a paint wash minimizes chemical exposure. If using bleach, wear gloves, goggles and a respirator, work in a ventilated space, and follow the manufacturer’s directions exactly.
What can I do if my wood appears blotchy after lightening?
Neutralize and rinse all bleach residue, let the wood dry fully, then try targeted bleach on darker spots or gentle sanding to even the tone.
A pre-stain conditioner, wash coat or toner before the final clear finish can help blend uneven areas.